

This article describes steps to enable or disable the Windows Security app Virus & threat protection notifications in Windows 11.
Windows Security, by default, will send notifications with critical information about the health and Security of your device.
The Windows Security app will notify users whenever the Virus & threat protection feature stops unwanted apps or websites. These notifications are purely informational, with no actions required from users.
You can turn it off if you constantly receive notifications that a threat was blocked or a malware scan was completed successfully, and you don’t want to keep receiving these.
On the other hand, if you want to be aware of what’s happening with your computer, turn it on.
Below is how to do that with the Windows Security app in Windows 11.
How to enable or disable Windows Security app virus & threat protection notifications in Windows 11
As described above, the Windows Security app will notify users whenever the Virus & threat protection feature stops unwanted apps or websites.
You can keep receiving notifications or stop receiving them together.
Below is how to disable or enable Virus & threat protection notifications with the Windows Security app in Windows 11.
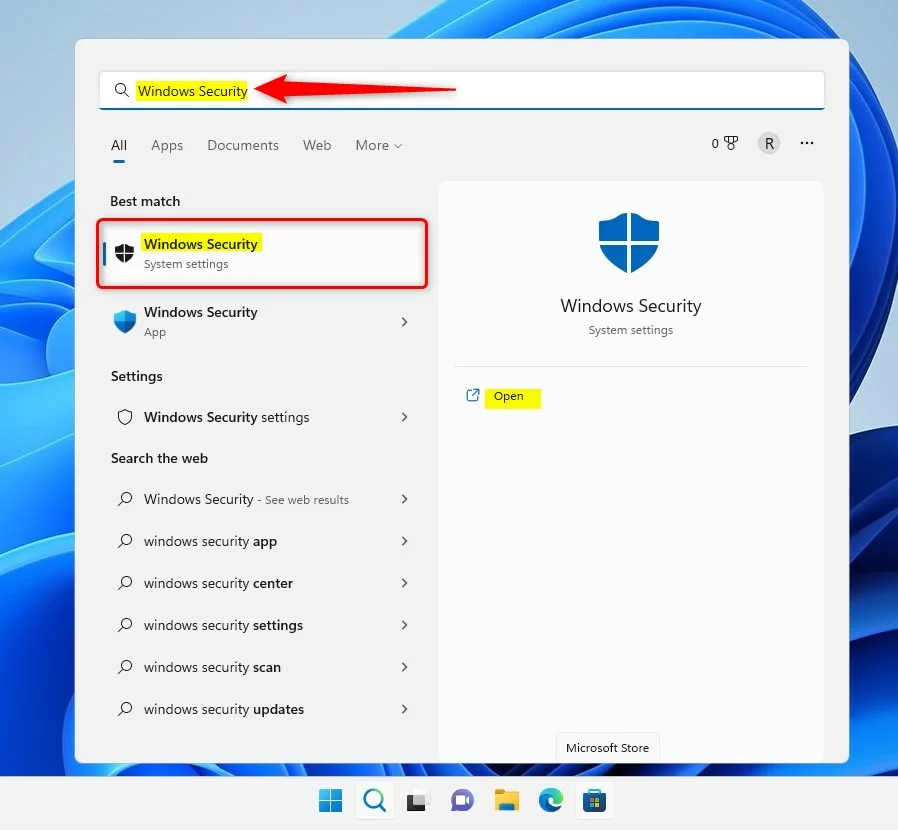
In Windows 11, click the Start menu, and in the search box, type Windows Security, then select Windows Security in the results list.
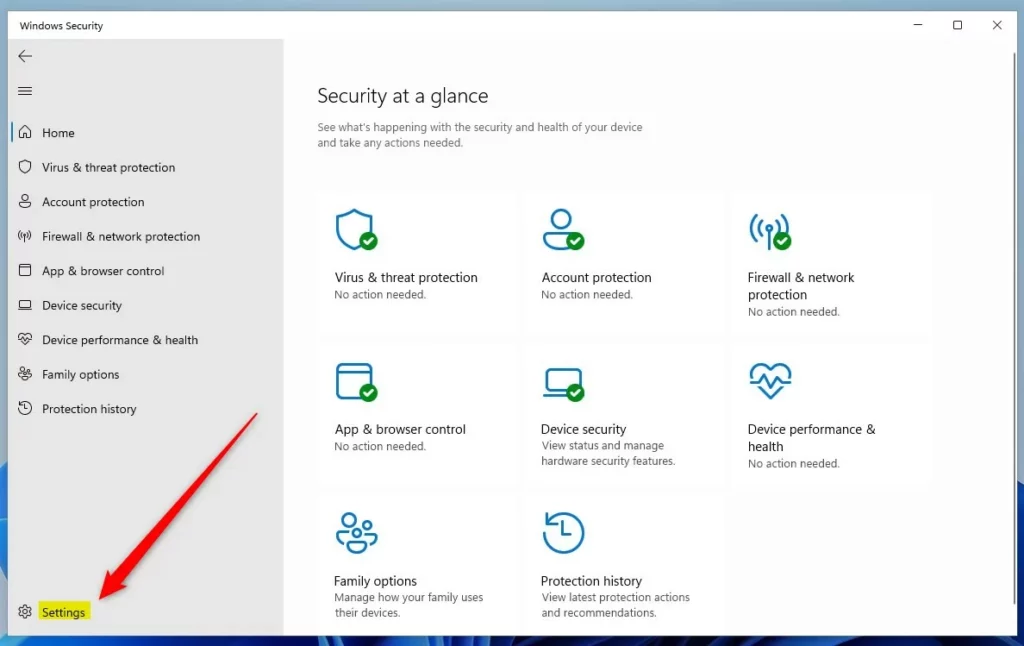
In the Windows Security app, click the Settings button (gear) on the button left of the Security at a glance window.
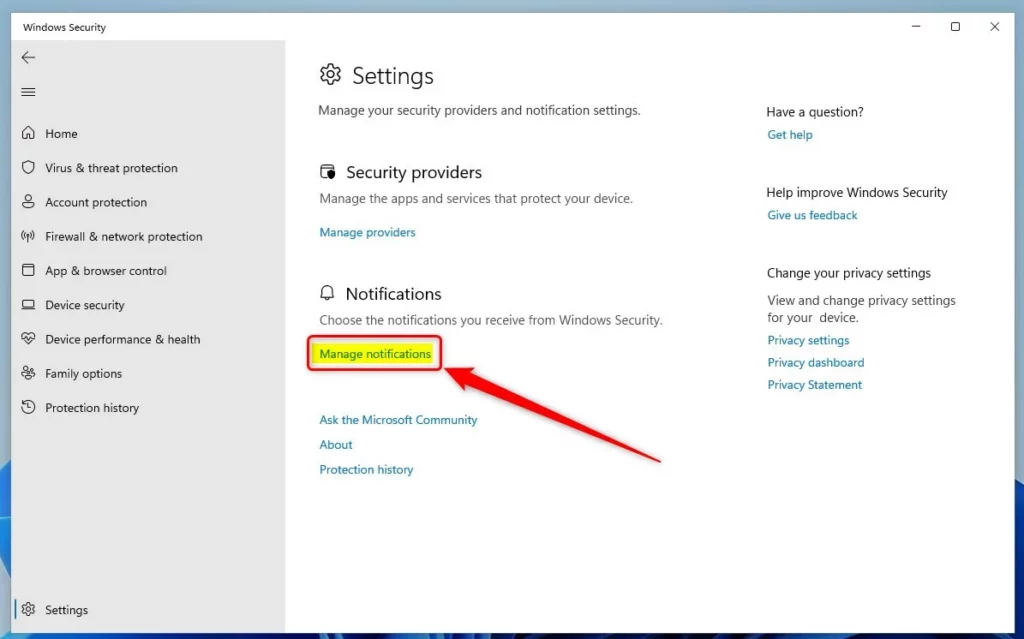
On the Settings page, under Notifications, click the Manage notifications link.
On the Notifications pane, under Virus & threat protection notifications, toggle the button to the Off position to disable.
To enable, toggle the button back to the On position.
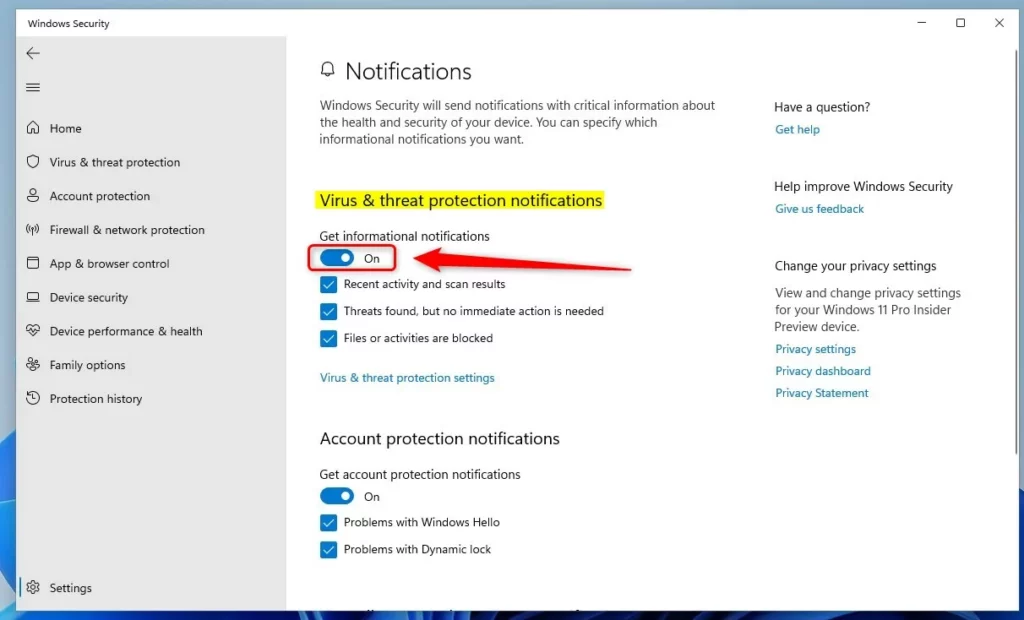
You may also selectively receive notifications only for boxes that are checked next to the available options:
- Recent activity and scan results
- Threats found, but no immediate action is needed
- Files or activities are blocked
You will also receive notifications when problems require immediate attention, regardless of the settings here.
That should do it!
Reference:
Conclusion
This guide provides detailed steps to enable or disable Virus & threat protection notifications using the Windows Security app in Windows 11. You can customize your notification preferences based on your preferences and needs by following the instructions outlined in this article.
- Accessing the Windows Security app’s settings allows you to manage notification preferences easily.
- Whether you want to stay informed or minimize the notifications you receive, the process is straightforward and can be tailored to your specific requirements.
- The ability to selectively receive notifications for different activities or threats offers further customization options.
- It’s essential to know that certain critical issues will still trigger notifications, irrespective of the settings configured.
Feel free to use the comment section to report inaccuracies or contribute additional insights.


Leave a Reply Cancel reply