How to Enable or Disable UAC for the Windows 11 Built-in Administrator
You can enable or disable User Account Control (UAC) for Windows 11’s built-in administrator account to control system change prompts.
The built-in administrator account in Windows 11 offers complete system control but bypasses typical UAC prompts by default when enabled, allowing significant changes without explicit user confirmation.
UAC is a crucial security feature that safeguards your PC by requiring explicit approval before critical system modifications occur. Leaving UAC disabled for the built-in administrator can increase security risks.
This tutorial walks you through the straightforward steps to toggle UAC settings for this powerful account, helping you manage security and prevent unwanted system alterations.
Enable or disable User Account Control for the built-in administrator by opening Local Security Policy (secpol.msc) or Registry Editor (regedit). Modify the “Admin Approval Mode for the Built-in Administrator account” setting or the “FilterAdministratorToken” registry value, then restart your PC.
Turn UAC On or Off Using Local Security Policy
This method uses a tool called Local Security Policy Editor. It lets you change security settings on your computer.
Why use this method? It’s straightforward and doesn’t require editing sensitive registry files.
What happens when done? UAC settings for the built-in administrator will change immediately after you restart.
Steps:
- Press Windows key + R on your keyboard to open the Run box.
- Type
secpol.mscand press Enter. - In the window that opens, go to Local Policies → Security Options on the left side.
- Look for the setting called “User Account Control: Admin Approval Mode for the Built-in Administrator account” on the right side.
- Double-click that setting.
- Choose Enabled to turn UAC on or Disabled to turn it off.
- Click OK.
- Close the Local Security Policy Editor.

Remember to restart your computer after making changes.
Turn UAC On or Off Using Registry Editor
If you prefer, you can also use the Windows Registry Editor to make this change. Be careful, as editing the registry can affect your system.
Why use this method? It gives you direct control over the setting through the registry.
What happens when done? The UAC setting changes for the built-in administrator after you restart.
Steps:
- ⚠️ Requires admin privileges: Press Windows key + R, type
regedit, and press Enter. - If prompted by UAC, click Yes to continue.
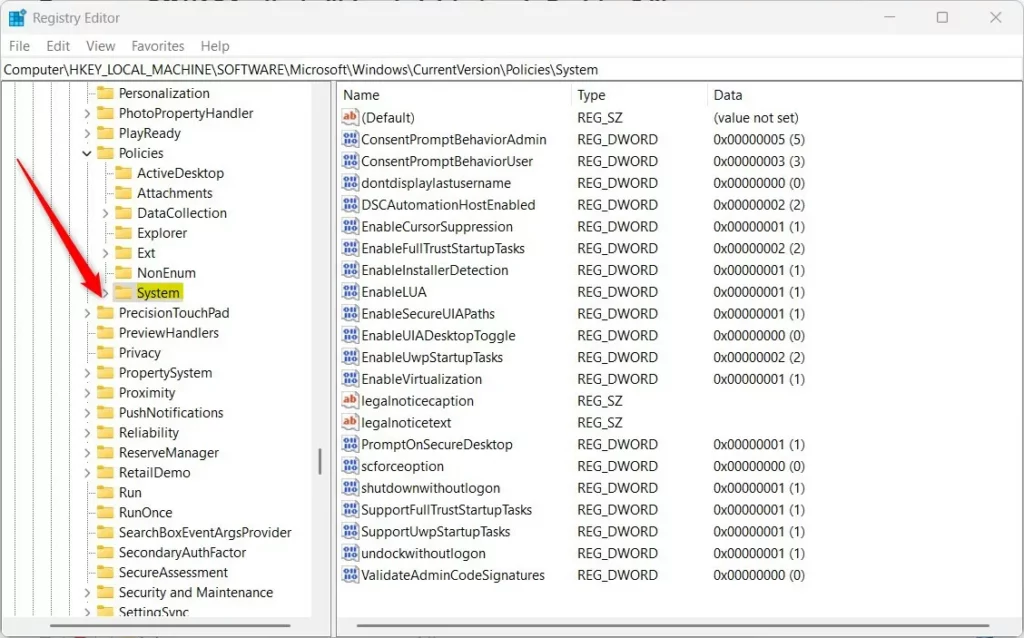
- In the Registry Editor, navigate to this path:
HKEY_LOCAL_MACHINE\SOFTWARE\Microsoft\Windows\CurrentVersion\Policies\System - If the System folder is missing, right-click on Policies, select New → Key, and name it System.
- Right-click on the right side pane inside System and select New → DWORD (32-bit) Value.
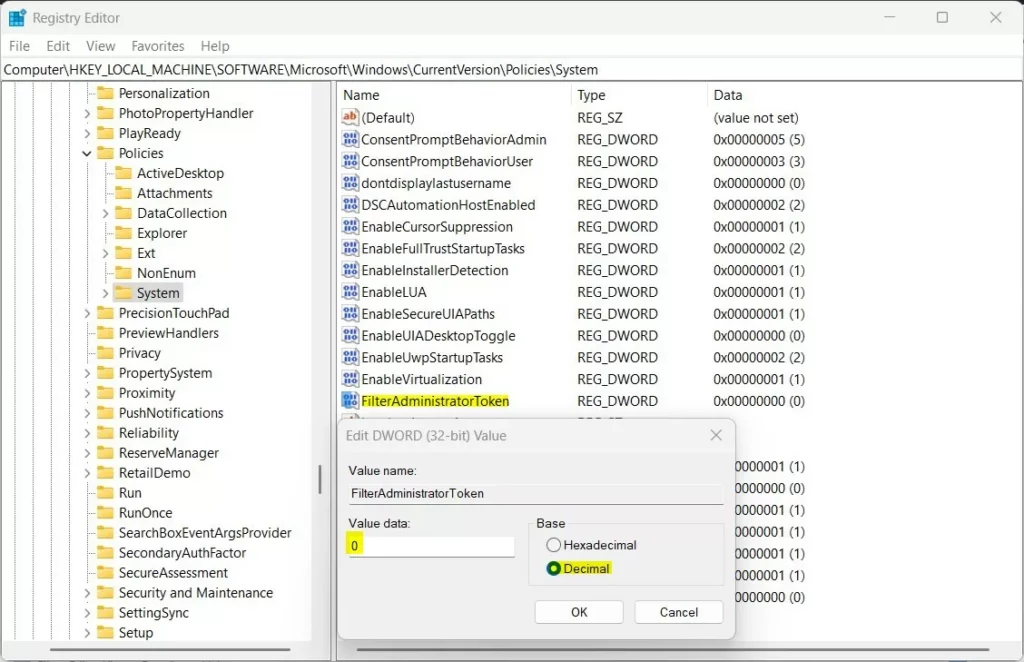
- Name this new value
FilterAdministratorToken. - Double-click the
FilterAdministratorTokenentry. - Choose Decimal as the base.
- Set the value data:
- 1 to turn UAC ON for the built-in administrator.
- 0 to turn UAC OFF.
- Click OK and close the Registry Editor.
- Restart your computer to apply the changes.
Summary
- The built-in administrator account in Windows 11 has full control and can run without asking for UAC permission.
- Using this account without UAC can be risky, as dangerous changes might happen without warning.
- You can turn UAC on or off for this account by using either the Local Security Policy Editor or the Registry Editor.
- Always restart your PC after making these changes so they take effect.
- If you want to learn more about enabling the built-in administrator account, check out this guide: How to Enable the Administrator in Windows 11.
How do I turn off UAC for all users in 🪟 Windows 11?
Changing or disabling User Account Control Click Start, and then search for and open Change User Account Control settings. Move the slider up and down to adjust the User Account Control settings. To turn off User Account Control, move the slider to the bottom on the Never notify setting.
How do I run UAC as administrator?
The simplest way is to use the alternate Start menu (right-click on the Start button), and then click on Terminal (Admin)2. Click on that, and you'll get the UAC prompt, confirming you want to run the program as administrator. If you are running an administrator-capable account, it should only require clicking on Yes.
Was this guide helpful?

About the Author
Richard
Tech Writer, IT Professional
Richard, a writer for Geek Rewind, is a tech enthusiast who loves breaking down complex IT topics into simple, easy-to-understand ideas. With years of hands-on experience in system administration and enterprise IT operations, he’s developed a knack for offering practical tips and solutions. Richard aims to make technology more accessible and actionable. He's deeply committed to the Geek Rewind community, always ready to answer questions and engage in discussions.
No comments yet — be the first to share your thoughts!