
Windows 11 has a special hidden administrator account that has full control over your computer. This account is turned off by default. When you enable it and sign in, you get full access without extra prompts.
User Account Control (UAC) is a feature that helps protect your PC by asking for permission before making big changes. But with the built-in administrator account, UAC might not always ask for confirmation, which can be risky.
This guide will show you simple ways to turn UAC on or off for the built-in administrator account. This helps you avoid accidental changes or problems.
Turn UAC On or Off Using Local Security Policy
This method uses a tool called Local Security Policy Editor, which lets you change security settings on your computer.
Steps:
- Press Windows key + R on your keyboard to open the Run box.
- Type secpol.msc and press Enter.
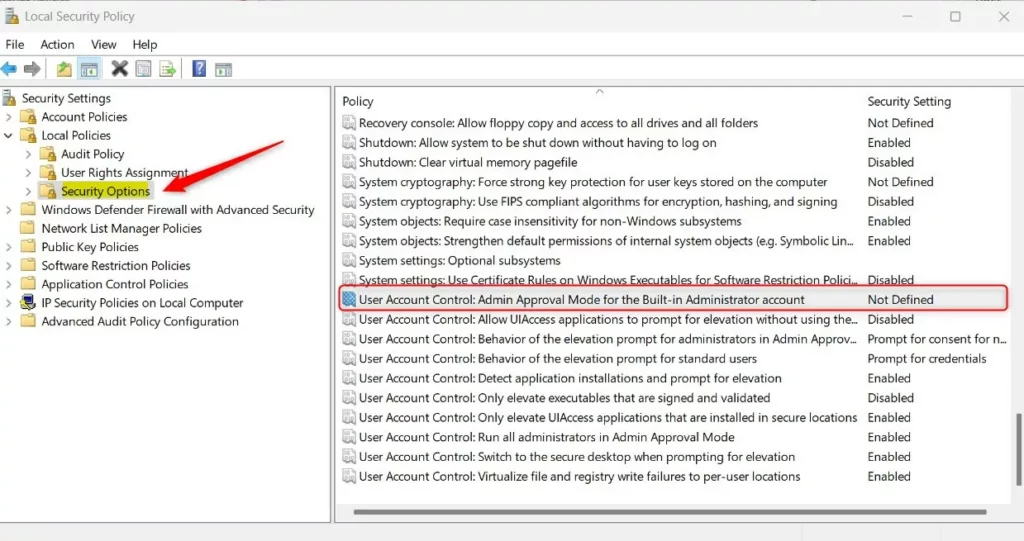
- In the window that opens, go to Local Policies → Security Options on the left side.
- Look for the setting called “User Account Control: Admin Approval Mode for the Built-in Administrator account” on the right side.
- Double-click that setting.
- Choose Enabled to turn UAC on or Disabled to turn it off.
- Click OK.
- Close the Local Security Policy Editor.

Remember to restart your computer after making changes.
Turn UAC On or Off Using Registry Editor
If you prefer, you can also use the Windows Registry Editor to make this change. Be careful, as editing the registry can affect your system.
Steps:
- Press Windows key + R, type regedit, and press Enter.
- If prompted by UAC, click Yes to continue.
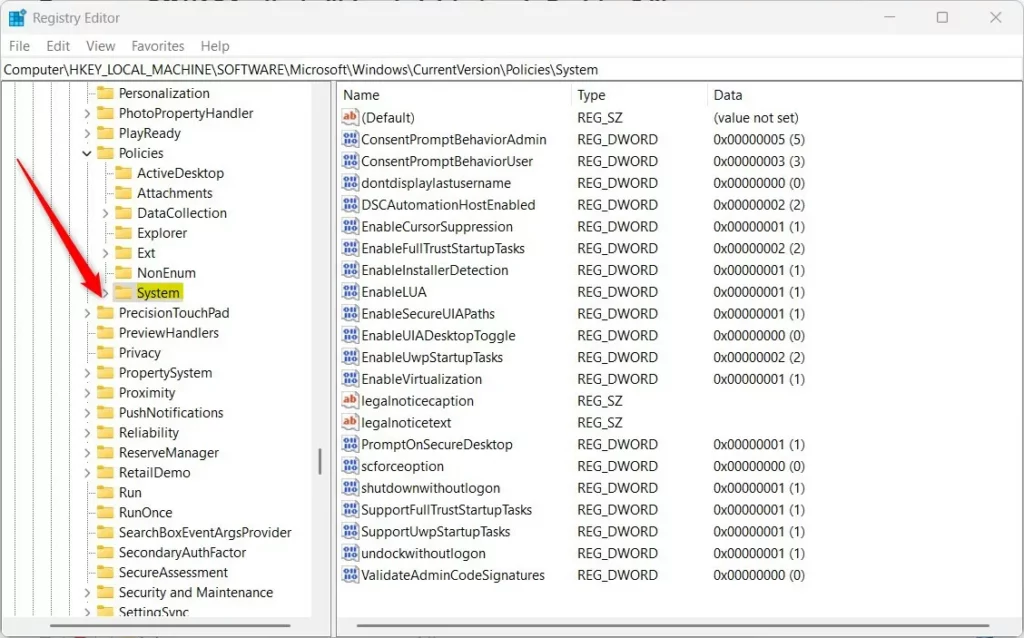
- In the Registry Editor, navigate to this path:
HKEY_LOCAL_MACHINE\SOFTWARE\Microsoft\Windows\CurrentVersion\Policies\System
- If the System folder is missing, right-click on Policies, select New → Key, and name it System.
- Right-click on the right side pane inside System and select New → DWORD (32-bit) Value.
- Name this new value FilterAdministratorToken.
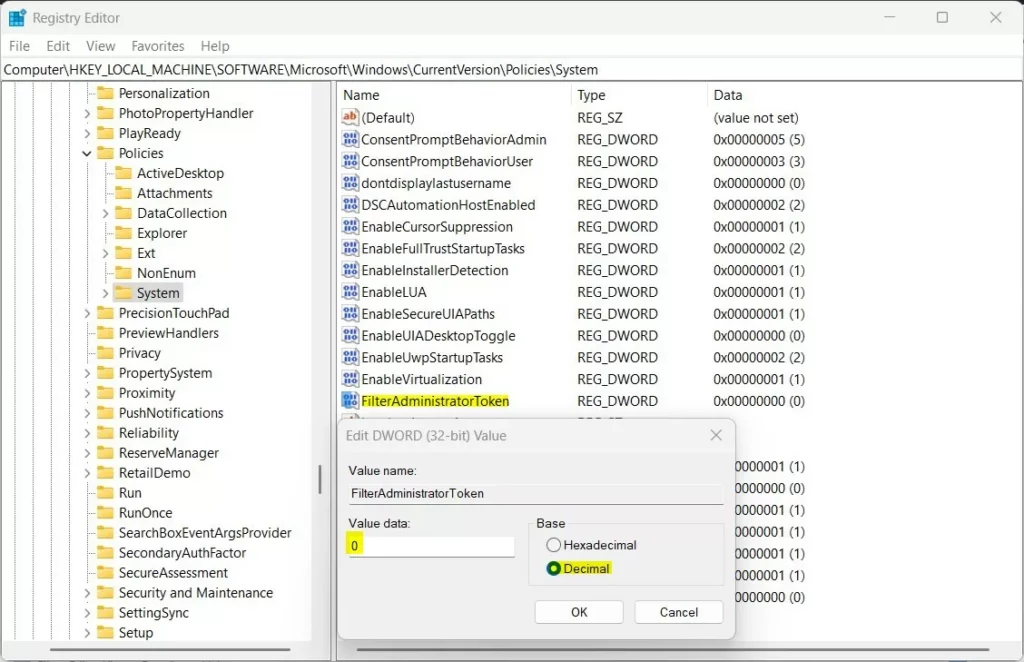
- Double-click the FilterAdministratorToken entry.
- Choose Decimal as the base.
- Set the value data:
- 1 to turn UAC ON for the built-in administrator.
- 0 to turn UAC OFF.
- Click OK and close the Registry Editor.
- Restart your computer to apply the changes.
Summary
- The built-in administrator account in Windows 11 has full control and can run without asking for UAC permission.
- Using this account without UAC can be risky, as dangerous changes might happen without warning.
- You can turn UAC on or off for this account by using either the Local Security Policy Editor or the Registry Editor.
- Always restart your PC after making these changes so they take effect.
If you want to learn more about enabling the built-in administrator account, check out this guide: How to Enable the Administrator in Windows 11.


Leave a Reply Cancel reply