
This guide shows you how to turn on system protection in Windows 11.
Why use System Protection?
System Protection acts like a safety net for your computer. It creates “restore points,” which are snapshots of your system files and settings. If your computer starts acting up after installing a new app or driver, you can use these snapshots to go back in time to when everything was working correctly.
What happens when done?
Once enabled, Windows will automatically track changes to your drive. If you encounter a major error, you can use restored to previous working states to fix the problem. Windows will manage the space used for these backups, deleting old ones to make room for new ones as needed. Note that this feature is restore points on systems with very little storage space. You can learn more about how this works by visiting Restore points can also be deleted to free up space.
How to Enable System Protection
You can use system protection to help restore the System using restore points data your computer if it becomes unstable. Follow these steps to turn it on for your drives.
Note: This process requires administrator privileges.
- Open your Settings menu. You can do this by pressing the Windows key + I on your keyboard or by clicking Start and selecting the Settings icon.

- Once inside Settings, click on System in the left menu, then scroll down and click on the About tile on the right side.

- On the About screen, look for the System protection link and click it.

- A small window will appear. Under the list of drives, click on the drive you want to protect (usually the C: drive) and then click the Configure button.

- In the new window, select the bubble that says Turn on system protection.
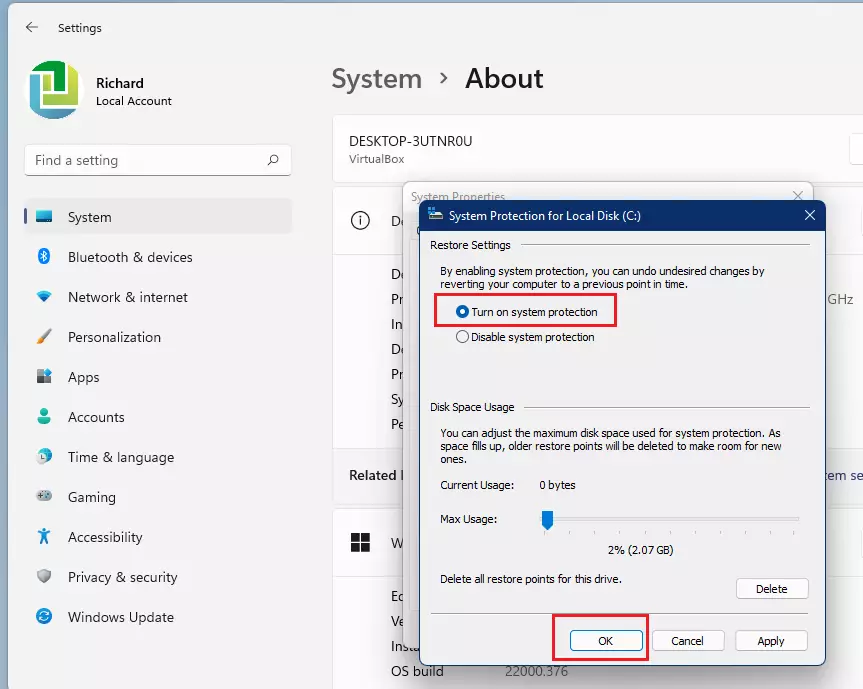
- You can now move the Max usage slider to choose how much disk space you want to set aside for these backups. Click OK when you are finished.
Summary
Enabling System Protection is a simple way to protect your data and settings from unexpected software issues. By creating regular restore points, you ensure that you can easily revert your computer to a healthy state if something goes wrong. Remember to check your disk space usage occasionally, especially if your hard drive is small, to keep your system running smoothly. %%SCTOK0%%%%SCTOK1%%

Leave a Reply