How to Enable or Disable Storage Sense in Windows 11
Storage Sense in Windows 11 automatically cleans up your computer by deleting unneeded files like temporary files and items in your Recycle Bin.
This feature helps free up precious hard drive space, which is especially useful if you have a smaller C: drive. Windows 11 typically has Storage Sense turned off when you first install it.
However, Windows might switch it on if your disk space drops below 1 gigabyte. You can easily choose to keep Storage Sense running or turn it off whenever you like.
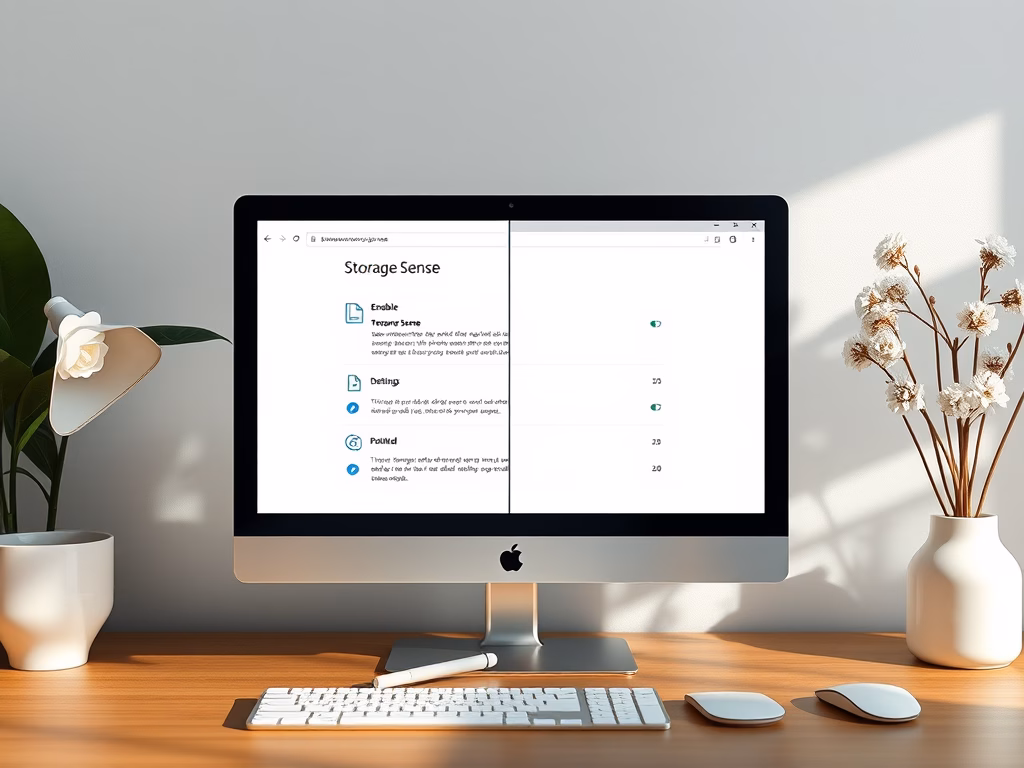
You manage Storage Sense in Windows 11 via the Settings app. Navigate to System > Storage > Storage Sense, then toggle the switch to enable or disable it. You can also configure its automatic cleanup settings here.
What Does Storage Sense Do?
- Deletes temporary files created by apps and the system
- Empties your Recycle Bin after files have been there for a set time
- Does not delete files in your Downloads folder or cloud storage unless you set it to
Who Can Change Storage Sense Settings?
⚠️ Admin Required: To change Storage Sense for all users, you must be signed in as an administrator on your PC.
How to Enable or Disable Storage Sense
There are two primary methods to control this setting for everyone using your PC:
Option 1Using Local Group Policy Editor (For 🪟 Windows 11 Pro, Enterprise, Education)
For Windows 11 Pro, Enterprise, and Education users, the Local Group Policy Editor offers a way to manage Storage Sense, allowing you to turn it on or off. This tool lets you control if Storage Sense is available to users on your computer. You’ll need to open the editor and find the specific setting to make your choice.
- Press ⊞ Win+R keys on your keyboard, type
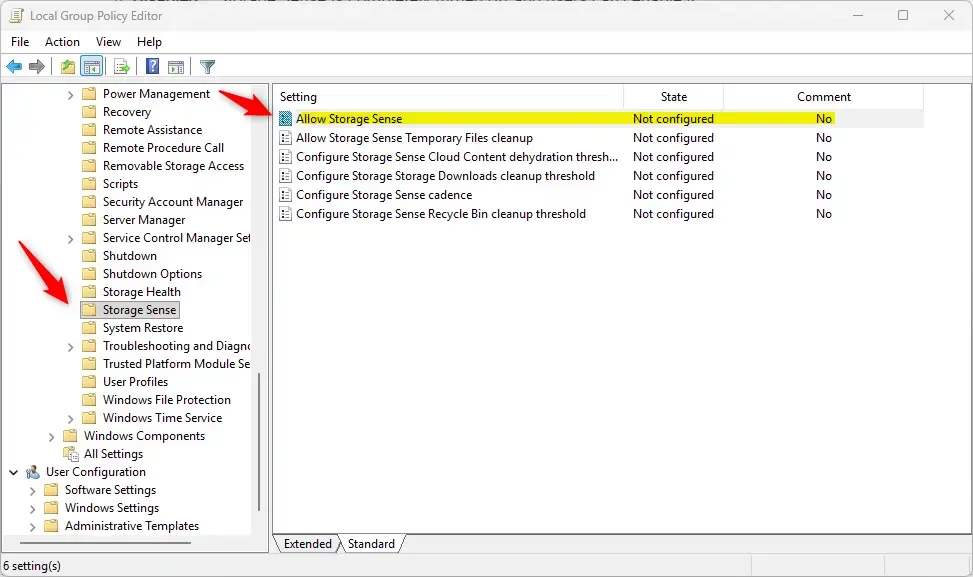
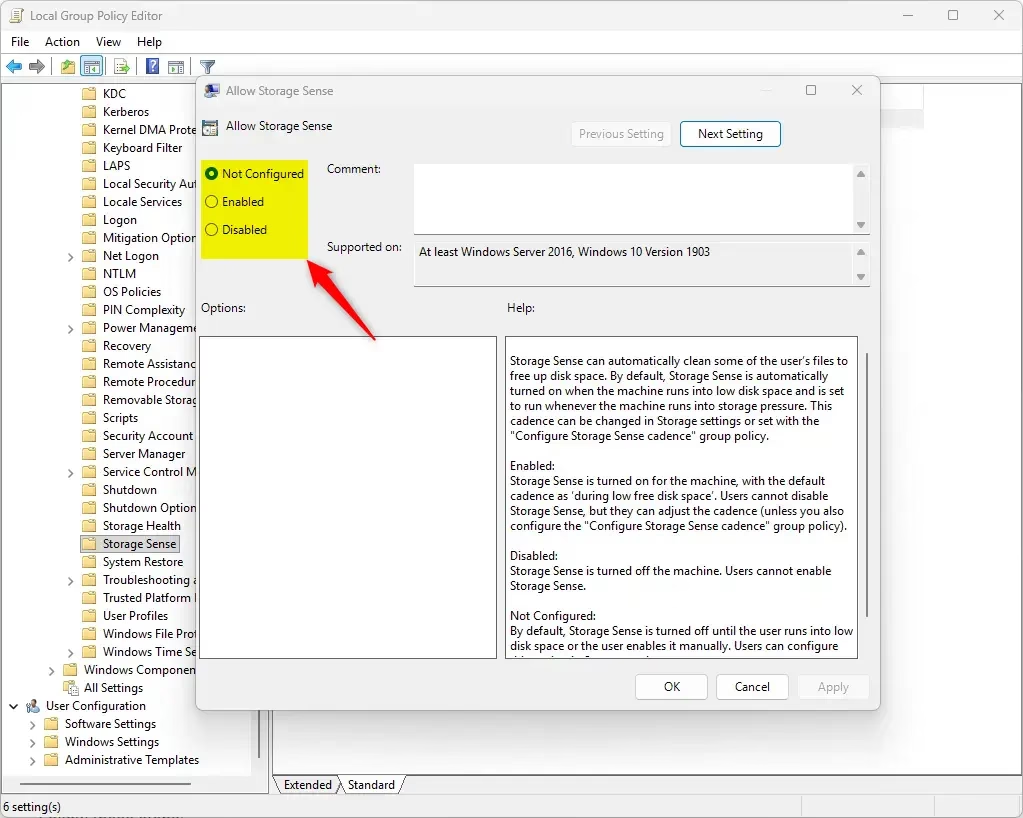
gpedit.msc, and press Enter to open the Local Group Policy Editor. - In the left panel, go to: Computer Configuration > Administrative Templates > System > Storage Sense
- In the right panel, double-click Allow Storage Sense.
- You will see three options:
- Not Configured – This lets users turn Storage Sense on or off themselves (default).
- Enabled – Storage Sense is always on, but users can change how often it runs.
- Disabled – Storage Sense is completely turned off and users can’t enable it .
- Choose the option you want, click OK, and close the editor.
Option 2Using Windows Registry (All 🪟 Windows 11 editions)
You can turn Storage Sense on or off for any Windows 11 edition by editing the Windows Registry. This method requires careful steps, and it’s very important to back up your registry first to avoid problems. Press the Windows key + R on your keyboard, then type regedit and press Enter to open the Registry Editor.
Follow these steps:
- ⚠️ Admin Required: Press ⊞ Win+R, type
regedit, and press Enter to open the Registry Editor. - Navigate to this key:
HKEY_LOCAL_MACHINE\SOFTWARE\Policies\Microsoft\Windows\StorageSense - If the StorageSense folder doesn’t exist, create it by right-clicking Windows, choosing New > Key, and naming it StorageSense.
- In the right pane, create or modify a DWORD (32-bit) value named AllowStorageSenseGlobal:
- Delete the value or set it to Not Configured (default): Remove the AllowStorageSenseGlobal value.
- To always enable Storage Sense: Set the value to 1.
- To always disable Storage Sense: Set the value to 0.
Default – Enable Storage Sense
reg delete "HKEY_LOCAL_MACHINE\SOFTWARE\Policies\Microsoft\Windows\StorageSense" /v AllowStorageSenseGlobal /fAlways enable Storage Sense
reg add "HKEY_LOCAL_MACHINE\SOFTWARE\Policies\Microsoft\Windows\StorageSense" /v AllowStorageSenseGlobal /t REG_DWORD /d 1 /fAlways disable Storage Sense
Storage Sense is a Windows 11 tool that automatically removes unneeded files to save computer space. Storage Sense is turned off by default, but an administrator can turn it on for all users. You can choose to let individual users decide whether to use Storage Sense, or leave the setting unconfigured. Turning Storage Sense on can help your PC run better.
Where is storage sense in 🪟 Windows 11?
Turn on Storage Sense Go to Start > Settings > System > Storage .
How often should I run storage Sense?
Click Storage Sense (or “Configure Storage Sense or run it now”) to open configuration. Choose the cadence: Only when low on disk space, Every day, Every week, or Every month. Many users prefer Weekly or Monthly as a balanced choice.
Was this guide helpful?

About the Author
Richard
Tech Writer, IT Professional
Richard, a writer for Geek Rewind, is a tech enthusiast who loves breaking down complex IT topics into simple, easy-to-understand ideas. With years of hands-on experience in system administration and enterprise IT operations, he’s developed a knack for offering practical tips and solutions. Richard aims to make technology more accessible and actionable. He's deeply committed to the Geek Rewind community, always ready to answer questions and engage in discussions.


No comments yet — be the first to share your thoughts!