How to Enable or Disable Automatic Sign-in After Windows 11 Update
Windows 11 includes a feature that helps you finish setting up your computer after an update without needing to type your password. This guide explains how to control this setting.
Why use this feature?
Normally, when Windows finishes an update, it waits for you to log in to finish the setup process. By enabling this feature, Windows uses your saved credentials to log in automatically, saving you time and effort.
What happens when done?
Once you enable this, your computer will automatically log in to your user account only when it is finishing up a Windows update. It does not change your regular login process; you will still need to enter your PIN or password when you turn on your computer normally.
How to change your Sign-in settings
You can adjust this setting through the main Windows Settings menu. Note: This process requires administrator privileges.
- Open the Settings app. You can do this by pressing the Windows key + I on your keyboard or by clicking Start and selecting the Settings icon.

- Click on Accounts in the left-hand menu.
- Select the Sign-in options tile on the right side of the screen.

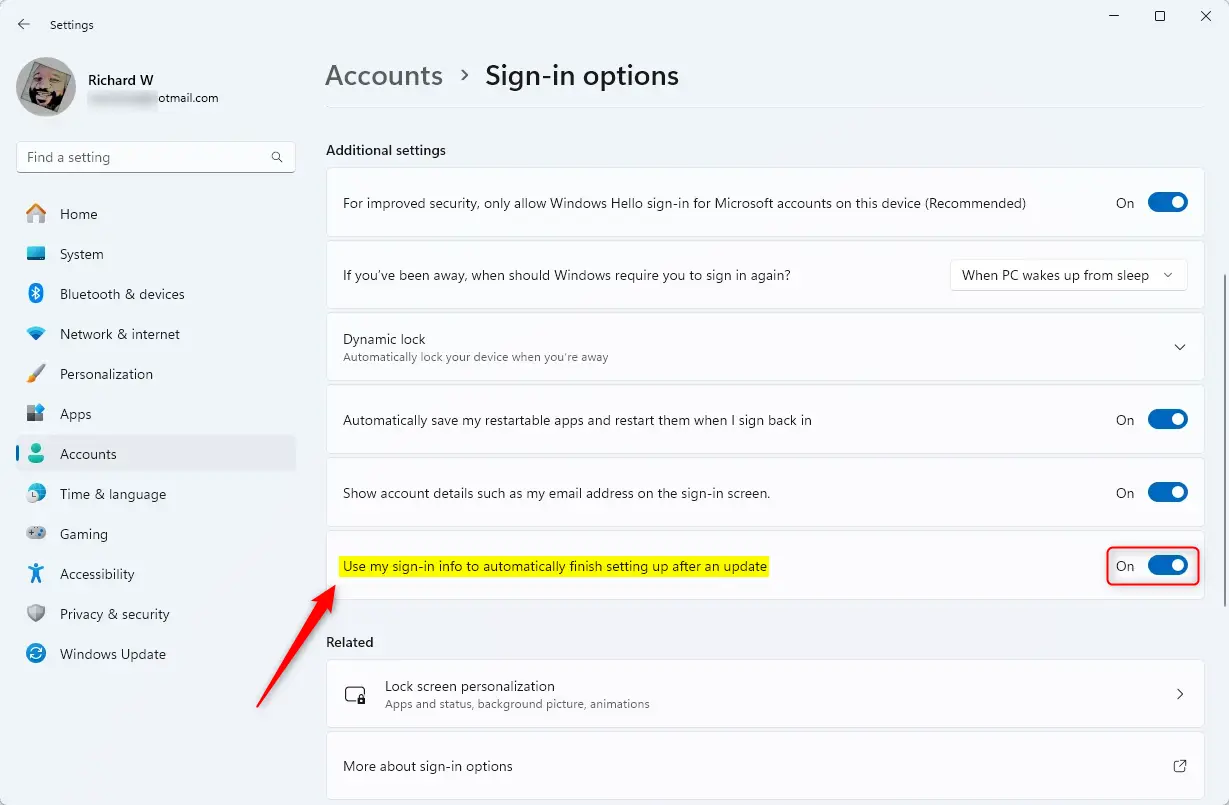
- Look for the section labeled Additional settings.
- Find the option that says “Use my sign-in info to automatically finish setting up after an update”.
- Toggle the switch to On to enable it, or Off to disable it.
You can close the window once you have made your choice.
Summary
Enabling the “Use my sign-in info to automatically finish setting up after an update” feature allows your computer to complete updates faster by removing the need for manual logins during the restart process. This is a convenient setting that only triggers during update cycles, keeping your standard security measures intact for everyday use. You can toggle this setting on or off at any time using the steps provided above.
Was this guide helpful?


Leave a Reply Cancel reply