
This article explains how to turn “Capture audio when recording a game” On or Off in Windows 11.
When playing your favorite games on Windows, you can capture important and cool moments and save the video for later. To do that, press the Windows logo key + ALT + G to capture the moment.
The gameplay moments you capture are automatically saved in the Video folder of your home directory. However, Windows lets you change that default location to another drive or folder with more free space and set the max recording length for video clips.
You can also configure Windows capture settings to include or exclude audio capture when recording games.
Capturing audio when recording games can enhance the overall experience by allowing you to hear the in-game sounds, such as background music, sound effects, and character dialogue.
This can make the recorded video more immersive and enjoyable to watch. Additionally, if you plan to share your gameplay videos on social media or with friends, having audio included can help communicate the game’s atmosphere and create a more engaging viewing experience.
Allow or disallow audio when recording games on Windows
As mentioned above, users can allow or disallow audio when recording games in Windows 11.
Having audio included can help communicate the game’s atmosphere and create a more engaging viewing experience.
Here’s how to turn it on or off.
First, open the Windows Settings app.
You can do that by clicking on the Start menu and selecting Settings. Or press the keyboard shortcut (Windows key + I) to launch the Settings app.
When the Setting app opens, click the Gaming button on the left.

Select the Captures tile on the right to expand it.

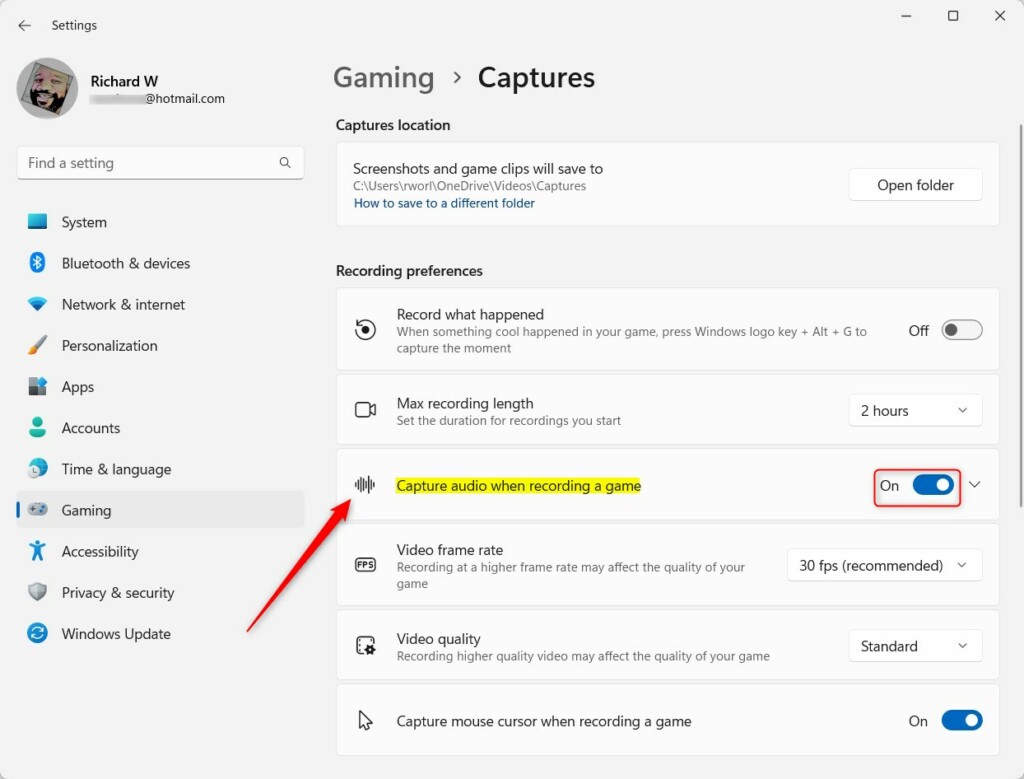
On the Gaming -> Captures setting pane, select the “Capture audio when recording a game” tile.
Then, toggle the button switch to the On position to enable audio in video captures.
To disable it, toggle the switch back to the Off position.
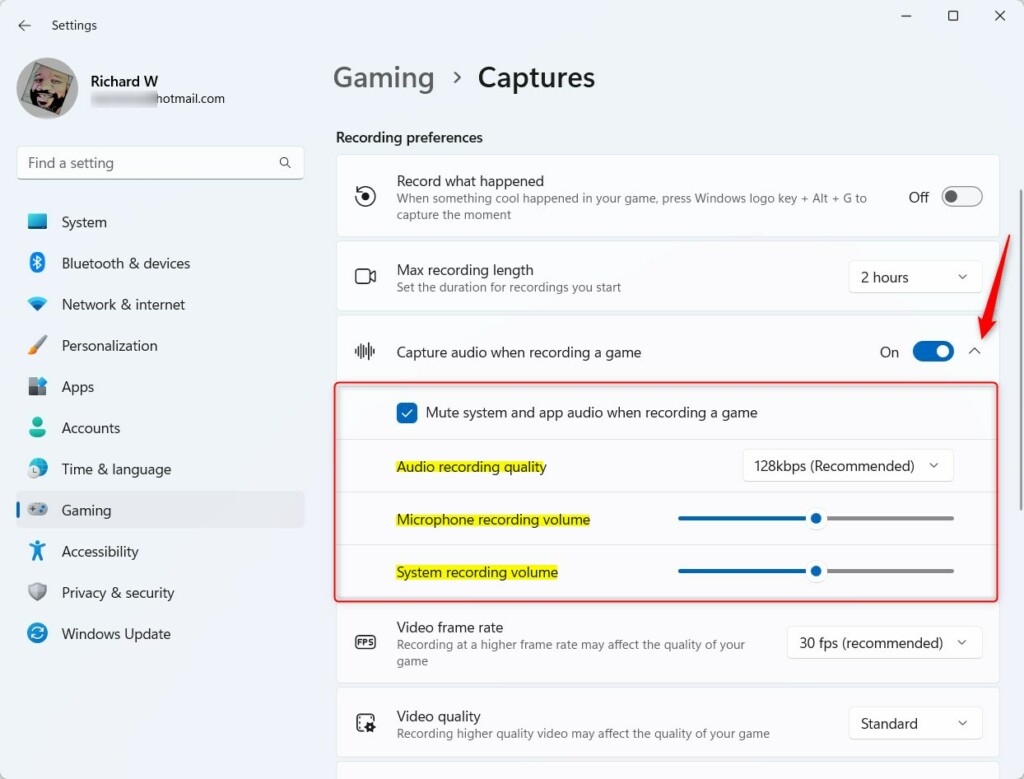
If you turn on audio capturing, expand additional hidden settings by clicking on the down-caret to the right of the button.
When the pane expands, configure the Audio recording quality, Microphone recording volume, and System recording volume.
Close the Settings app when you are done.
That should do it!
Conclusion:
- Including audio when recording games in Windows 11 can enhance the overall viewer experience by making the video more immersive and engaging.
- Audio capture allows the in-game sounds, such as background music, sound effects, and character dialogue, to be conveyed, contributing to a more vivid representation of the gameplay.
- Sharing gameplay videos with audio included can help communicate the game’s atmosphere and create a more captivating viewing experience for the audience.
- Following the steps outlined in this article, you can easily configure the audio capture settings in Windows 11 and customize additional audio recording parameters to suit your preferences.
Leave a Reply Cancel reply