

This article explains how to manually start or stop Windows Automatic Maintenance (WAM) in Windows 11.
Windows Automatic Maintenance (WAM) is a feature that combines various background tasks and performs them all at once at a scheduled time, usually 2 AM by default.
The WAM tasks include keeping the Windows operating system (OS) and applications up-to-date, checking security, and running scans for malware.
Windows lets you change WAM schedules if the default 2 AM time isn’t suitable and lists all available device tasks. You can also manually start and stop Windows Automatic Maintenance anytime you wish.
Start or stop Windows Automatic Maintenance
As described above, users can manually start or stop WAM anytime without waiting for its default scheduled time.
Here’s how to do that.
First, open the Control Panel app.
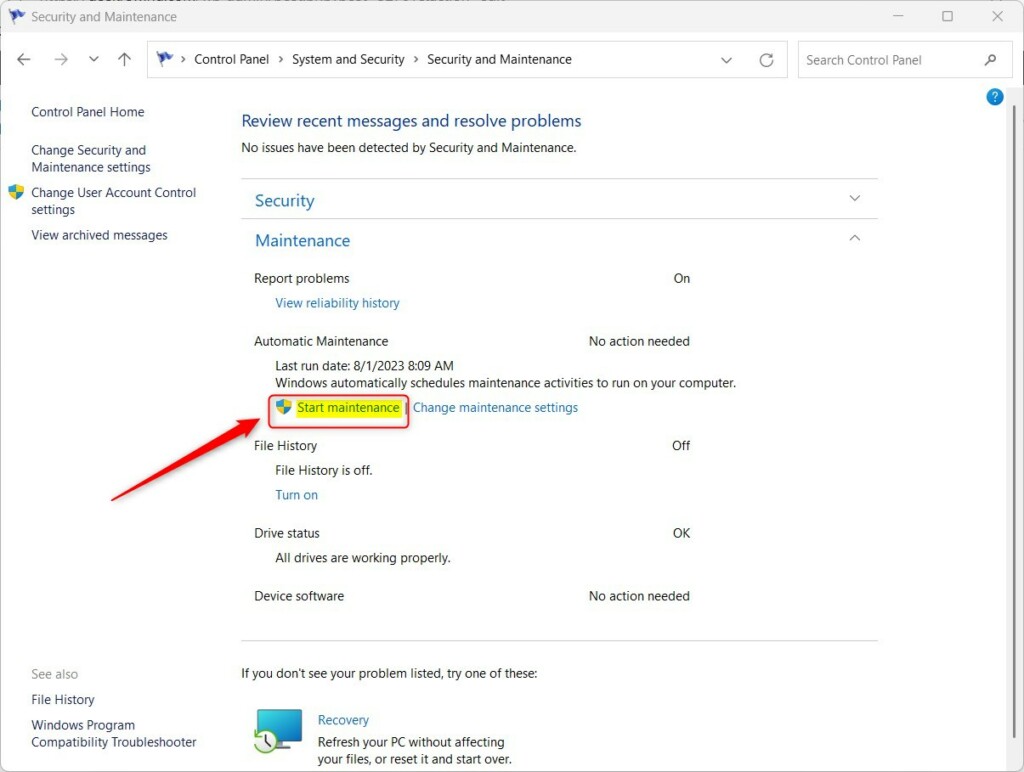
Then go to the Control Panel > System and Security > Security and Maintenance > Automatic Maintenance page.
On the Maintenance settings page, click the Start maintenance link to start WAM manually. You will see the start link if Windows Automatic Maintenance isn’t running.
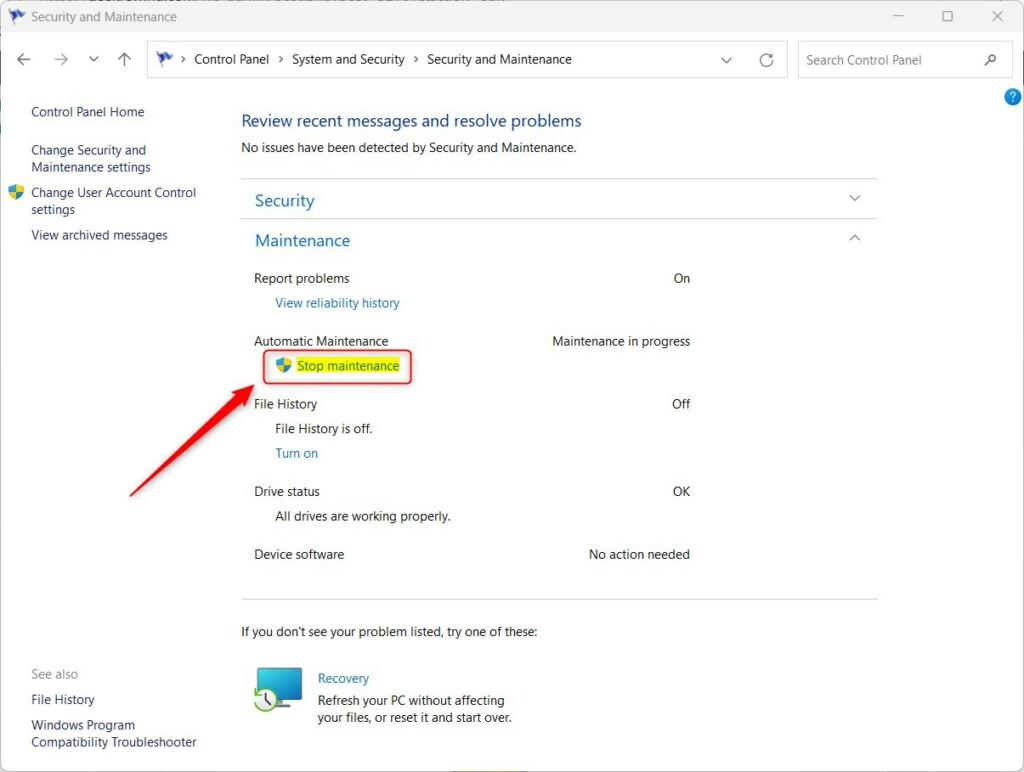
If WAM is running, you will see the Stop maintenance link. To stop Windows Automatic Maintenance, click the Stop Maintenance link highlighted below.
When you are done, close the Control Panel app.
Manually Start or stop WAM via Windows Terminal
Another way to start or stop Windows Automatic Maintenance is to use PowerShell or the Comment Prompt.
To do that, first, open the Windows Terminal app.
When the Terminal app opens, run the command below to start or stop WAM.
Start Windows Automatic Maintenance:
MSchedExe.exe Start
Stop Windows Automatic Maintenance:
MSchedExe.exe Stop
That should do it!
Conclusion:
- Windows Automatic Maintenance (WAM) in Windows 11 combines various background tasks and performs them at a scheduled time, typically 2 AM by default.
- Users have the flexibility to change the WAM schedule to a more suitable time, as well as manually start or stop Windows Automatic Maintenance at any time.
- Users can initiate WAM manually via the Control Panel by navigating to the Maintenance settings page and clicking the “Start maintenance” or “Stop maintenance” links.
- Another method to start or stop WAM is through the Windows Terminal app using the commands “MSchedExe.exe Start” and “MSchedExe.exe Stop.”
- These steps allow users to manage Windows Automatic Maintenance according to their preferences and system requirements.
Leave a Reply Cancel reply