
This post describes steps to enable or disable a new feature that shows a snap layout when you drag a window to the top of your screen in Windows 11.
Snap is a feature in Windows that allows users to launch a flyout with possible layouts to reorient their windows on the screen by hovering their mouse over the top edge of your app windows on the maximize button.
The latest version of Windows 11 introduces an additional Snap feature, revealing a Snap layout menu when you drag a window to the top of your screen. This new feature may help you organize your windows on the screen, but it may not be very pleasant for some.
If you don’t like to show snap layouts when dragging a window to the top of your screen in Windows 11, the steps below show you how to do that.
How to enable or disable show snap layouts when I drag a window to the top of my screen in Windows 11
As mentioned above, Windows 11 introduces a new feature called “Show snap layouts when I drag a window to the top of the screen, ” revealing a snap layout menu on the top of the screen.
Below is how to enable or disable it in Windows 11.
Windows 11 has a centralized location for the majority of its settings. As a result, everything can be done, from system configurations to creating new users and updating Windows from its System Settings pane.
To get to System Settings, you can use the Windows key + I shortcut or click on Start ==> Settings, as shown in the image below:

Alternatively, you can use the search box on the taskbar and search for Settings. Then select to open it.
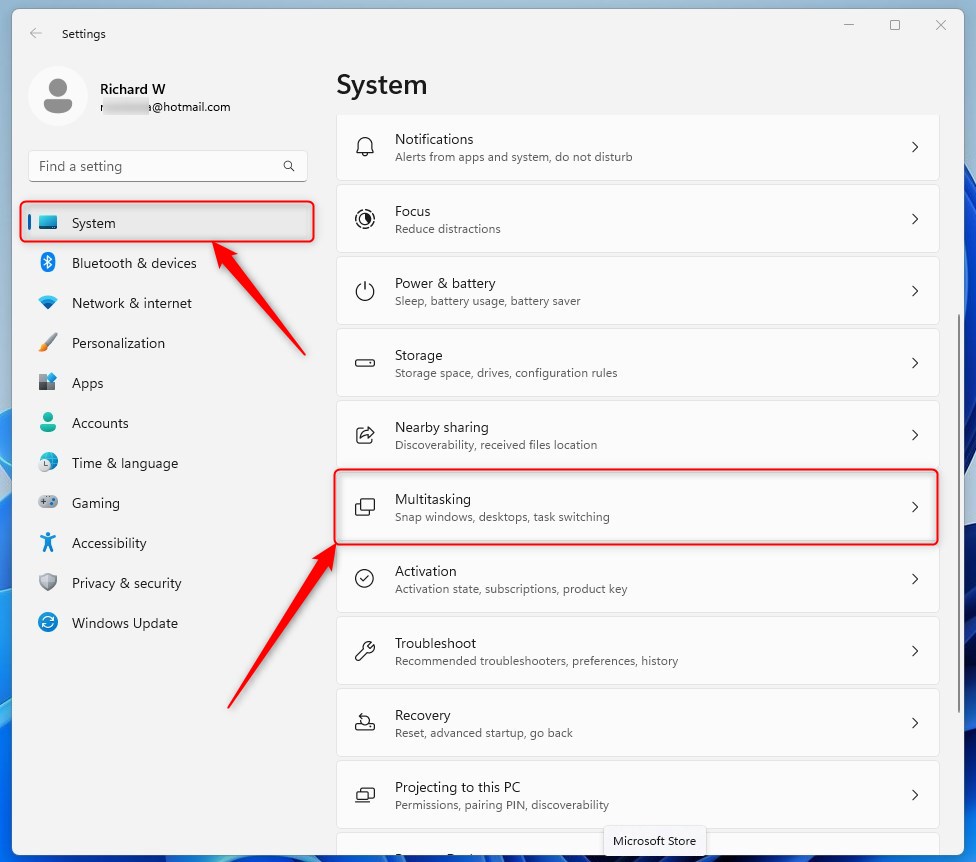
Windows Settings pane should look similar to the image below. In the Windows Settings app, click System on the left.
Select the Multitasking tile to expand on the right, as highlighted in the image below.
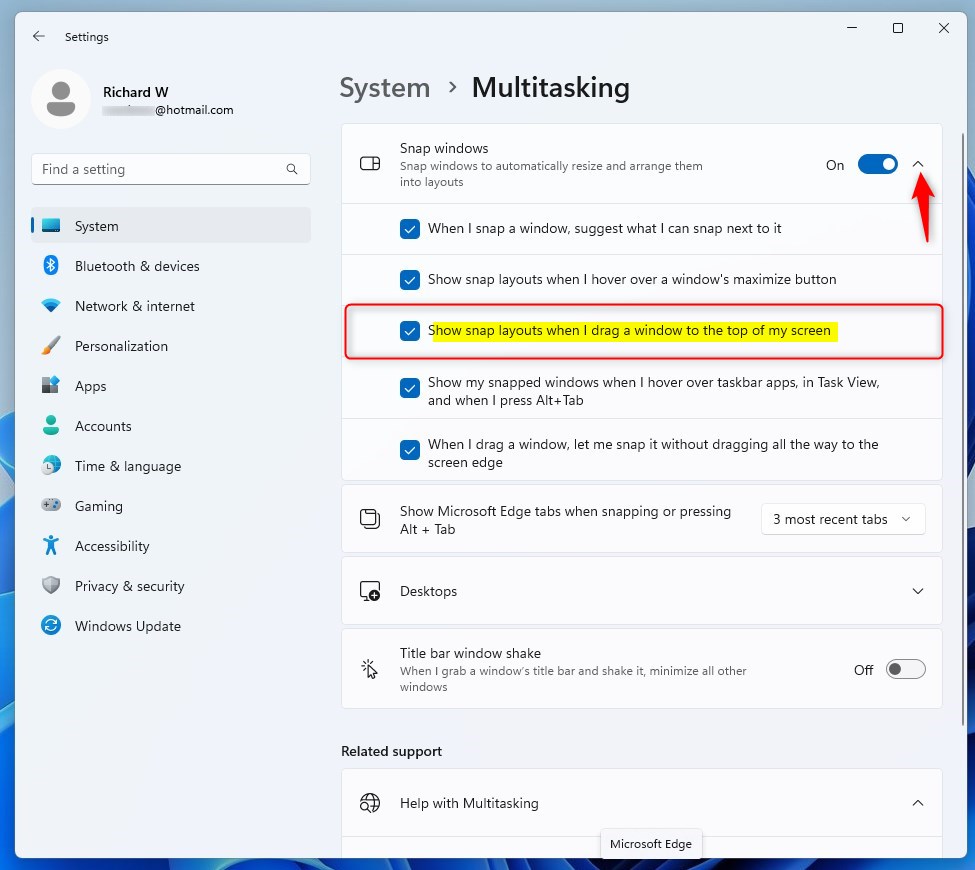
On the System -> Multitasking setting pane, toggle the down-caret button to expand the Snap windows tile.
Then check or uncheck the box next to “Show snap layouts when I drag a window to the top of my screen” to enable or disable the Snap layout at the top of the screen.
That should do it!
Conclusion:
- Enabling or disabling the “Show snap layouts when I drag a window to the top of my screen” feature in Windows 11 is an easy process through the Multitasking settings.
- This feature can be useful for organizing windows on the screen, but users can turn it off if it is not preferred.
- Users can customize their Windows 11 experience based on their workflow and preferences by following the simple steps outlined in this post.
Leave a Reply