
This article explains how to show or hide the Libraries folder in Windows 11.
The libraries folder is hidden from view on Windows 11 by default. The libraries folder allows users to include files and folders stored on the local computer or at a remote location so that users can browse and access them from a single place.
When you include a file or folder in the libraries folder, it does not physically move or change the storage location of the file or folder; it simply gives you quick access to the content from a unified location.
These folders are automatically added to the libraries folder: Camera Roll, Documents, Music, Pictures, Saved Pictures, and Videos. The libraries folder is located at %AppData%\Microsoft\Windows\Libraries.
Show the Libraries folder on Windows 11
If you previously used the libraries folder in other Windows versions and want to return it to Windows 11, follow the steps below.
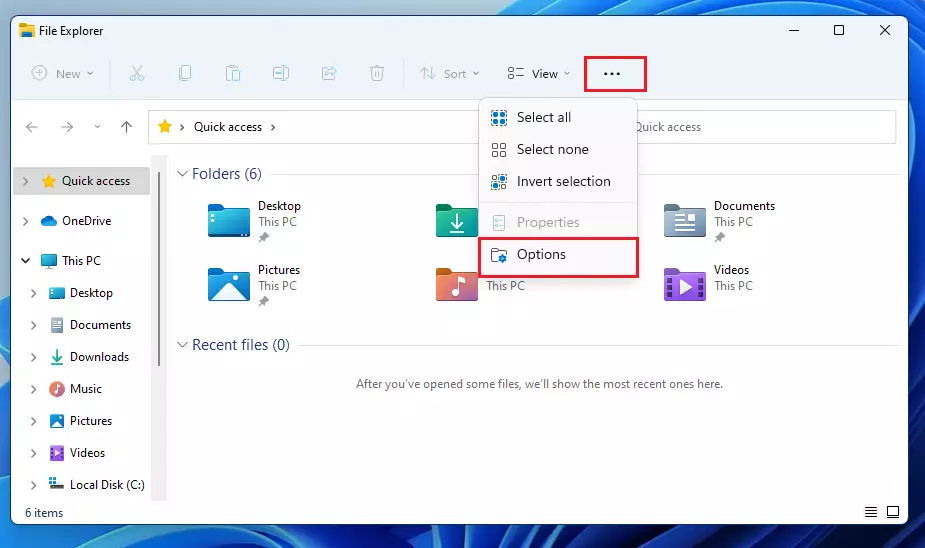
Open File Explorer, then click on the ellipse (three dots) on the taskbar menu and select Options as highlighted below.
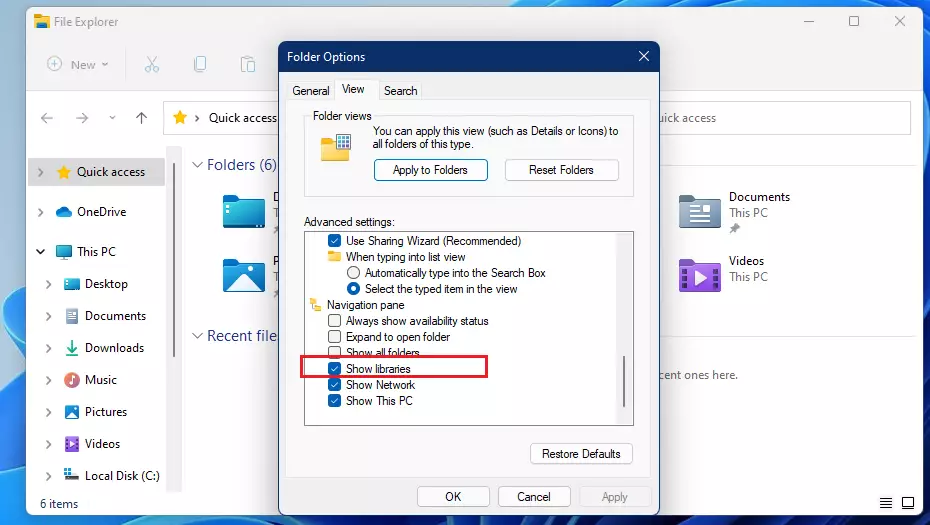
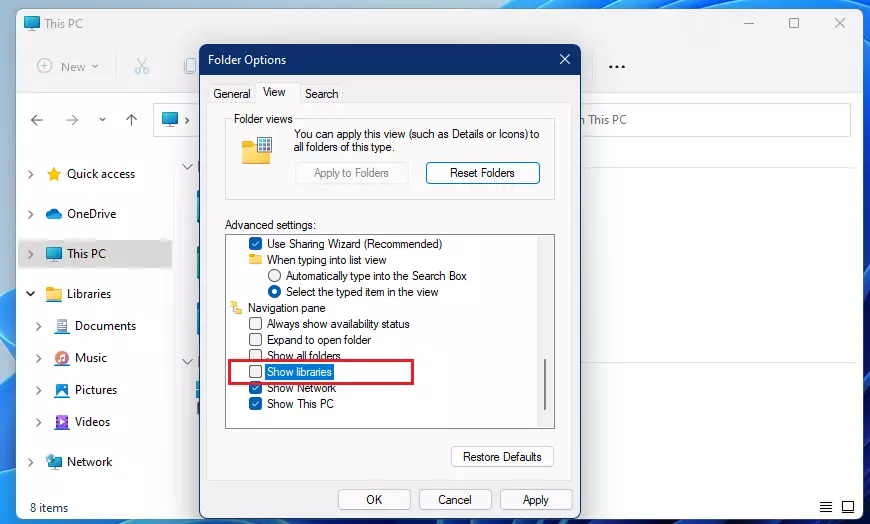
On the Folder Options window, click the View tab, then under Advanced settings, check the box next to “Show libraries” as highlighted below.
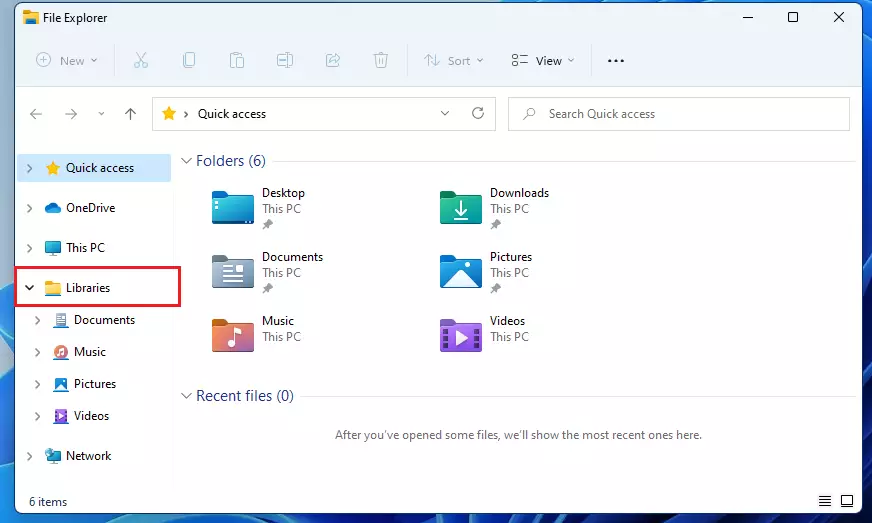
Now the Libraries folder should appear on the navigation menu in File Explorer, as shown below.
How to hide the Libraries folder on Windows 11
If you change your mind about displaying the Libraries folder in File Explorer, you can hide it from view. To do that, reverse the steps above by going to File Explorer, clicking the ellipse on the taskbar menu, then selecting Options.
On the View tab, under Advanced settings, uncheck the “Show libraries” as shown below.
That will hide the Libraries from view in File Explorer.
How to add files or folders to the Libraries on Windows 11
Now that the Libraries folder is enabled, you can add or remove files and folders from the Libraries.
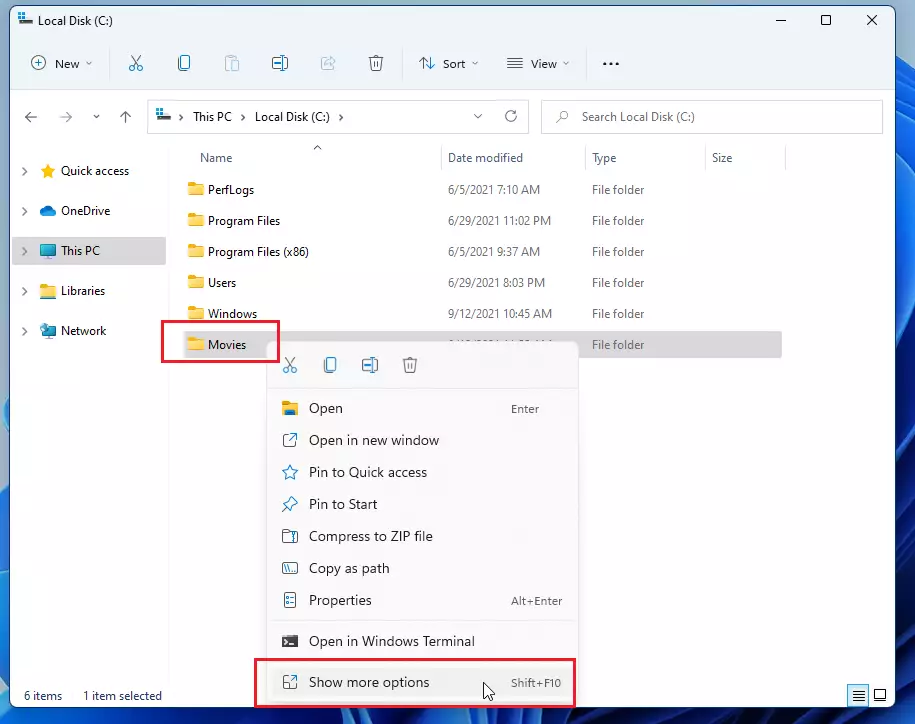
To add a file or folder, right-click a folder you want to add to the Libraries and select “Show more options” on the context menu.
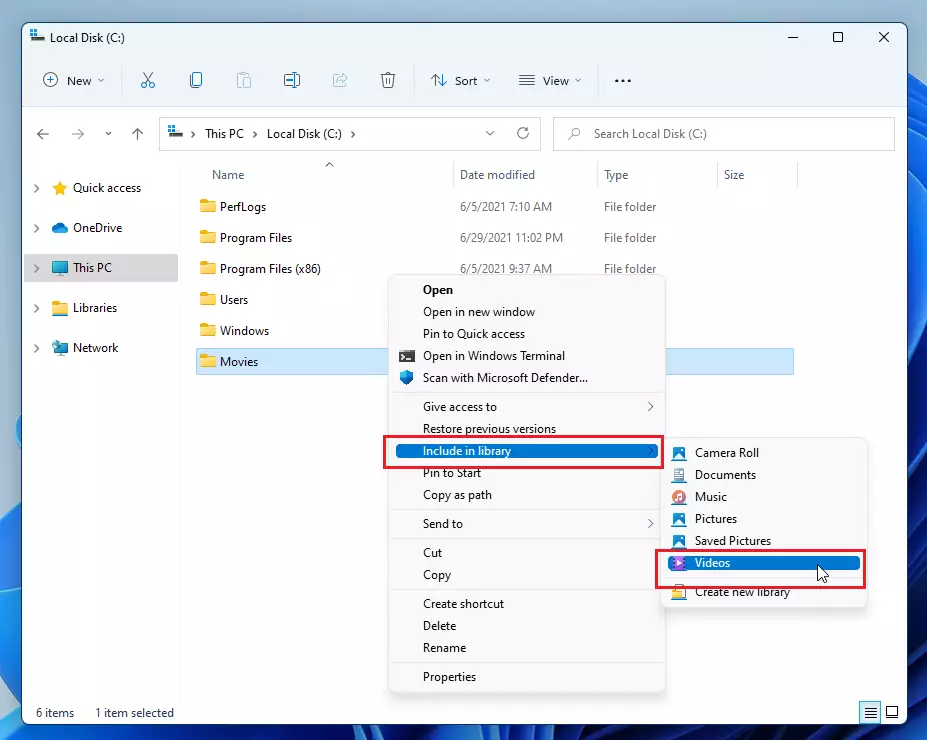
On the More option context menu, click Include in library and select the folder to include or create a new one.
That should do it!
Conclusion:
- The Libraries folder in Windows 11 simplifies file management by aggregating content from multiple locations.
- Users can easily toggle the visibility of the Libraries folder in File Explorer for convenience.
- Adding or removing files and folders from the Libraries is straightforward and enhances accessibility.
- Understanding how to manage the Libraries folder can improve overall productivity and organization on your Windows 11 device.

Leave a Reply Cancel reply