
This article explains how to set up and create Dev Drive in Windows 11.
Dev Drive is a new form of storage volume available to improve performance for key developer workloads. It is built on ReFS technology to employ targeted file system optimizations and provide more control over storage volume settings and security.
Dev Drive is created for the best performance and automatically grants trust in the new volume to support antivirus configuration and administrative control over what filters are attached.
There are two performance modes one can use with Dev Drive. The following table summarizes performance mode synchronous and asynchronous scan behavior.
| Performance mode state | Scan type | Description | Summary |
|---|---|---|---|
| Not enabled (Off) | Synchronous (Real-time protection) | Opening a file initiates a Real-time protection scan. | Open now, scan now. |
| Enabled (On) | Asynchronous | File open operations are scanned asynchronously. | Open now, scan later. |
For more on Dev Drive performance and considerations, read the post below.
Create Dev Drive from unallocated space
As mentioned above, Dev Drive is a new form of storage volume available to improve performance for key developer workloads.
Here’s how to create a Dev Drive from unallocated space.
Prerequisites
- Windows 11 Insider Program Build: Dev Channel.
- Recommend 16GB memory (minimum of 8GB)
- Minimum 50GB of free disk space
- Dev Drives are available on all Windows SKU versions.
To create a Dev Drive, use the steps below.
First, open the Windows Settings app.
You can do that by clicking on the Start menu and selecting Settings. Or press the keyboard shortcut (Windows key + I) to launch the Settings app.

When the Setting app opens, click the System button on the left.

On the right, click on the Storage tile to expand.

On the System -> Storage settings pane, click on the Advanced storage settings tile to expand.

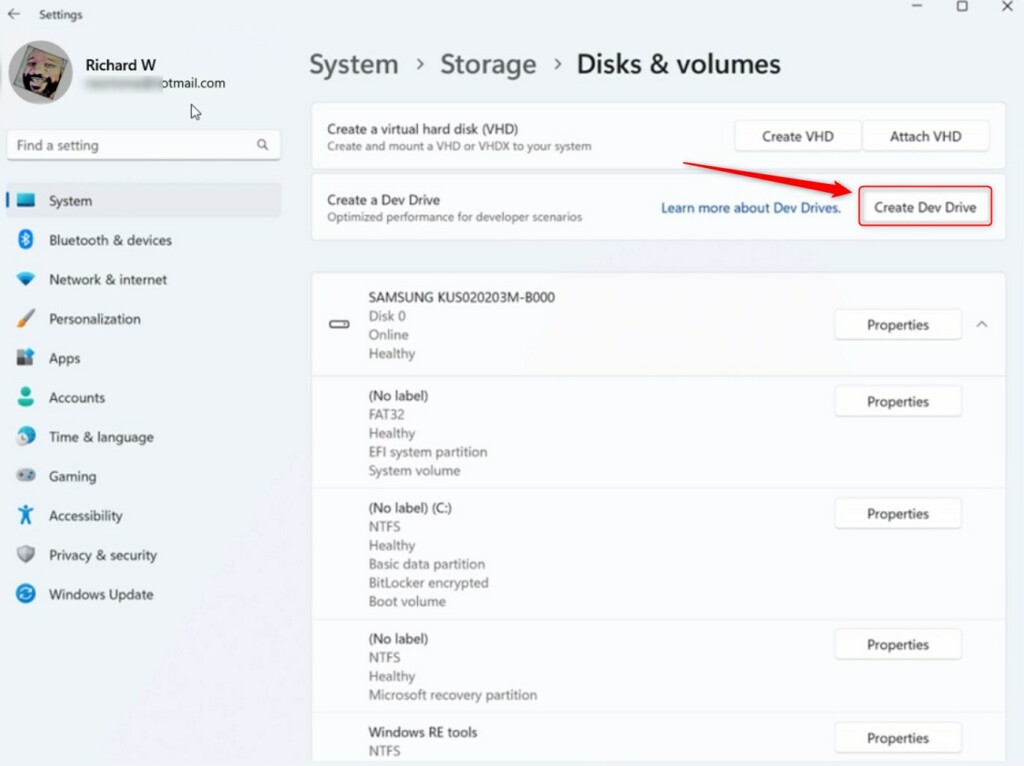
On the System -> Storage -> Advanced storage settings -> Disks & volumes settings pane, click Create Deve Drive button.
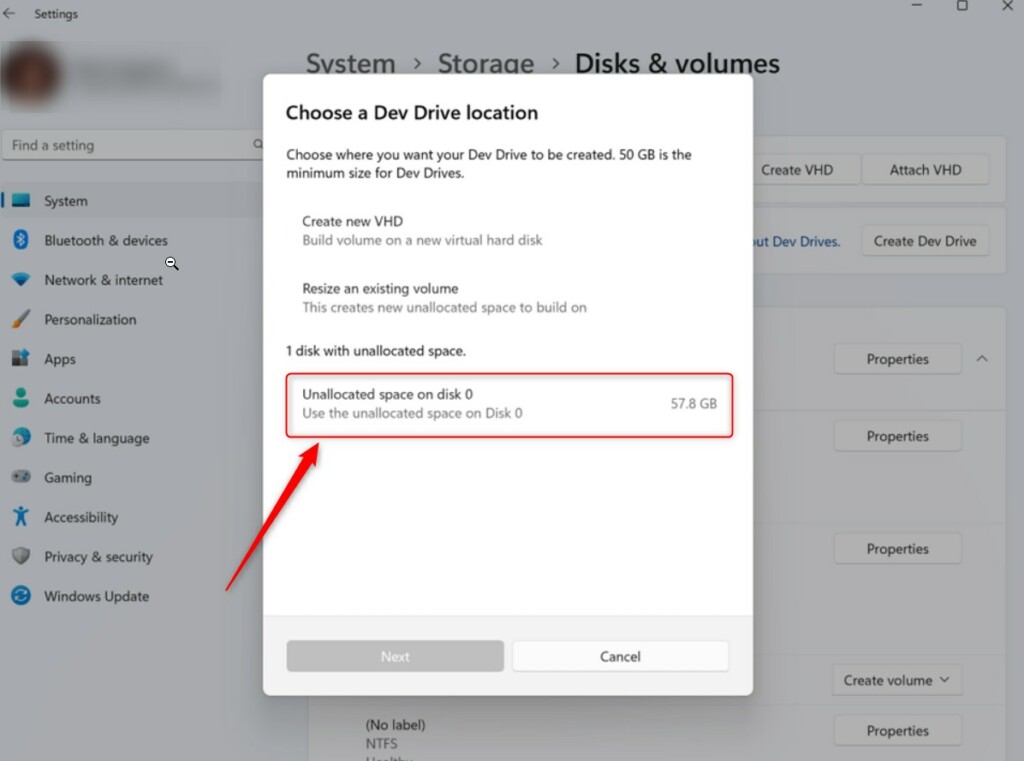
On the pop-up window, select the unallocated space for the Dev Drive and click Next.
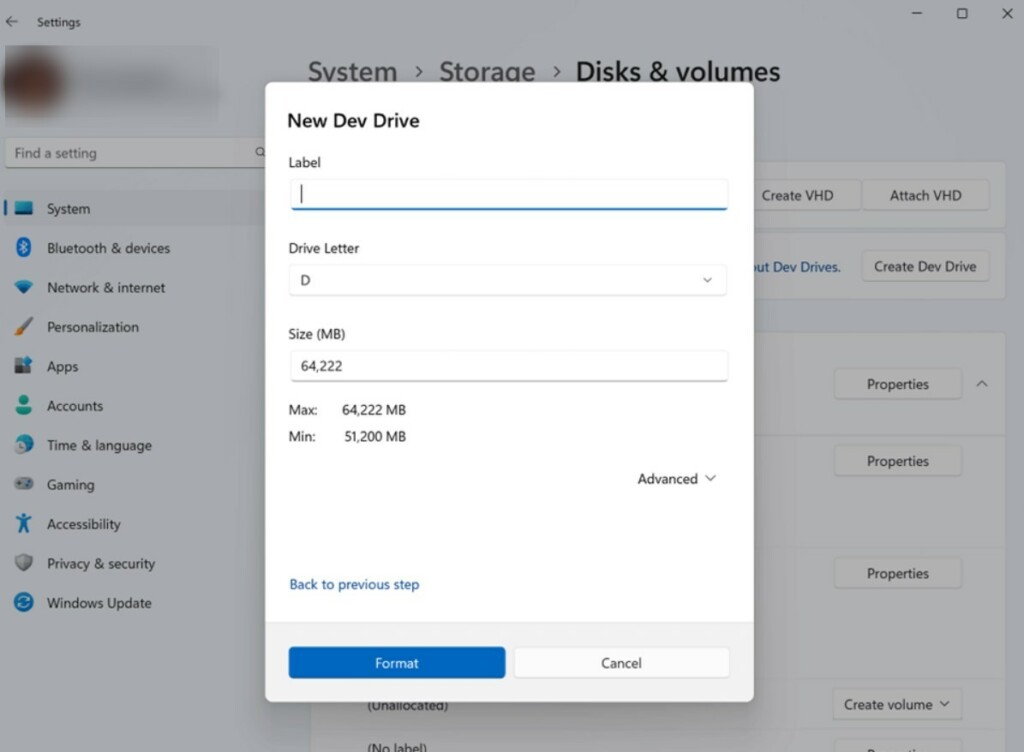
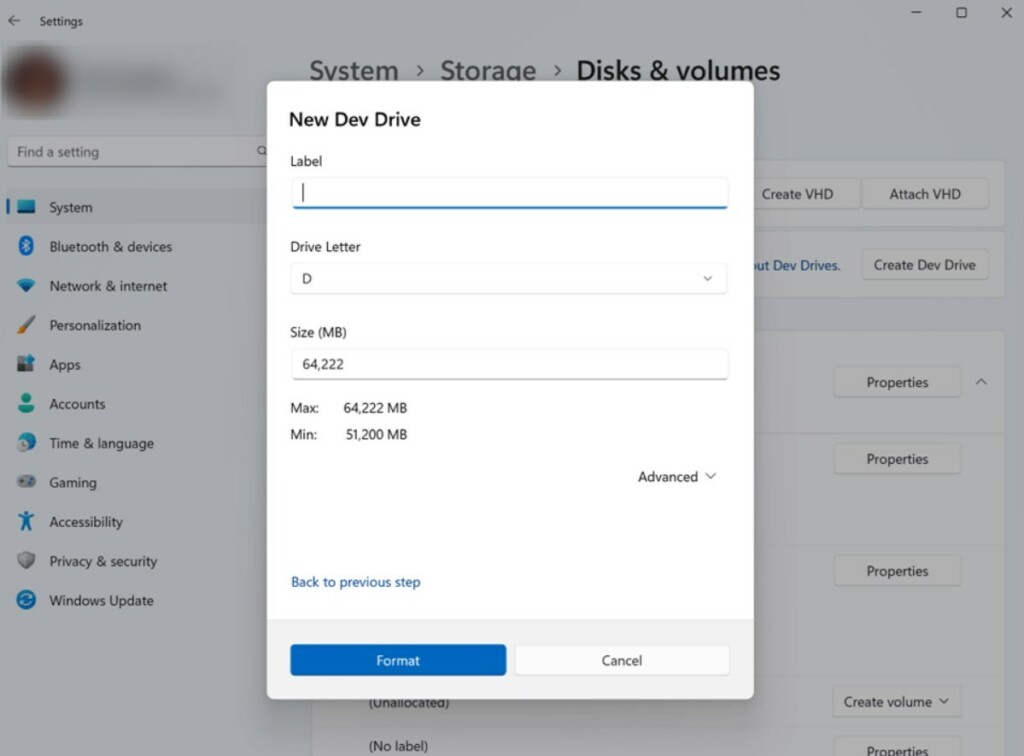
On the next screen, enter the Label or name. Select a Drive Letter to assign to the Dev Drive, type in the drive size (at least 50GB), and click Format.
Click on Format to create a new Dev Drive with the abovementioned space.
Create Virtual Hard Disk (VHD/VHDX) Dev Drive
You can also create a virtual hard disk (VHD/VHDX) for your Dev Drive. With this option, you will first set up a virtual hard disk, then use the disk for your Dev Drive.
The Dev Drive you create using this option will only be available in the This PC pane of File Explorer. The virtual hard disk will automatically unmount whenever you restart your computer.
It would be best to mount it again when you want to use it.
To set up a virtual disk drive for your Dev Drive, open Windows Settings and navigate to System > Storage > Advanced Storage Settings > Disks & volumes. Select Create dev drive.
On the pop-up window, click Create new VHD.

On the next screen, provide the following using the help guide below:
- Virtual hard disk name: Give a name to your VHD (Dev Drive).
- Location: Assign a directory path where the Dev Drive VHD will be located on your machine. The default location is
C:\, unless creating a Dev Drive using Dev Home, in which case the default location is%userprofile%\DevDrives. We recommend using a per-user directory path location to store your Dev Drive to avoid any unintentional sharing. - Virtual hard disk size: Assign the amount of disk space that will be allocated for the volume to use, minimum size is 50GB.
- Virtual hard disk format:
- VHD: Supports virtual disks up to 2040GB in size.
- VHDX: Supports virtual disks up to 64TB in size and offers more resilient protection against unexpected IO failure caused by issues like power outage). Learn more about Managing VHDs.
- Disk type:
- Fixed size – This virtual hard disk file is allocated to the maximum size when created (Recommended for efficiency)
- Dynamically expanding – Grows to maximum size as data is written

After you click the Create button, it will take a moment to create and attach (mount) the new virtual hard disk.
On the next screen, you will need to initialize the disk. Choose either GPT (default) or MBR partition style.
Finally, specify the Label (drive name), Drive Letter, and Size allocation. Then Format the disk to use.
That should do it!
Reference:
Conclusion:
- Dev Drive is a groundbreaking storage volume designed to enhance performance for developer workloads on Windows 11.
- Leveraging ReFS technology, it offers targeted file system optimizations and increased control over storage volume settings and security.
- With two performance modes, synchronous and asynchronous, Dev Drive provides flexibility and enhanced usability for developers.
- Developers can benefit from improved performance and productivity by creating a Dev Drive from unallocated space or setting up a virtual hard disk (VHD/VHDX).
- Refer to the detailed reference provided for more in-depth insights and considerations on Dev Drive.

Leave a Reply Cancel reply