
This article provides instructions for setting the primary display in extended mode on Windows 11.
Windows 11 supports multiple display monitors. When your computer detects multiple displays, each display will be numbered to help you identify them more easily. A number will appear on the screen of the display it’s assigned to.
You can arrange the Displays according to your physical monitor setup. To rearrange the Displays, select one and drag it to the desired position (either left or right of the others).
When your computer detects dual monitors, the desktop is duplicated across all displays, allowing you to view the same content on each screen.
You can change the way the desktop is displayed on the monitor. These are different settings you can choose from.
- PC screen: See things on one Display only
- Duplicate: See things on all displays
- Extend: See your desktop across multiple displays
- Second screen only: See everything on the second Display
In most environments, it is advisable to use displays in extended mode and designate one monitor as the primary display. The main display will serve as the active desktop and show the clock along with taskbar corner icons.
How to change your main Display in Windows 11
Using extended mode with one display as the primary monitor in Windows for dual displays is beneficial.
To do that, continue below.
Windows 11 has a centralized location for the majority of its settings. Everything can be done, from system configurations to creating new users and updating Windows from its System Settings pane.
To get to System Settings, you can use the Windows key + I shortcut or click on Start ==> Settings, as shown in the image below:

Alternatively, you can use the search box on the taskbar to search for Settings. Then select to open it.
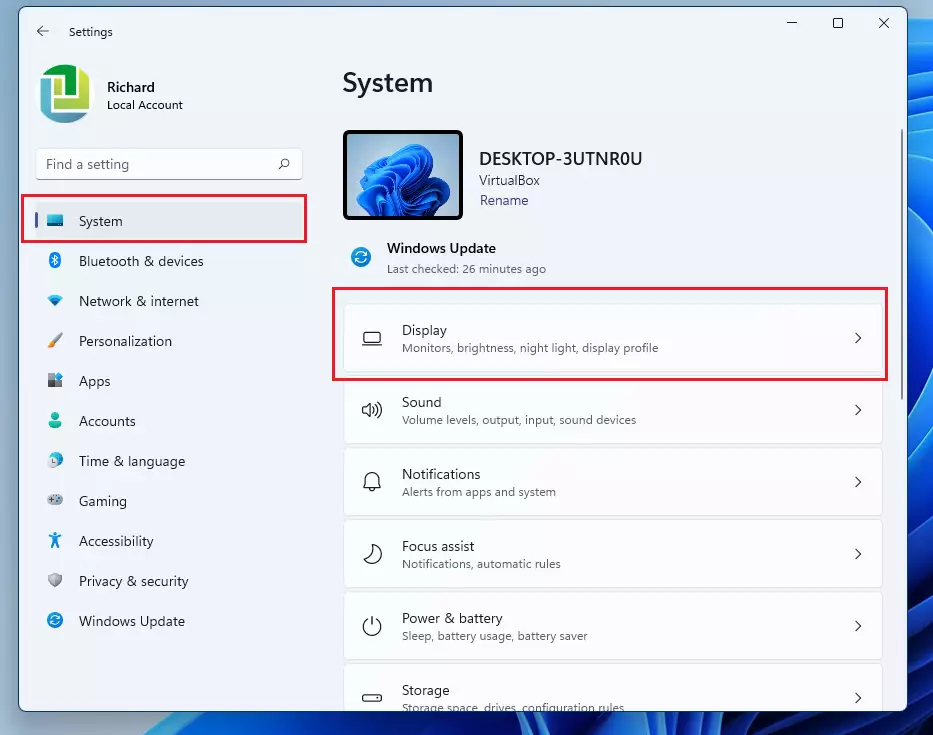
In Windows Settings, click on System and select Display from the right pane of your screen, as shown in the image below.
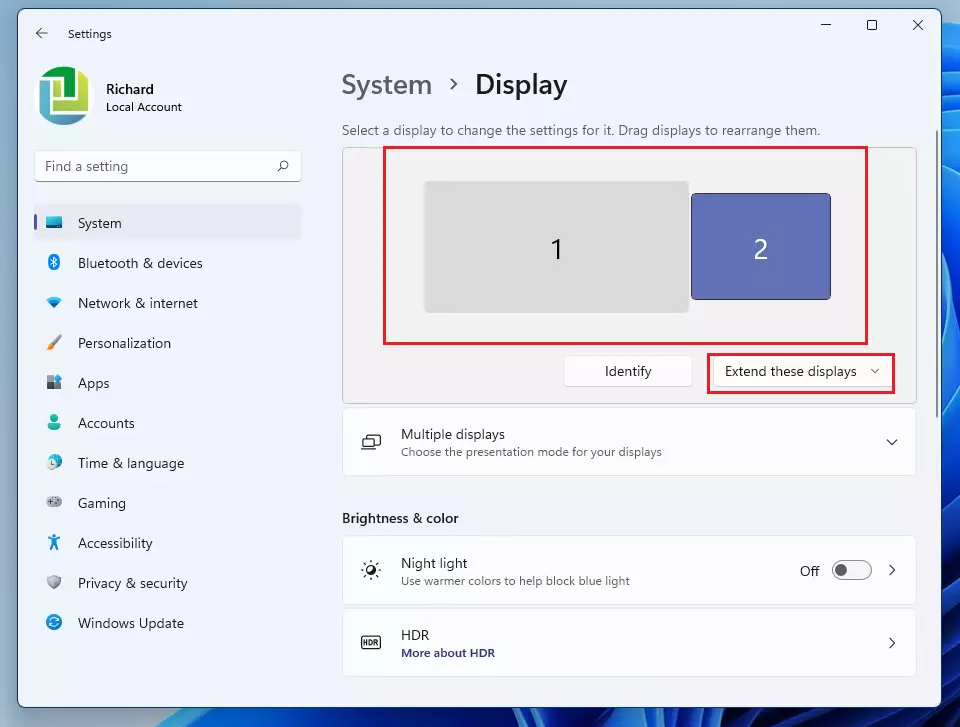
On the Display settings pane, Windows will detect two displays. You can use the Identify button to identify each monitor by number.
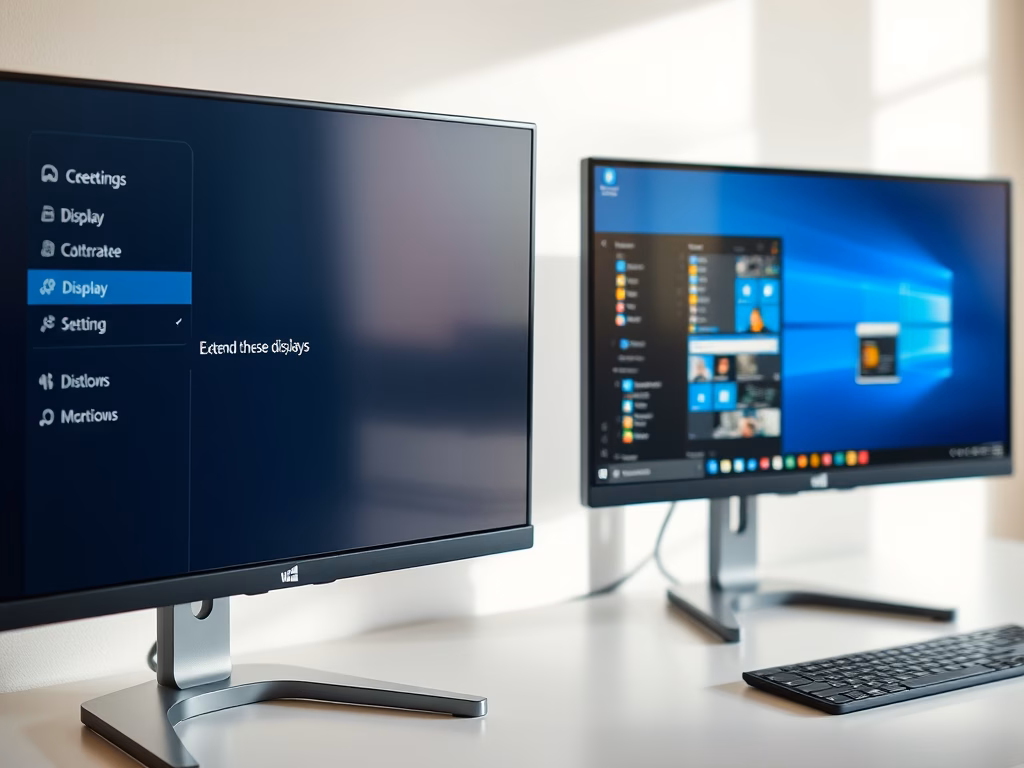
You can then select the option to Extend these displays, as highlighted below.
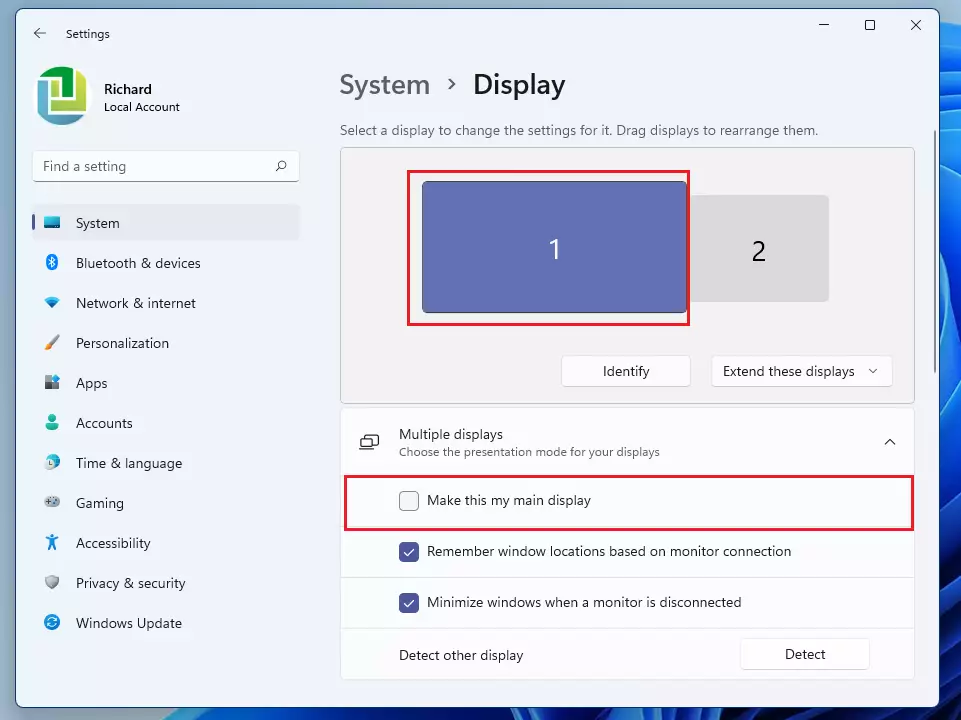
Next, select the Display you want as your primary Display, then check the highlighted box to “Make this my main display.“
To set the main display, switch your app icons immediately. You may need to reboot to see all app icons fully and to change the clock to the main monitor.
That should do it!
Conclusion:
- Setting your primary display in extended mode enhances productivity by allowing for more screen space.
- Identifying and arranging your monitors can streamline your workflow and improve usability.
- Windows 11 provides an intuitive interface for managing display settings, making it easy to customize your setup.
- Ensuring that your preferred monitor is set as the primary display helps organize your apps and notifications effectively.
- Remember to reboot if necessary to apply changes and ensure all icons are displayed correctly.
By following these steps, you can make the most of your dual monitor setup in Windows 11.

Leave a Reply Cancel reply