How to Set Default Speakers in Windows 11
You set your default speakers in Windows 11 by selecting your desired audio output device within the Sound settings.
This default device becomes the primary destination for all audio from your applications, ensuring sound plays through your chosen speakers, headphones, or soundbar automatically.
This is crucial for easily managing audio across different devices. For instance, you might switch from your gaming speakers to Bluetooth headphones for calls. Setting a default streamlines this process.
Windows 11 empowers you to designate one audio device as the main output for system sounds and the majority of your apps.
Open Windows Settings by pressing Windows key + i. Navigate to System > Sound, then select your preferred audio output device from the “Choose your output device” drop-down menu. This designates your selected speakers or headphones as the default for all applications.
Select Default Speakers in 🪟 Windows 11
Setting your default speakers in Windows 11 is simple and makes sure all your apps play sound through the right device automatically.
Step 1: Open Windows Settings
Press the Windows key + i on your keyboard to open Settings. You can also click the Start button, then select Settings from the menu.

Another option is to click the search box next to the Start button, type ‘Settings‘, and press Enter.
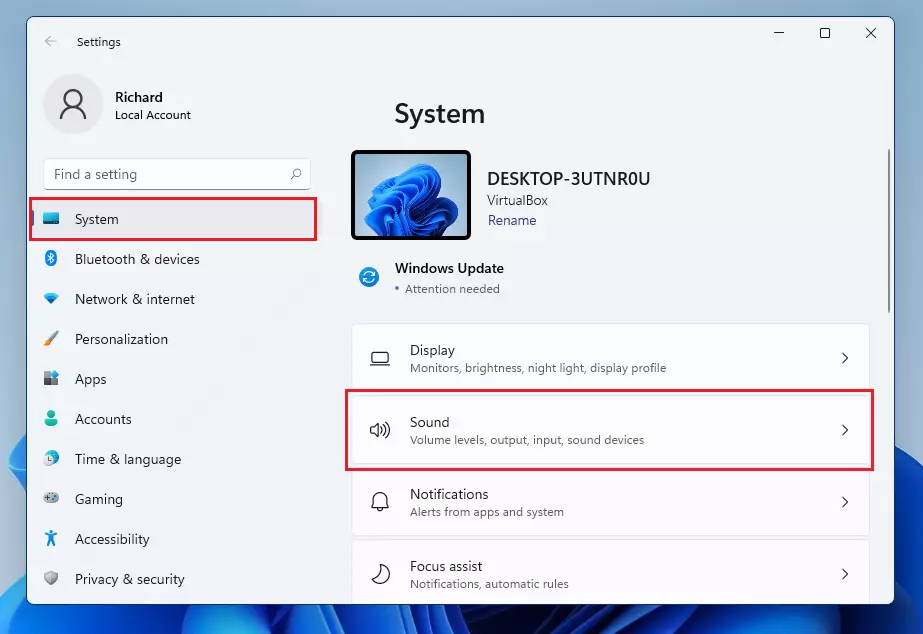
Step 2: Go to Sound Settings
In the Settings window, click System in the left menu. Then select Sound on the right side.
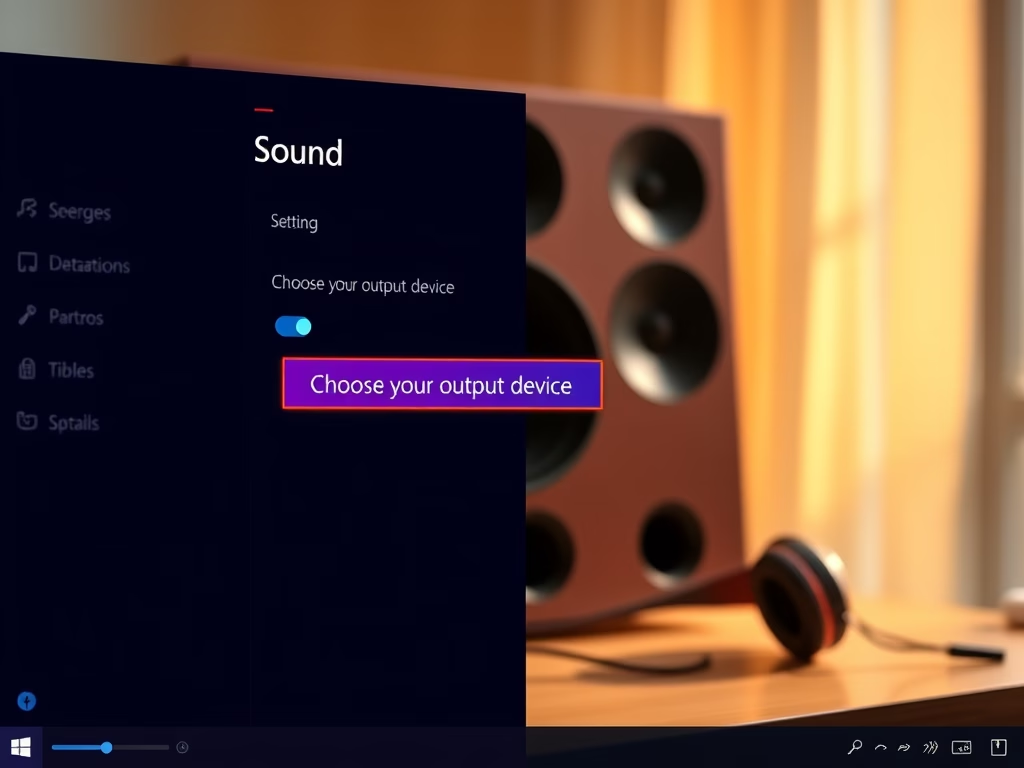
Step 3: Choose Your Output Device
Look for the section labeled Output. Find the option that says Choose your output device. Click the drop-down menu and pick the speakers or headphones you want to use as your default sound device.
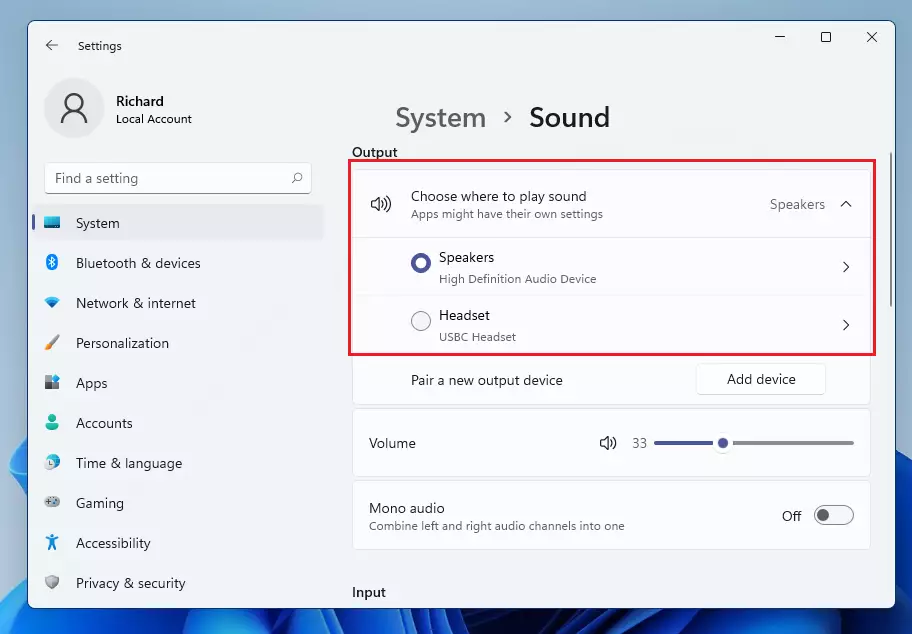
What happens next? When you select your preferred device, Windows starts using it for all sounds. Apps will play sound through this device unless they have their own specific settings.
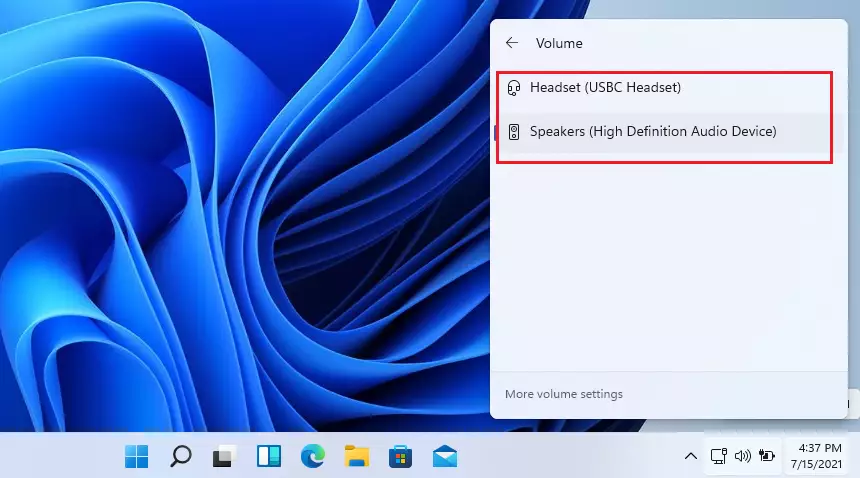
Quickly Switch Sound Devices from the Taskbar
You can quickly switch between your sound devices, like speakers or headphones, right from the Windows 11 taskbar without needing to open the main Settings app.
Step 1: Click the Speaker Icon
Look for the speaker icon on the right side of the taskbar. Click it.
Step 2: See All Sound Devices
Click the right arrow next to the volume slider. This shows you all your sound devices.
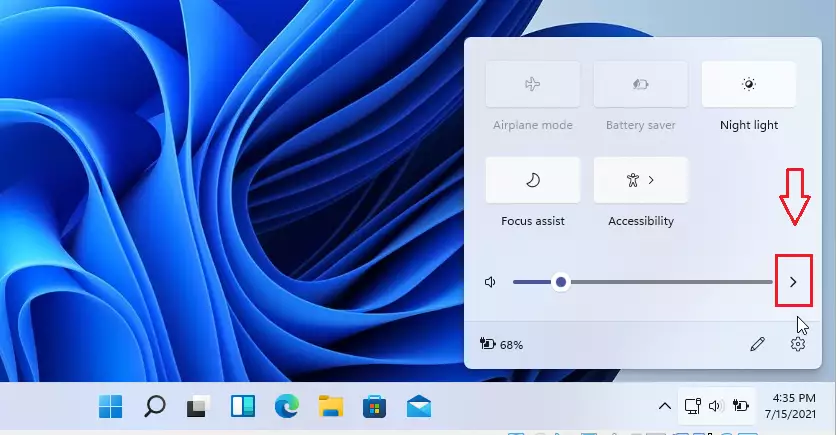
Step 3: Pick Your Device
Select the device you want to use. Windows will switch sound output to that device right away.
Troubleshooting Tip: If you don’t see your speakers or headphones listed, make sure they are properly connected and turned on. Sometimes Windows needs a moment to recognize new devices.
Summary
Setting your default speaker in Windows 11 is simple, ensuring your sound plays where you want it to, whether you use the Settings app or a quick taskbar change.- Setting a default speaker in Windows 11 makes sure your sound comes from the device you want.
- You can change your audio device anytime using the Settings app.
- You can also quickly switch devices from the taskbar without opening Settings.
- Some apps can use their own sound device, so check app settings if you hear sound from the wrong speakers.
- Keep your audio devices connected and turned on so Windows recognizes them.
- For more help with Windows 11, visit the official Microsoft support page: https://support.microsoft.com/windows
How do I change the default speaker settings?
Once you’ve selected your device, click the ‘Set as default’ button. This is a quick process. If you have multiple audio devices, you might need to experiment a little to find the perfect setup.
Was this guide helpful?

About the Author
Richard
Tech Writer, IT Professional
Richard, a writer for Geek Rewind, is a tech enthusiast who loves breaking down complex IT topics into simple, easy-to-understand ideas. With years of hands-on experience in system administration and enterprise IT operations, he’s developed a knack for offering practical tips and solutions. Richard aims to make technology more accessible and actionable. He's deeply committed to the Geek Rewind community, always ready to answer questions and engage in discussions.


No comments yet — be the first to share your thoughts!