
This article provides instructions on how to set a default printer in Windows 11.
Windows 11 includes a feature that automatically selects the printer you used most recently as your default printer. When multiple printers are used, the wrong one may be set as your default printer, even if it works well with just one printer installed.
Users transitioning from Windows 10 may need time to adjust to Windows 11’s changes. To prevent your default printer from being automatically assigned in Windows 11, follow the steps below.
Choose your default printer in Windows 11
Windows automatically sets the most recent printer as the default. This can be frustrating in a multi-printer environment, resulting in printing errors.
To prevent this, manually set your Windows computer’s default printer.
Windows 11 features a centralized location for most settings. You can manage system configurations, create new users, and update Windows all from the System Settings panel.
To get to System Settings, you can use the Windows key + I shortcut or click on Start ==> Settings, as shown in the image below:

Alternatively, you can use the search box on the taskbar to search for Settings. Then select to open it.
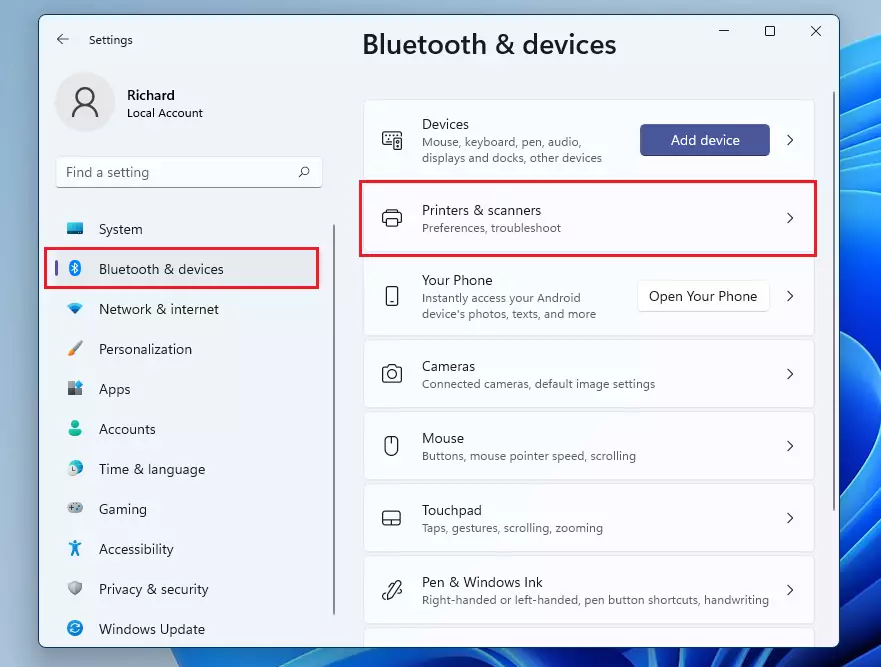
The Windows Settings pane should resemble the image below. In Windows Settings, click on Bluetooth & devices and select Printers & scanners in the right pane.
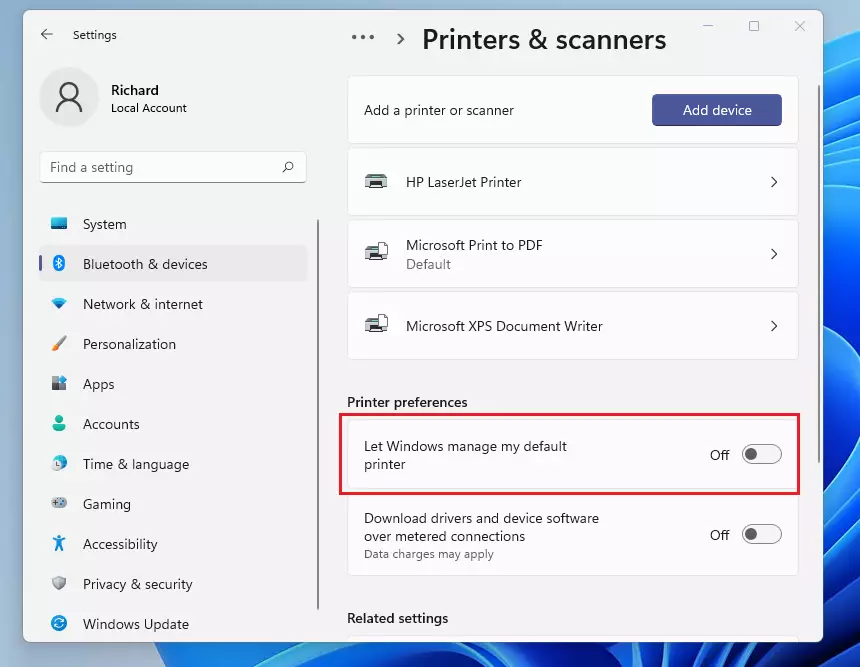
On the Printers & scanners settings pane, under Printer preferences, toggle the button to the Off position for ‘Let Windows manage my default printer.
When you turn it off, Windows will stop selecting your default printers.
With this feature disabled, choose the printer from the list that you want to set as your default printer so that all your print jobs are sent there automatically.
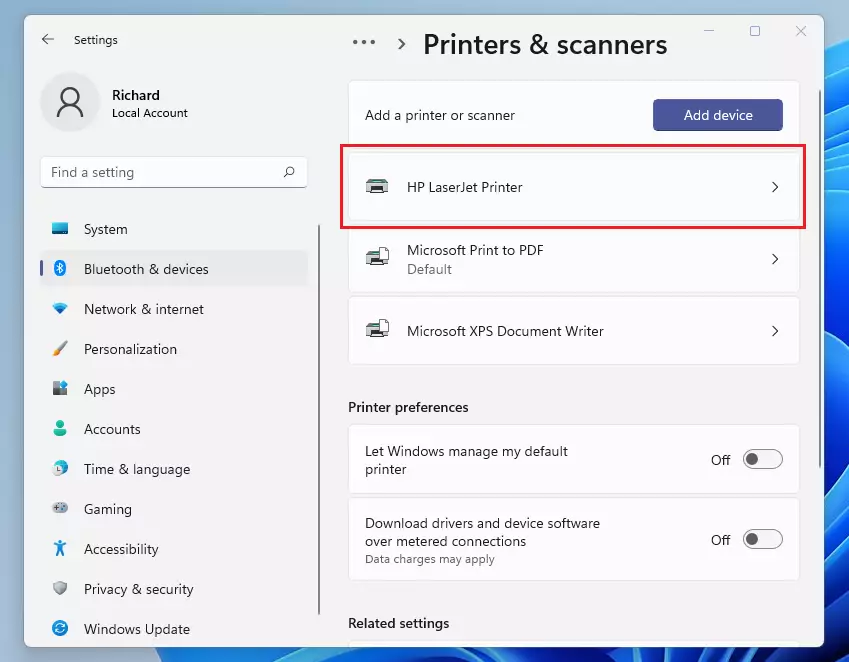
On your selected printer, click the button from the printer properties pane that reads ‘Set as default‘ as highlighted below.
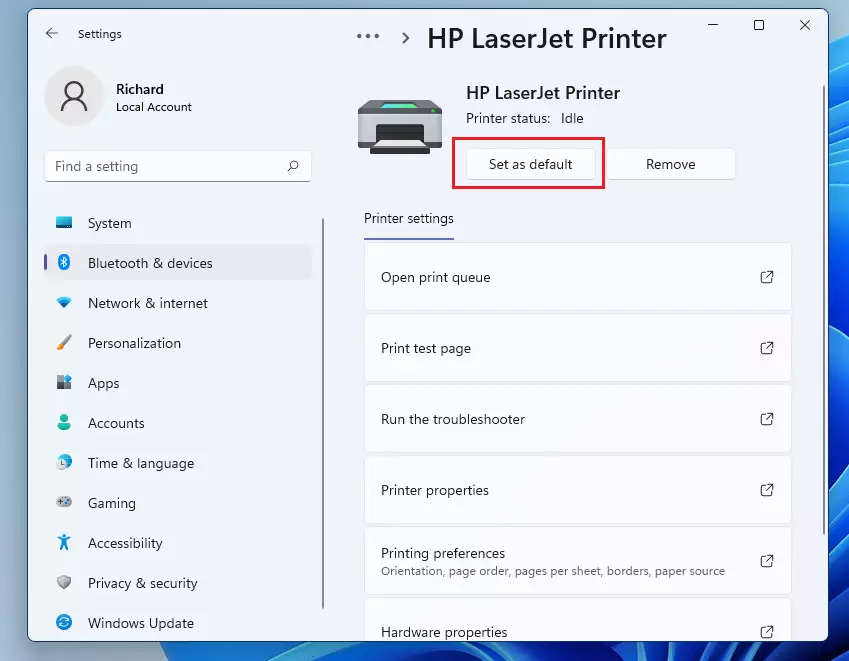
Exit, and you’re done.
Conclusion:
- Setting a default printer in Windows 11 is essential to avoid confusion and printing errors when using multiple printers.
- Disabling the automatic management feature gives you complete control over your default printer selection.
- Following the outlined steps ensures a smoother printing experience tailored to your preferences.
- Familiarizing yourself with the Windows 11 settings can enhance your productivity and reduce frustration related to printing tasks.
Leave a Reply