
This brief tutorial shows students and new users how to stop Windows 10 from changing their default printer.
Windows 10 has a feature that automatically sets the printer you used most recently to be your default printer. This can be inconvenient, especially in an environment with multiple printers. Disabling this feature can help you avoid such issues and let you manually set your default printer.
If you don’t want Windows to set or change your default printer automatically, the steps below will show you how to turn it off.
To get started, follow the steps below:
Disable Windows auto printer set
Do this if you want to disable Windows from changing your default printer.
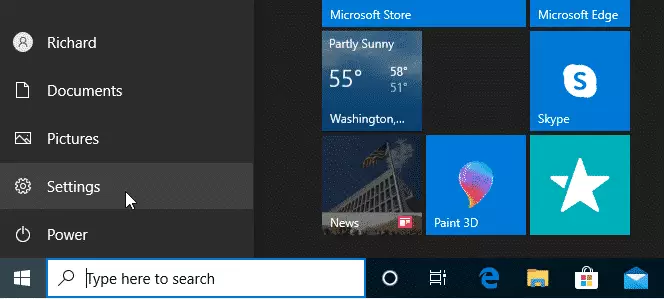
Click Start from the menu and select Settings (the gear icon on the left). Or you can press the Windows key + I on your keyboard to open it quickly.
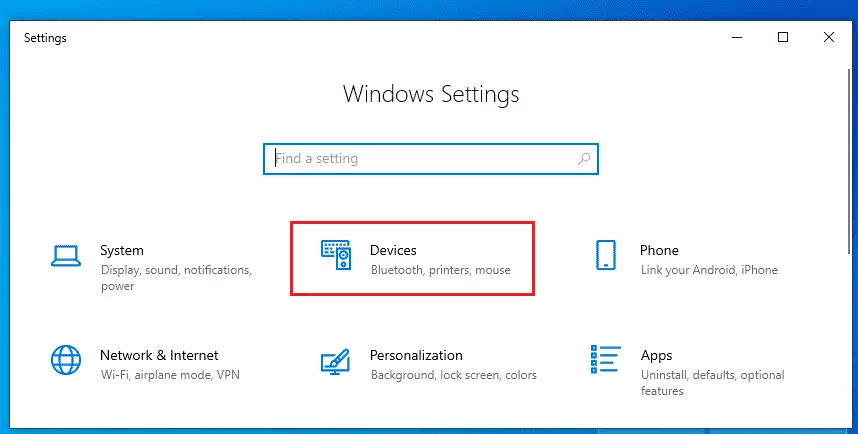
In the Settings pane, click “Devices.“
Select “Printers & Scanners” in the sidebar menu when the Devices pane opens.
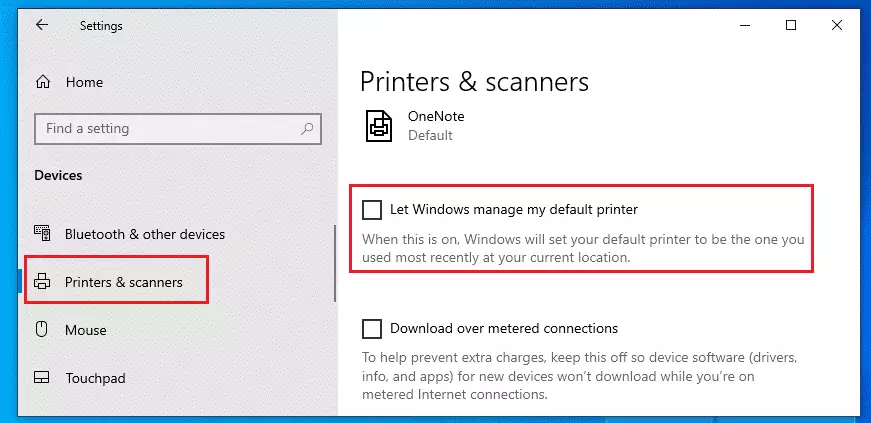
On the Printers & Scanner pane, scroll down and locate the “Let Windows manage my default printer” option.
Then, uncheck it to turn off the feature.
The note states, “When this is on, Windows will set your default printer to be the one you used the most recently at your current location.”
Now that this is disabled, you can set your default printer, and Windows will not change it.
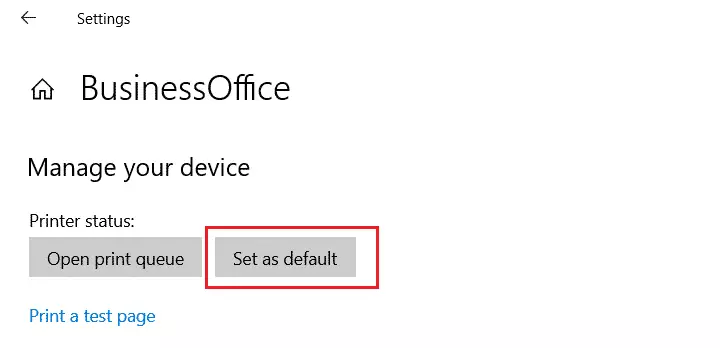
Select the printer on the same page you want to be your default and click Manage.
Then, set it as default.
That’s it!
Conclusion:
- Disabling the automatic setting of the default printer in Windows 10 provides more control over your printing preferences.
- This feature is especially useful in environments with multiple printers to avoid unwanted changes.
- By following the steps outlined, you can ensure that your chosen default printer remains unchanged.
- Remember to regularly check your printer settings if you frequently switch between printers.
- Enjoy a smoother and more personalized printing experience!
Leave a Reply