
This article explains how to restart a network adapter in Windows 11.
A network adapter, commonly known as a network interface card (NIC), is a hardware component that allows a device to connect to a network.
Restarting a network adapter is a simple way to fix connectivity issues and clear out temporary glitches or errors that may be causing problems.
When you restart a network adapter, it will disable and then re-enable the network adapter.
Reset or restart network adapter
There are several ways to restart a network adapter in Windows. One method is to turn the adapter off and then back on to reset it.
You can also disable and re-enable a network adapter to restart it.
Here’s a post that shows you how to enable or disable a network adapter in Windows.
Restart network adapter using PowerShell
Yet another way to restart a network adapter is to use PowerShell.
First, run the command below to list all the network interfaces on a computer.
Get-NetAdapter | Format-Table -AutoSize
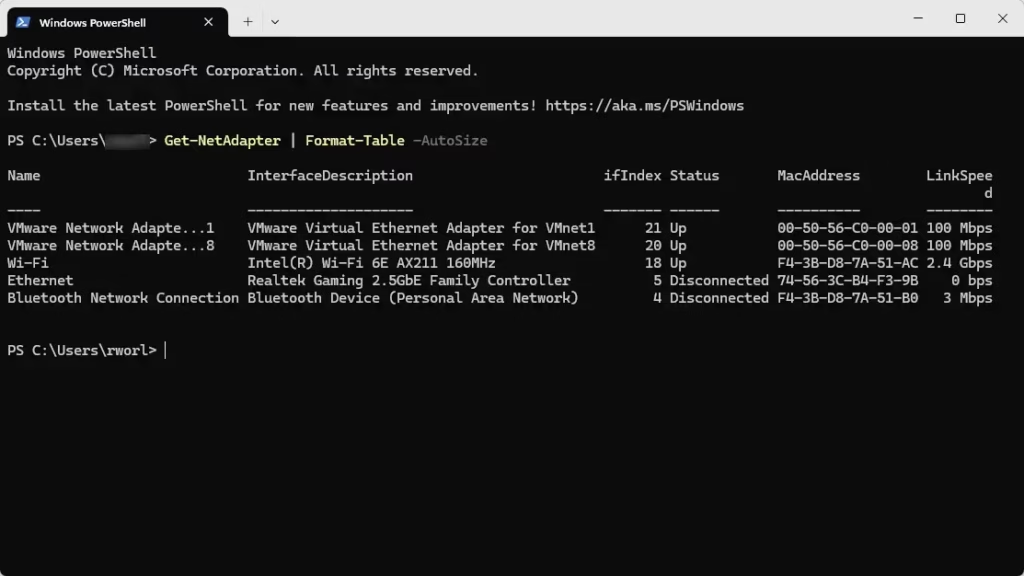
Then, run the command below to restart the adapter using its name.
Restart-NetAdapter -Name "Wi-Fi"
That should do it!
Conclusion:
Restarting a network adapter in Windows 11 can effectively resolve connectivity issues and refresh your network settings. Here are the key takeaways:
- Simple Fixes: Restarting can help clear temporary glitches and errors.
- Multiple Methods: You can restart a network adapter using different methods, including turning it off/on, disabling/enabling, or using PowerShell.
- PowerShell Command: The
Restart-NetAdaptercommand is a quick way to restart specific network interfaces. - Helpful Resources: Additional guides are available for detailed steps on disabling/enabling network adapters and managing Wi-Fi settings.
By following these methods, you can enhance your device’s network performance and ensure a more stable connection.


Leave a Reply Cancel reply