
This article provides a step-by-step guide on how to uninstall Microsoft Teams from the Taskbar in Windows 11.
By default, Windows 11 adds several apps to the Taskbar. Upon logging in, you will see the Start menu, Windows search, Widgets, Edge, and the Microsoft Store, among others.
The Microsoft Teams Chat icon is now added to the Taskbar and starts automatically when you log into Windows 11.
Windows 11 allows you to easily remove apps from the Taskbar. Follow the steps below to remove or disable apps that are less important to you.
Remove Microsoft Teams from the Taskbar in Windows 11
You can hide the new Team Chat from the Taskbar in the System settings pane.
Windows 11 has a centralized location for the majority of its settings. Everything can be done, from system configurations to creating new users and updating Windows from its System Settings pane.
To get to System Settings, you can use the Windows key + I shortcut or click on Start ==> Settings, as shown in the image below:

Alternatively, you can use the search box on the Taskbar and search for Settings. Then select to open it.
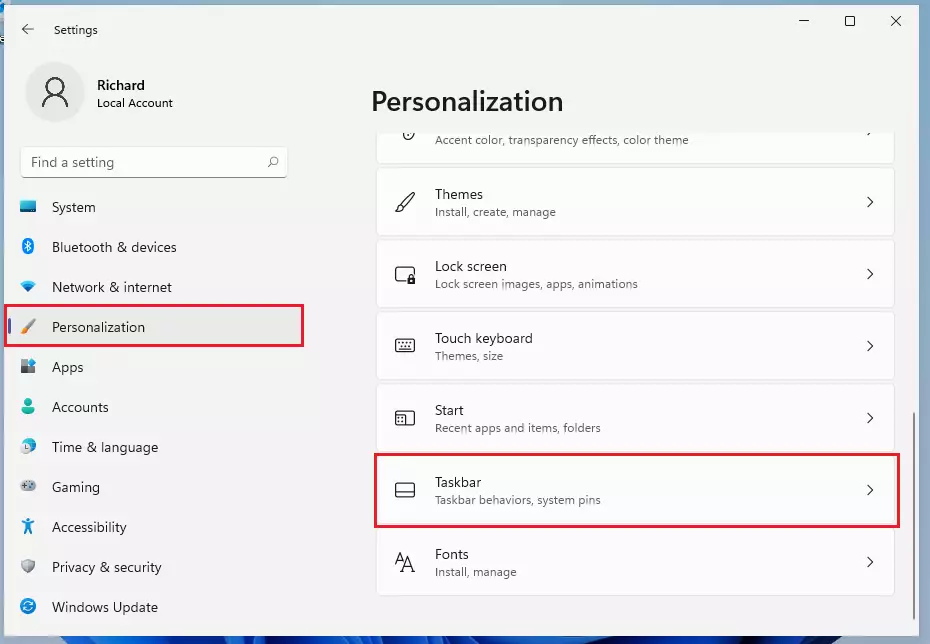
In Windows Settings, click on Personalization and select Taskbar in the right pane of your screen, as illustrated in the image below.
To remove Teams Chat from the Taskbar in Windows 11, locate it in the Taskbar items list and toggle the switch to the Off position. You can use the same method to hide other apps from the Taskbar as well.
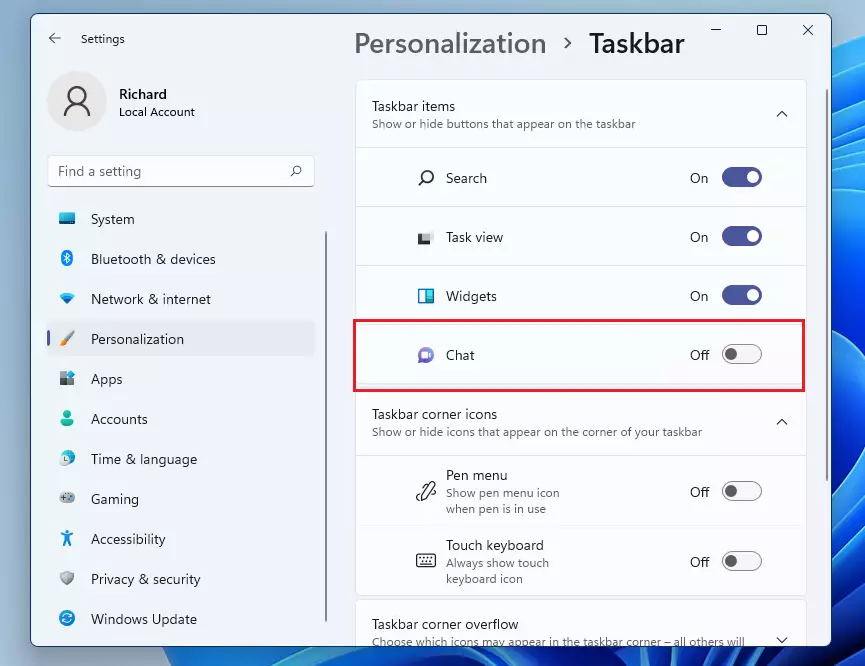
Doing that will hide the new Teams Chat from the Taskbar in Windows 11
How to Uninstall Microsoft Teams Chat in Windows 11
If you want to uninstall the new Teams Chat App so it’s not automatically started in Windows 11, use the steps below.
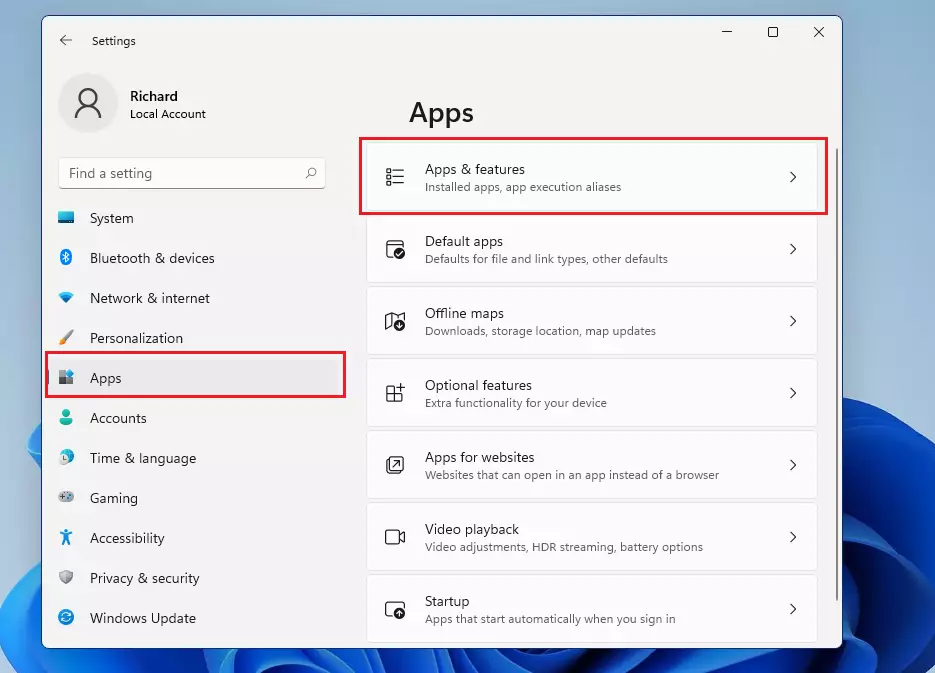
Go to the Start menu ==> Settings. From the Settings pane, select App and click Apps & Features as highlighted below.
On the Apps & Features settings pane, under the App list, you’ll see available apps running in the background. Some of these are needed, like the weather app – to get timely weather info, Alarms & Clock – to receive important event reminders, and others.
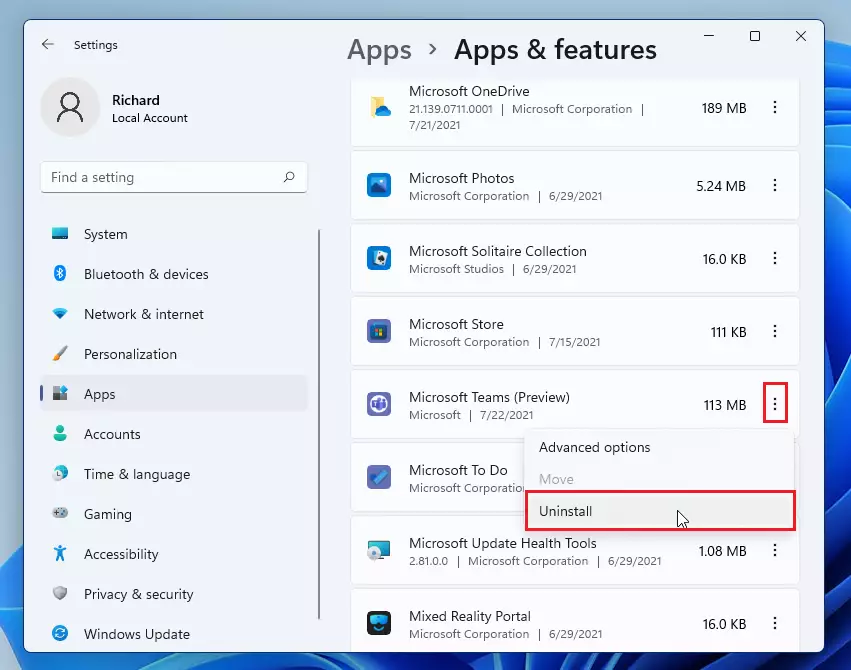
To uninstall the new Teams Chat, click on the ellipsis (three vertical dots) next to Microsoft Teams on the list, then select Uninstall, as shown in the image below.
How to Disable Microsoft Teams Chat in Windows 11
If you simply want to hide and disable Teams Chat and not uninstall, use this method. To disable and stop the Teams Chat app from running in the background, locate the apps you want to stop, click on the ellipsis (three vertical dots) next to them, and select Advanced options from the menu.
In the Advanced option, under Background apps permissions, choose Never to run this App in the background. Then, toggle the button to the Off position to disable Run at log-in.
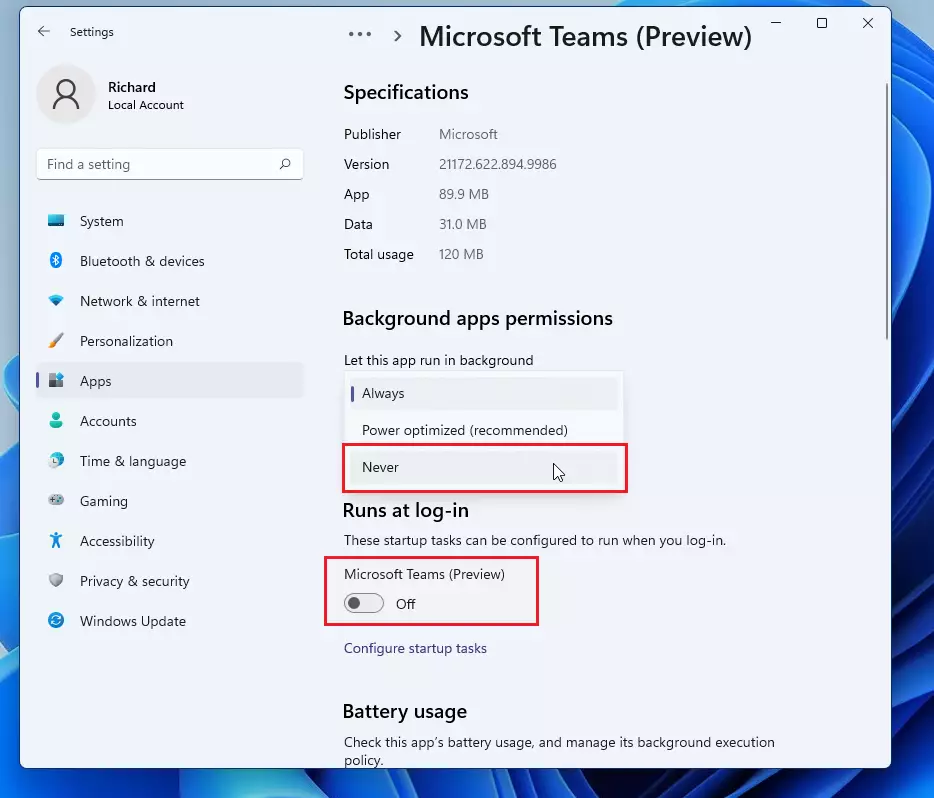
This is disabled and stops Teams Chat from starting up and running in the background.
That should do it!
Conclusion:
You can effectively manage Microsoft Teams Chat in Windows 11 by following the above steps. Here’s a quick recap of what you can do:
- Hide Teams Chat: Remove the Teams Chat icon from the Taskbar to declutter your workspace.
- Uninstall Teams Chat: Completely remove the app from your system if you don’t plan on using it.
- Disable Background Running: Prevent Teams Chat from starting automatically and running in the background, improving your system’s performance.
- Personalize Your Experience: Tailor your Taskbar and app settings to suit your preferences and enhance your productivity.
These options give you control over your workspace and help you maintain a focused environment in Windows 11.
Leave a Reply Cancel reply