
This article explains how to move folders in the user’s home directory in Windows 11.
By default, Windows stores all user files and folders in the directory C:\Users, followed by your account username. Within each user’s home folder, you will find various folders such as Desktop, Downloads, Documents, Music, Pictures, and Videos, along with other data that is automatically created and added to each account.
As the user adds more content, the local C: drive will fill up. If the drive does not have enough free space, the user’s home directory will also run low on storage, making it difficult to save new content in their home folder.
Today, many computers are equipped with multiple drives and partitions. If your computer has different disk drives and partitions, and your local C:\ drive is running low on space, you might consider moving some folders from your home directory to a larger drive with more available space.
How to move user home folders in Windows 11
Again, Windows allows you to move folders in your home directory to a different partition or drive. For example, you might move the Pictures folder to another partition so that enough room is left on your Windows system drive.
Or move the Videos folder to a bigger partition when you’re running out of space on a smaller one. Windows lets you do that easily in File Explorer.
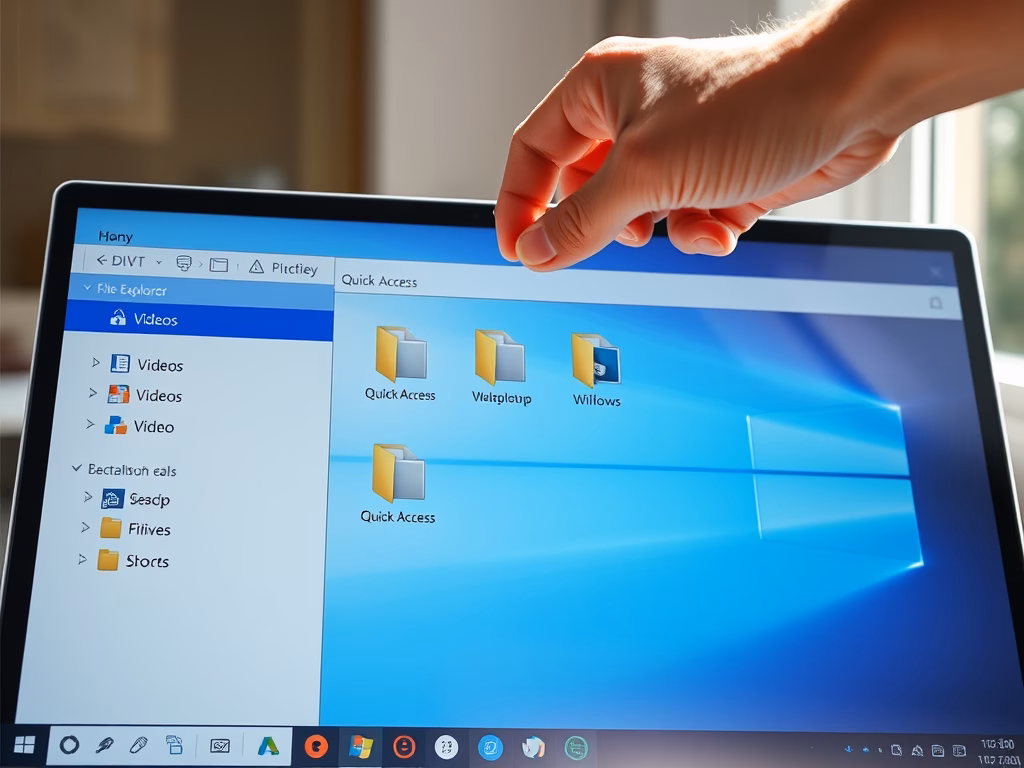
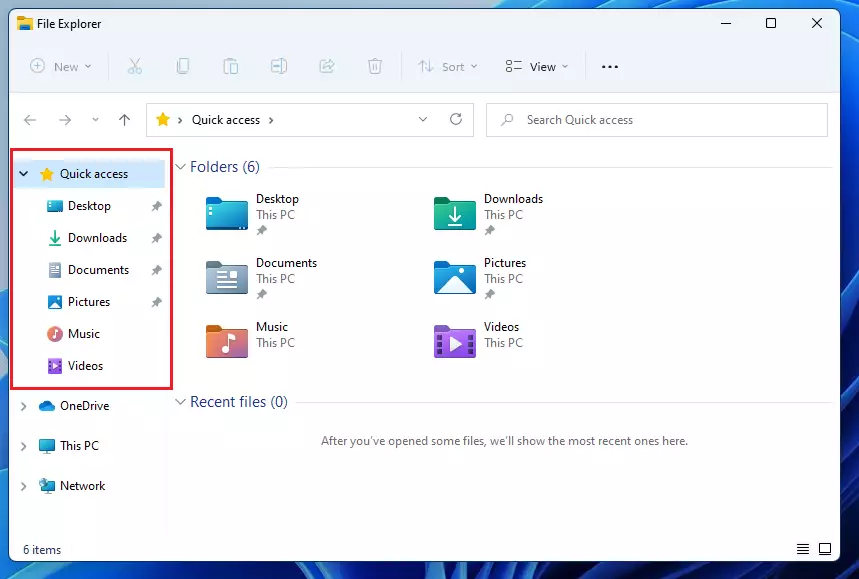
To do that, open File Explorer and click Quick Access if it isn’t open. Next, select the user folders under Quick Access that you want to move to a new location.
Under Quick Access, you’ll find the Documents, Downloads, Pictures, Music, Videos, and Desktop folders. We’ll want to move the Videos folder to another drive partition with a bigger space.
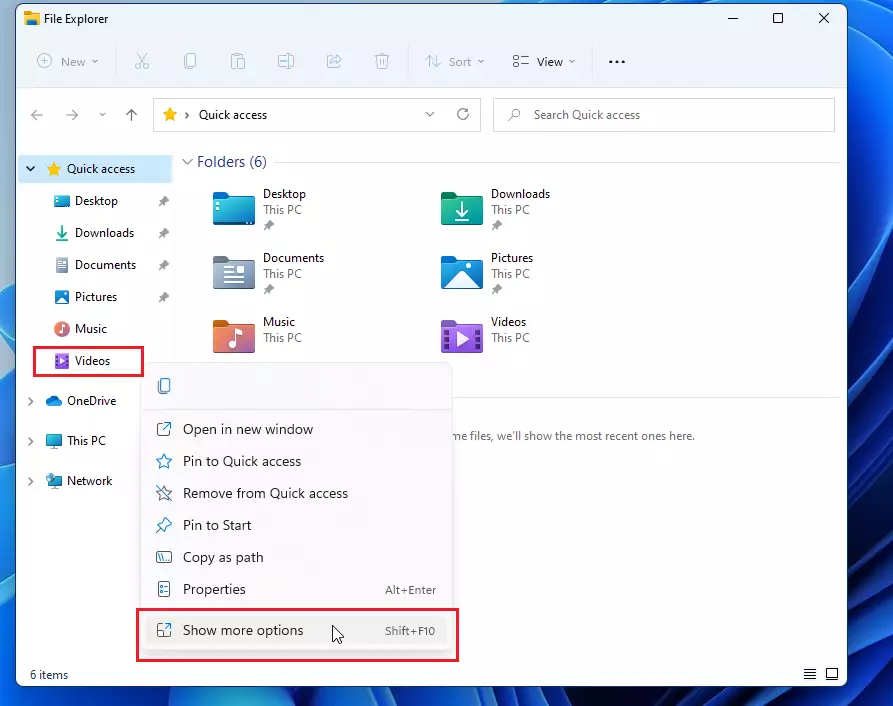
To move the Video folder, right-click the Videos folder, then select Show more options on the first context menu.
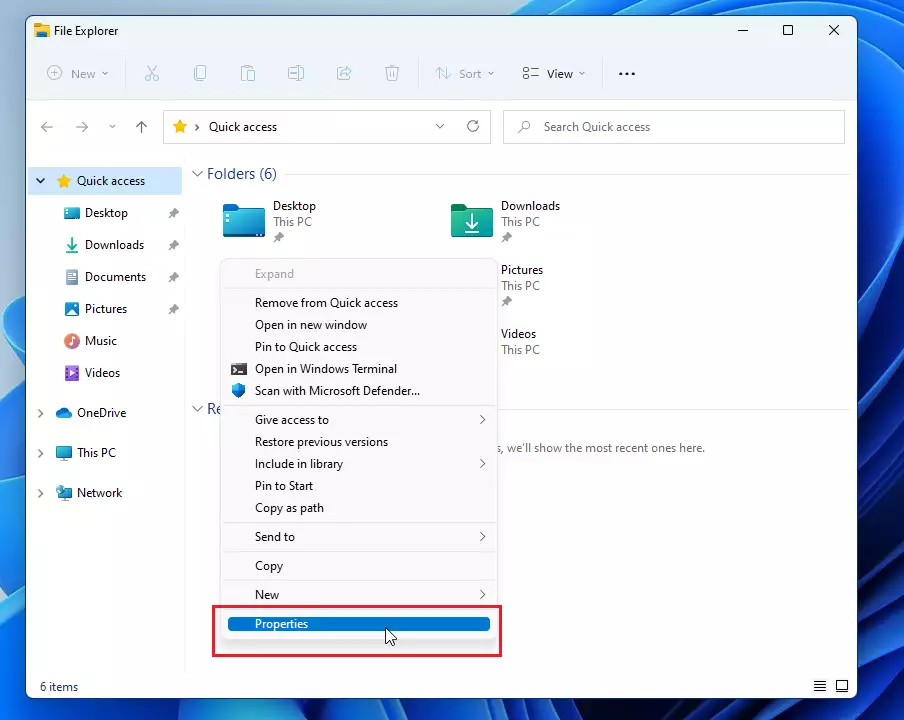
On the next context menu, select Properties, as highlighted below.
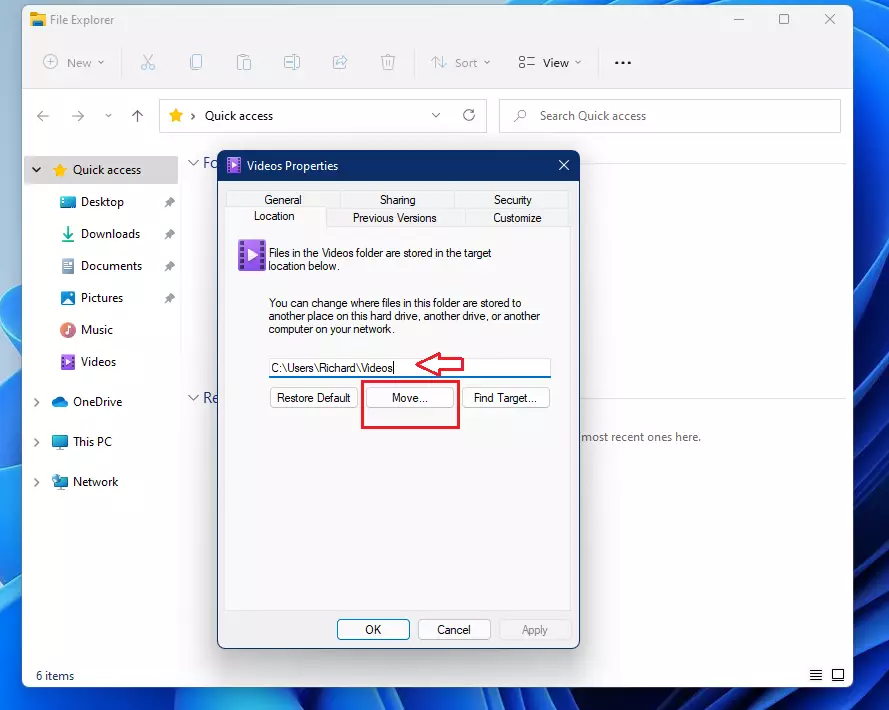
On the Properties pane, select the Location tab. On the location tab, you’ll see the current path of the Videos folder, which is by default in the C:\Users\Username folder.
To move it to another location, click the Move button highlighted below.
Then, browse and select the new folder in which you want to store all video content. For this post, the new path is on the E:\Richard\Videos.
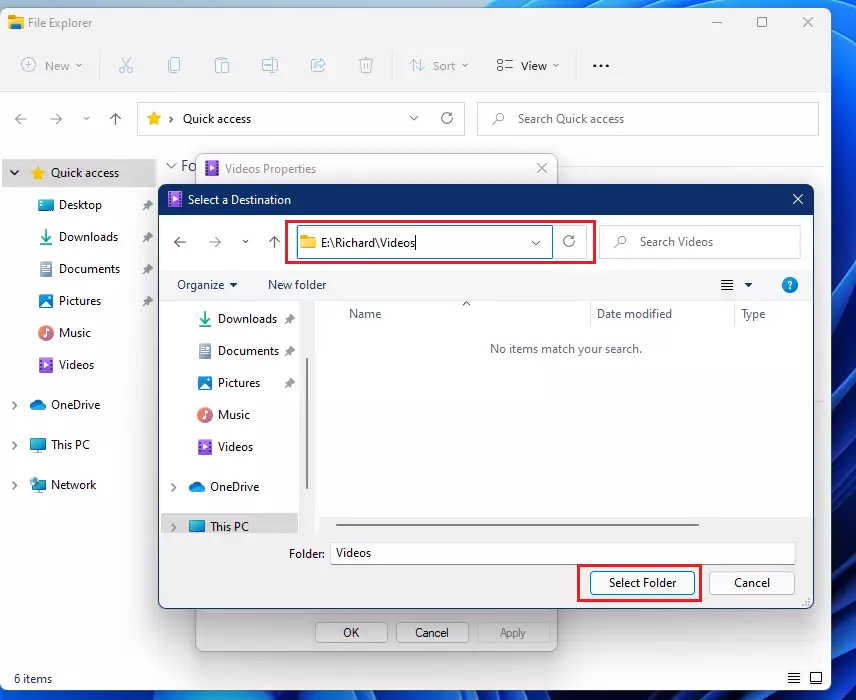
Click the Select Folder button. When you select the folder, Windows will return to the folder Properties window. Click OK to apply your changes.
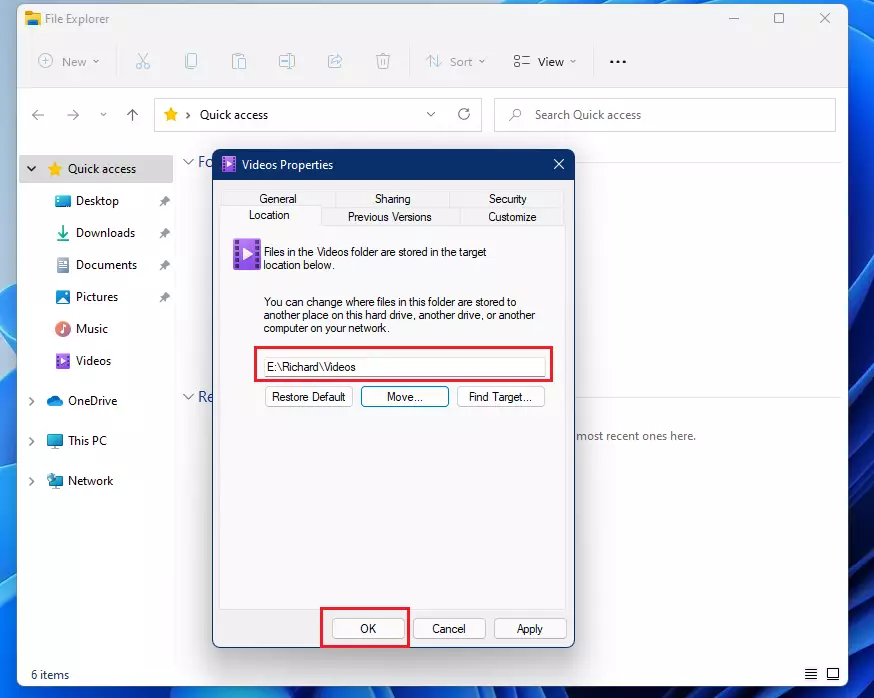
Windows will warn you that you’re about to move the folder to a new location. Click Yes to complete the move.
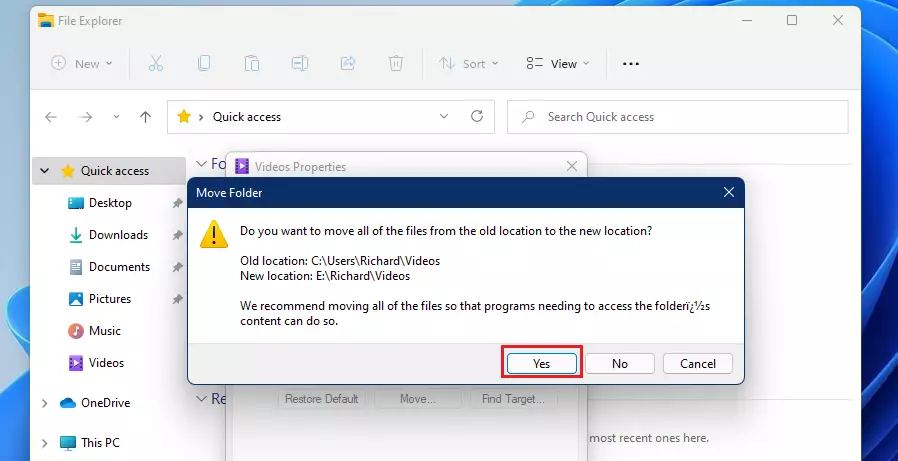
When asked to confirm that you want to move all files from the old location to the new location, click Yes.
Depending on the folder size, it may take a while to complete. After all the content is moved, the Videos folder should be stored in the new location, and any new video will also be stored there.
When you’re done, close File Explorer and verify the change.
Conclusion:
- Moving user folders in Windows 11 can effectively free up space on your primary disk drive.
- Accessing and modifying folders through File Explorer is straightforward and user-friendly.
- Users can quickly relocate folders like Pictures and Videos to larger drives or partitions.
- Ensuring that your primary drive has sufficient storage can enhance overall system performance.
- Regularly managing and organizing your folders can help prevent storage issues in the future.


Leave a Reply