
This post describes the steps to manually change the date and time in Windows 11.
By default, Windows automatically sets the date and time based on your time zone, country, and region. In addition, daylight saving time (DST) is also set automatically based on the country and region you are in.
Allowing Windows to manage your System’s date and Time automatically will ensure that your PC date and Time are accurate as long as you have an internet connection to time servers online.
That said, Windows also allows you to manage your system’s data and time manually. When you manually change and update your System’s date and Time, you must do it every time there’s a change.
You must be signed in as an administrator and turn off Set Time automatically to manually change the date and Time.
Below is how to do that in Windows 11.
How to manually change system date and Time in Windows 11
As mentioned above, Windows allows users to manage their system data manually. You can do it independently if you don’t want Windows automatically setting the date and time.
Below is how to do that.
Windows 11 has a centralized location for the majority of its settings. As a result, everything can be done, from system configurations to creating new users and updating Windows from its System Settings pane.
To get to System Settings, you can use the Windows key + I shortcut or click on Start ==> Settings, as shown in the image below:

Alternatively, you can use the search box on the taskbar and search for Settings. Then select to open it.
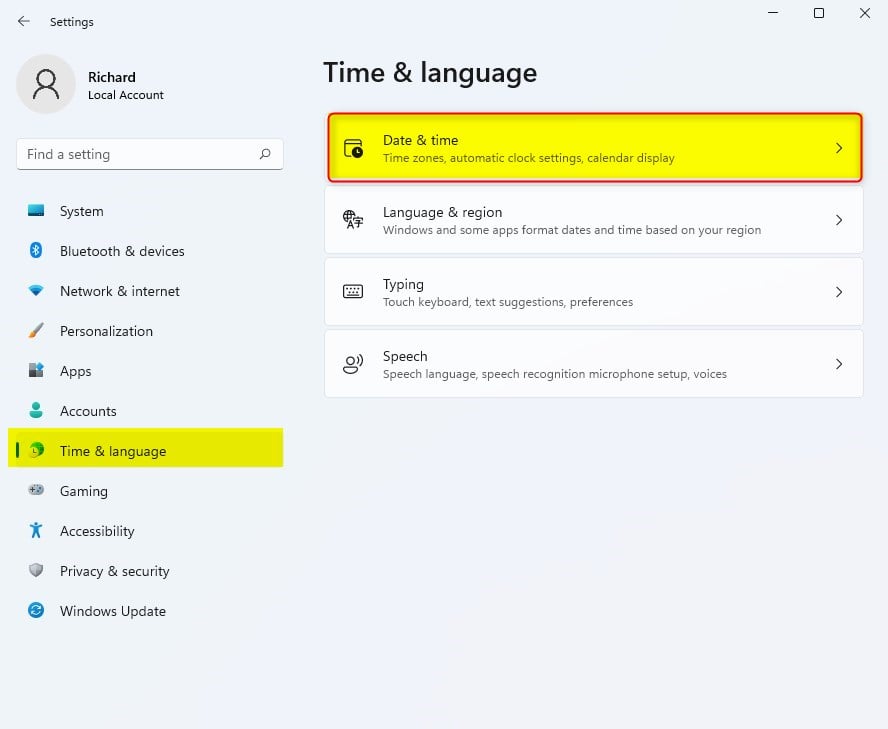
Windows Settings pane should look similar to the image below. On the Windows Settings app, click the Time & language on the left, then select the Date & time tile on the right pane, as highlighted in the image below.
On the System> Time & language > Date & time settings pane, toggle the switch button for Set Time automatically to Off.
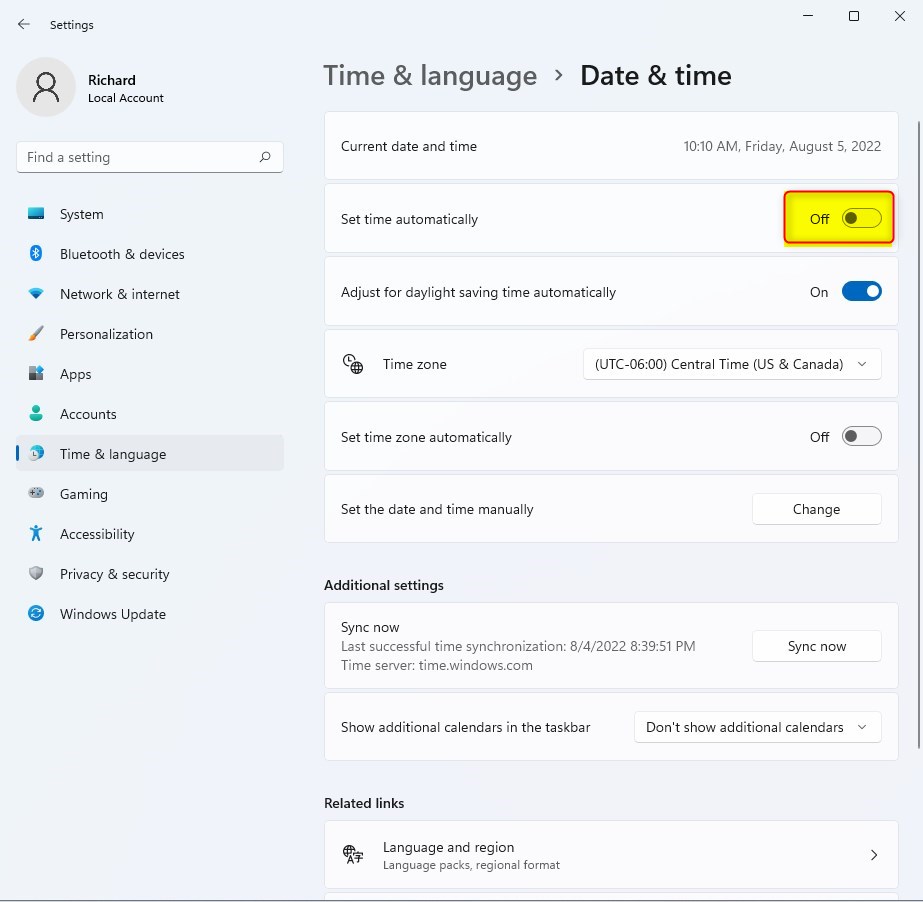
Once the Set Time automatically is set to Off, you will then be able to set the date and Time for all users manually.
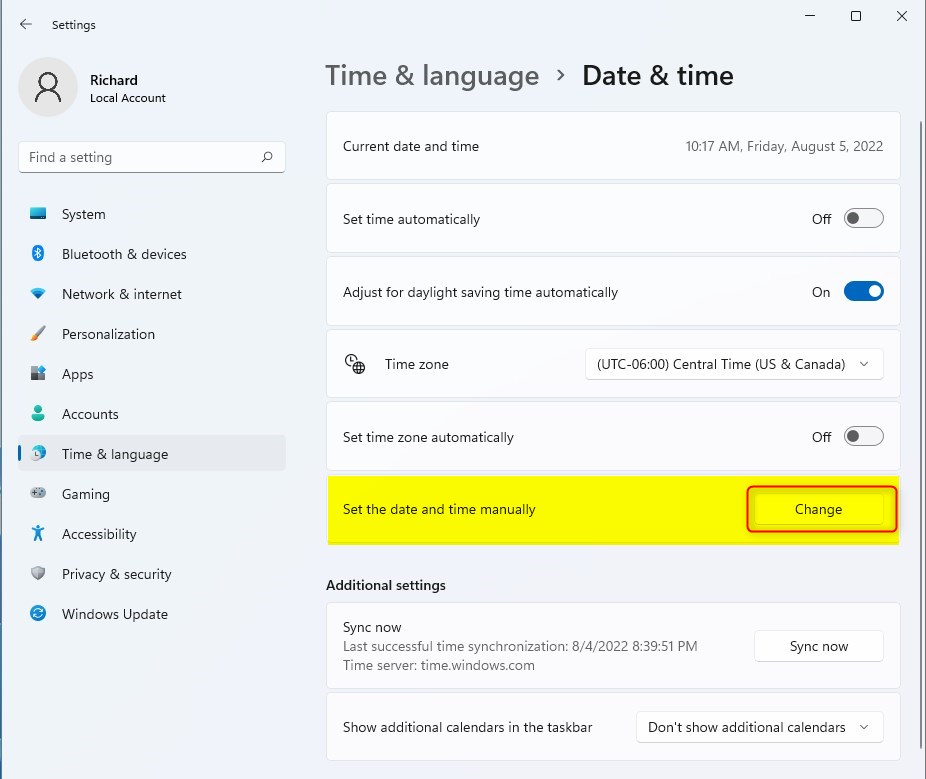
Further down on the Date & time settings pane, locate the Set the date and time manually tile. Then click on the Change button.
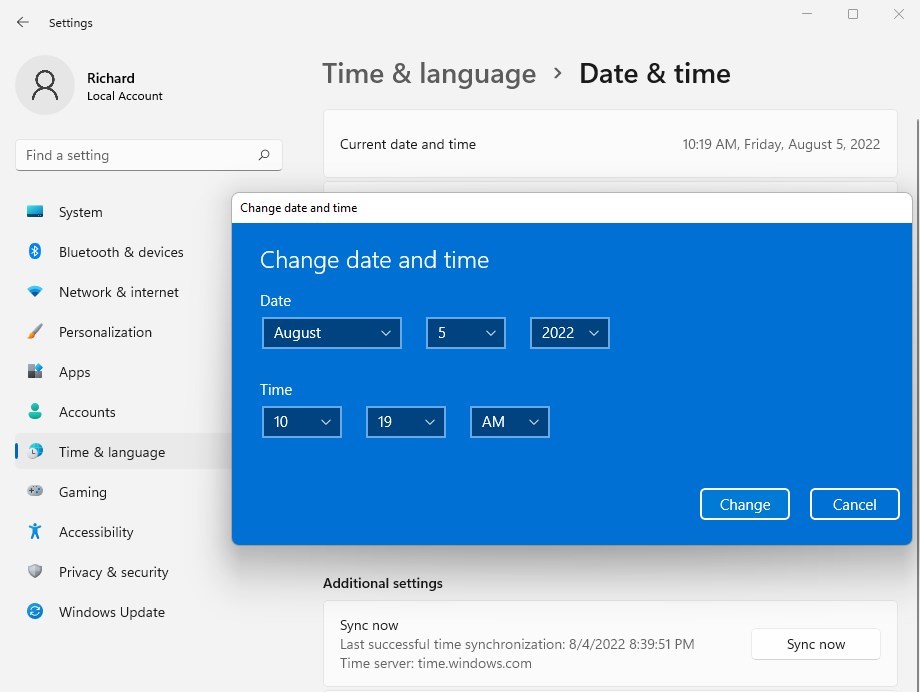
You can change the date and time on the pop-up window as shown below. When you are done, click the Change button to save.
That should do it! You can now close the Windows settings app.
Conclusion:
- Windows 11 provides the option to manage system date and time manually, allowing users to take full control over these settings.
- Users can manually adjust the date and time as needed by turning off “Set Time automatically” in the Windows Settings.
- Access to these settings is conveniently located within the Windows Settings app, accessible through the Windows key + I shortcut or the Start menu.
- With these simple steps, users can easily and accurately set the date and time for their Windows 11 system, offering flexibility and customization for individual preferences.


Leave a Reply