
Your Lock screen is the first thing you see before you log into your computer. You can also see it when you lock your PC by pressing Windows key + L. Windows 11 lets you add small apps called widgets to this screen. These widgets show you useful information like the weather, your calendar, or the latest news without needing to unlock your computer.
This guide will show you how to add or remove Lock screen widgets so your lock screen displays exactly what you want to see.
Step 1: Turn On Lock Screen Widgets
Windows 11 lock screen widgets provide quick access to essential information like weather and calendar events without unlocking your device, allowing you to customize what matters most and stay updated with the latest widget features. For step-by-step instructions on how to do this, visit this guide: How to Enable Lock Screen Widgets.
Step 2: Open Windows Settings
To manage Windows 11 lock screen widgets, open Settings, navigate to Bluetooth & devices, select Lock screen, then add or remove widgets from the Your widgets section—a process that takes just a few clicks and requires no technical knowledge. You can open Settings in two simple ways:
- Click the Start button and then click Settings.
- Or press
Windows key + Ion your keyboard.
Step 3: Go to Lock Screen Settings
In the Settings window, follow these steps:
- Click on Bluetooth & devices in the left menu.
- On the right side, find and click Lock screen.


Step 4: Add or Remove Widgets
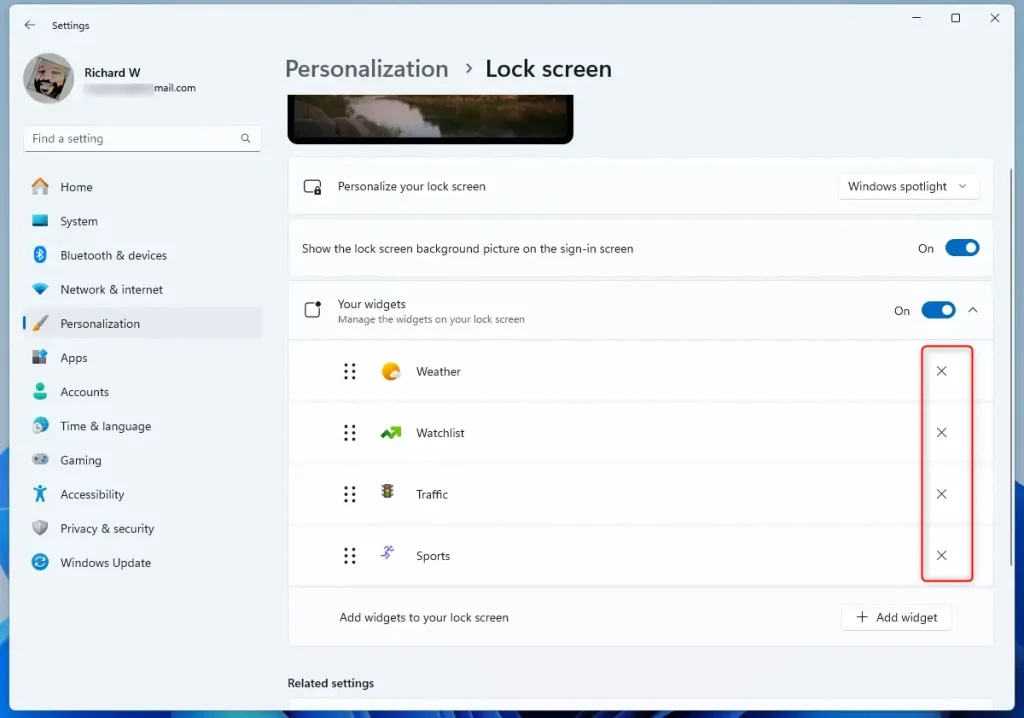
Scroll down until you find the section called Your widgets. Click on it to expand the list.
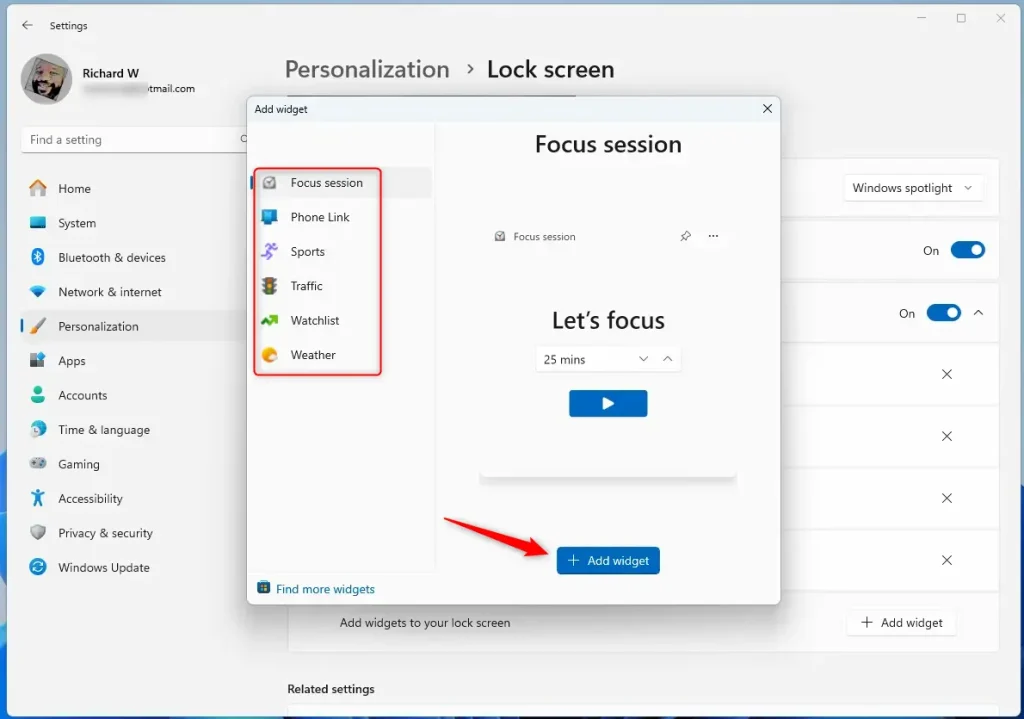
To Add Widgets:
- Click the Add widget button.
- Choose the widgets you want from the list (such as Weather or Calendar).
- Click Add widget again to confirm your choice.

To Remove a Widget:
- Look at the list of your added widgets under Your widgets.
- Click the X button next to the widget you want to delete.
Step 5: Close Settings
When you’re finished adding or removing widgets, just close the Settings app. Your Lock screen will now display your chosen widgets.
Why Use Lock Screen Widgets?
- Quick Info: See important information like the weather or your calendar without unlocking your PC.
- Easy to Change: Add or remove widgets anytime through Settings.
- Make It Yours: Customize what information you want to see.
- Stay Updated: Keep Windows updated to get the newest widget features.
- Simple Interface: The Settings app makes managing widgets easy to understand.
Summary
Managing Lock screen widgets on Windows 11 is simple and takes just a few clicks. Open Settings, go to Bluetooth & devices, select Lock screen, and then add or remove widgets from the Your widgets section. Lock screen widgets give you quick access to important information like weather and calendar events without needing to unlock your computer. You can customize your Lock screen anytime by adding new widgets or removing ones you no longer want to see.


Leave a Reply Cancel reply