
This article describes steps one can take to install SonarQube on Ubuntu Linux.
SonarQube helps developers write clean and better code. It is an open-source platform for inspecting and analyzing code for quality and applying security best practices.
With this platform, businesses and developers can find and fix bugs, find vulnerabilities, and maintain coding standards, removing complexity.
Below is how to install and use SonarQube on Ubuntu Linux.
How to install SonarQube on Ubuntu Linux
As mentioned above, SonarQube helps developers write clean and better code. In addition, it is an open-source platform for inspecting and analyzing code for quality and best security practices.
Below is how to install it on Ubuntu Linux.
Install OpenJDK
SonarQube is built with Jave and requires its JDK installed. However, the open-source version should be great to use with it.
Below is how to install OpenJDK on Ubuntu.
sudo apt update
sudo apt install default-jdk
For additional resources on installing OpenJDK on Ubuntu, read the post below.
How to install OpenJDK on Ubuntu Linux
Install PostgreSQL
A database server is also required with SonarQube. PostgreSQL is a database server well-suited for SonarQube.
Below is how to install PostgreSQL on Ubuntu Linux.
Run the commands below to add the PostgreSQL repository GPG key.
wget -q https://www.postgresql.org/media/keys/ACCC4CF8.asc -O - | sudo apt-key add -
Next, create a PostgreSQL repository file.
sudo sh -c 'echo "deb http://apt.postgresql.org/pub/repos/apt/ `lsb_release -cs`-pgdg main" >> /etc/apt/sources.list.d/pgdg.list'
Next, update the Ubuntu package index and install PostgreSQL version 13.
sudo apt update
sudo apt install postgresql-13
For additional resources on installing PostgreSQL, read the post below.
How to install PostgreSQL on Ubuntu Linux
Create a SonarQube database and user
Now that the database server is installed, let’s go and create a database for SonarQube to use and an account for it.
Log on to the PostgreSQL command shell.
sudo -u postgres psql
Create a new database user called sonarqube.
CREATE USER sonarqube WITH PASSWORD 'type_password_here';
Create a new database called sonarqube.
CREATE DATABASE sonarqube OWNER sonarqube;
Then, grant the sonarqube user full access to the sonarqube database.
GRANT ALL PRIVILEGES ON DATABASE sonarqube TO sonarqube;
Exit.
\q
Create a SonarQube system account and download
At this point, we’re ready to begin setting up SonarQube. First, create a system account named sonarqube.
sudo useradd -b /opt/sonarqube -s /bin/bash sonarqube
Install some package dependencies.
sudo apt install unzip software-properties-common wget
Download SonarQube version 9.6.1.
wget https://binaries.sonarsource.com/Distribution/sonarqube/sonarqube-9.6.1.59531.zip
Unzip the downloaded file, then move the unzipped file to the SonarQube home directory.
unzip sonarqube-9.6.1.59531.zip
sudo mv sonarqube-9.6.1.59531 /opt/sonarqube
Make sure the sonarqube account is the owner of the content.
sudo chown -R sonarqube:sonarqube /opt/sonarqube
Configure SonarQube
With SonarQube content downloaded, go and configure its configuration file. Then, run the commands below to open its main config file.
sudo nano /opt/sonarqube/conf/sonar.properties
Make the highlighted lines in the file by adding the database and account names created above.
# DATABASE

# IMPORTANT:
# - The embedded H2 database is used by default. It is recommended for tests but not for
#   production use. Supported databases are Oracle, PostgreSQL and Microsoft SQLServer.
# - Changes to database connection URL (sonar.jdbc.url) can affect SonarSource licensed products.
# User credentials.
# Permissions to create tables, indices and triggers must be granted to JDBC user.
# The schema must be created first.
sonar.jdbc.username=sonarqube
sonar.jdbc.password=type_password_here
Also, make sure the server IP and port number are defined.
#Startup can be long if entropy source is short of entropy. Adding
#-Djava.security.egd=file:/dev/./urandom is an option to resolve the problem.
#
sonar.web.javaOpts=-Xmx512m -Xms128m -XX:+HeapDumpOnOutOfMemoryError
# Same as previous property, but allows to not repeat all other settings like -Xmx
sonar.web.javaAdditionalOpts=-server
# Binding IP address. For servers with more than one IP address, this property specifies which
# address will be used for listening on the specified ports.
# By default, ports will be used on all IP addresses associated with the server.
sonar.web.host=127.0.0.1
# Web context. When set, it must start with forward slash (for example /sonarqube).
# The default value is root context (empty value).
#sonar.web.context=
# TCP port for incoming HTTP connections. Default value is 9000.
sonar.web.port=9000
sonar.log.level=INFO
sonar.path.logs=logs
Save the file and exit.
Create SonarQube systemd service
Finally, run the commands below to create a systemd service file for SonarQube. This will help you control SonarQube services.
sudo nano /etc/systemd/system/sonarqube.service
Copy and paste the lines below into the file and save.
[Unit]
Description=SonarQube service
After=syslog.target network.target

[Service]
Type=forking
ExecStart=/opt/sonarqube/bin/linux-x86-64/sonar.sh start
ExecStop=/opt/sonarqube/bin/linux-x86-64/sonar.sh stop
User=sonarqube
Group=sonarqube
Restart=always
LimitNOFILE=65536
LimitNPROC=4096

[Install]
WantedBy=multi-user.target
Reload the systemd daemon, then start and enable the SonarQube service.
sudo systemctl daemon-reload
sudo systemctl start sonarqube
sudo systemctl enable sonarqube
SonarQube should be started and running.
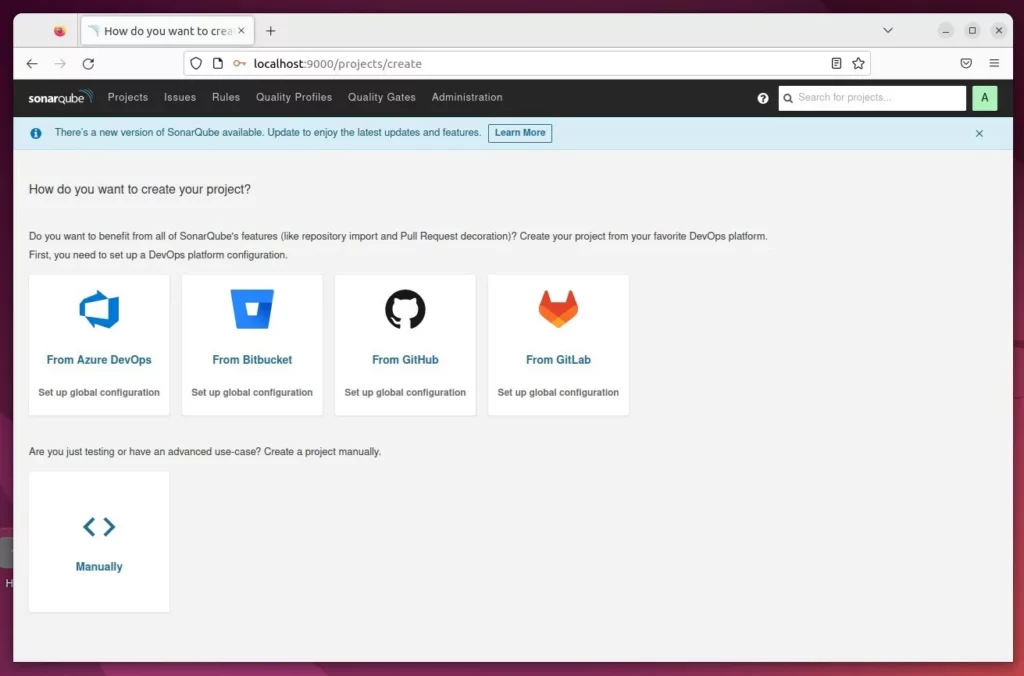
Access SonarQube portal
Finally, open your web browser and browse to the server hostname or IP address followed by port number 9000.
http://localhost:9000
You should see SonarQube’s default login portal.

Login with default admin and admin for both username and password.
Use Reverse proxy with SonarQube
The most effective way to use SonarQube is to set up a reverse proxy. We have written two posts on reverse proxy for both Apache and Nginx.
Use the posts below to set up a reverse proxy with SonarQube.
That should do it!
Conclusion:
- The installation and usage of SonarQube on Ubuntu Linux are covered in this guide.
- Users can now utilize SonarQube to ensure code quality, identify and rectify bugs and vulnerabilities, and maintain coding standards on their Ubuntu Linux systems.
- Additional resources are provided to set up a reverse proxy with Apache and Nginx for optimal SonarQube usage.
- Readers are encouraged to provide feedback or contributions using the comment form.


Leave a Reply