
This article describes the steps to install and use the Nessus vulnerability scanner on Ubuntu Linux.
Nessus is an open-source vulnerability assessment and penetration testing tool one can install on various platforms, including Raspberry Pi. It uses the Common Vulnerabilities and Exposures (CVE) architecture to make vulnerability assessment simple, easy, and intuitive.
Nessus should be handy for companies and individuals seeking a security and vulnerability scanner to secure their environments.
More information on Nessus can be found on their official website.
How to install Nessus on Ubuntu Linux
As mentioned above, Nessus is an open-source vulnerability assessment and penetration testing tool one can install and use on various platforms, including Raspberry Pi.
Below is how to install it on Ubuntu Linux.
Download and install the Nessus DEB package.
There are multiple ways to install the Nessus security scanners on Ubuntu Linux. However, downloading and installing its official DEB package is the most straightforward way.
The parent company, Tenable provides Nessus packages for different Linux distributions, including Ubuntu Linux.
At the time of this writing, version 10.4.1 is the latest. To download via curl, run the commands below.
sudo apt install curl
curl --request GET --url 'https://www.tenable.com/downloads/api/v2/pages/nessus/files/Nessus-10.4.1-ubuntu1404_amd64.deb' --output 'Nessus-10.4.1-ubuntu1404_amd64.deb'
After downloading the installer, run the commands below to install Nessus.
sudo dpkg -i Nessus-10.4.1-ubuntu1404_amd64.deb
After installing, the commands below can be used to start and enable Nessue’s services to start up when the system boots automatically.
sudo systemctl start nessusd
sudo systemctl is-enabled nessusd
You can also check the Nessus’ service status by running the commands below.
sudo systemctl status nessusd
The command above should output lines similar to those below.
● nessusd.service - The Nessus Vulnerability Scanner

     Loaded: loaded (/lib/systemd/system/nessusd.service; enabled; preset: enabled)
     Active: active (running) since Tue 2022-11-15 10:28:01 CST; 17s ago
   Main PID: 2906 (nessus-service)
      Tasks: 13 (limit: 2282)
     Memory: 55.6M
        CPU: 15.495s
     CGroup: /system.slice/nessusd.service
             ├─2906 /opt/nessus/sbin/nessus-service -q
             └─2908 nessusd -q
Nov 15 10:28:01 Ubuntu2210 systemd[1]: Started The Nessus Vulnerability Scanner.
Nov 15 10:28:03 Ubuntu2210 nessus-service[2908]: Cached 0 plugin libs in 0msec
Setup Ubuntu Firewall
By default, the Ubuntu firewall isn’t enabled. However, if you are running a firewall on your system, you must allow the following ports and services.
Allow OpenSSH by running the commands below.
sudo ufw allow "OpenSSH"
Allow Nessus to use the default port that it uses for its web portal.
sudo ufw allow 8834/tcp
Access the Nessus web portal
At this point, Nessus should have started on port 8834. Open your web browser and browse to the server hostname or IP address followed by port number 8834.
https://localhost:8834
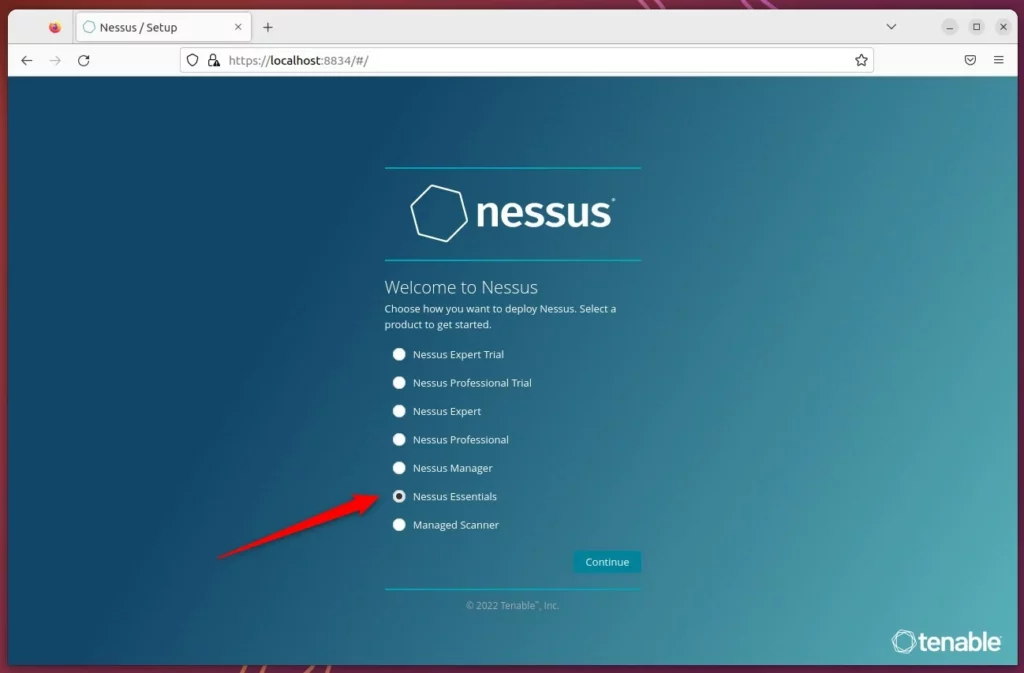
On the setup screen, choose how you want to deploy Nessus. For this post, we are going to choose the Nessus Essentials option.
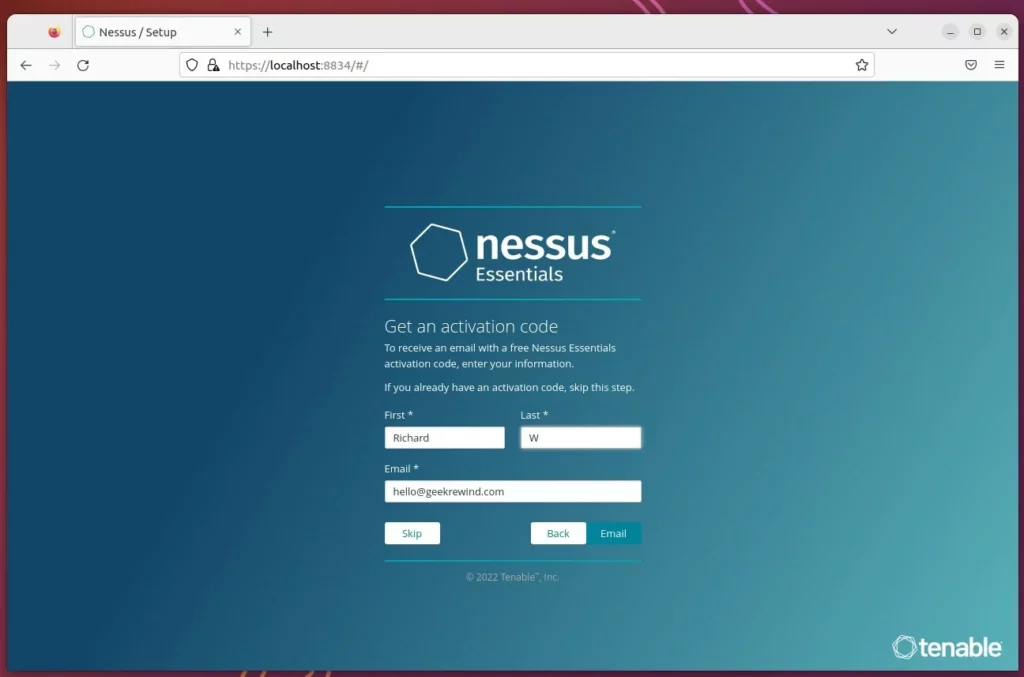
Set up your account to receive your activation code.
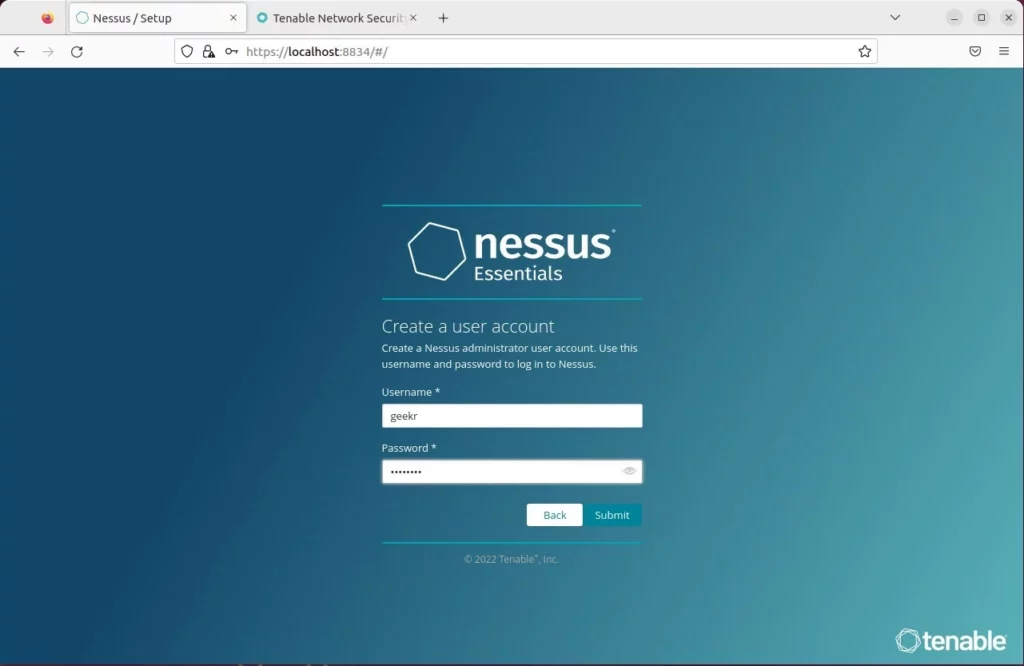
Once you get your activation code, enter it and continue. Then create a username and password for your account.
When you are done, Nessus should download additional plugins and begin initializing. After a few moments, you should be allowed to sign into your Nessus portal.

Configure Nessus nessuscli
To quickly manage Nessus via the command line, you may have to set up the bashrc settings below.
Add both Nessus bin directories to the system PATH via the ~/.bashrc config file in your home directory.
echo 'export PATH="$PATH:/opt/nessus/bin:/opt/nessus/sbin"' >> ~/.bashrc
Apply and reload your changes.
source ~/.bashrc
You should now be able to use the nessuscli command utility.
nessuscli help
Read the Get Started with Nessus for more help on running scans.
That should do it!
Conclusion:
- Installation: The article provides detailed steps for downloading and installing the Nessus DEB package on Ubuntu Linux, ensuring a smooth setup process.
- Initial Configuration: It covers setting up the Ubuntu firewall to allow necessary ports and services for the Nessus vulnerability scanner.
- Web Portal Access: The guide includes instructions for accessing the Nessus web portal and proceeding with the setup, making it accessible for users.
- CLI Configuration: Additionally, it presents commands for configuring the nessuscli command utility for managing Nessus via the command line, providing flexibility to users.

Leave a Reply