How to Install TeamViewer via Command Line on Ubuntu


Installing TeamViewer from the command line on Ubuntu lets you set up remote desktop software (a tool that lets you view and control another computer over the internet) with text commands instead of clicking through menus. The whole process runs in the terminal, so there are no extra confirmation pop-ups to click through.
This saves time, especially when you need to set up remote access on several machines. You can paste the same commands on each one, or put them in a script.
Download the `.deb` package from the TeamViewer website using `wget`. Then, update your package index with `sudo apt update` and install TeamViewer using `sudo apt install ./teamviewer_amd64.deb`.
Install TeamViewer on Ubuntu Linux
You can install TeamViewer on Ubuntu by downloading the official installation package (a .deb file) from the TeamViewer website and installing it from the Terminal. This gets you the latest version without searching through an app store. You need an account with sudo rights, because installing software changes the whole system. The steps below work on current Ubuntu releases.
The first step is to download the installer package directly from the TeamViewer website. Doing it from the terminal means you never have to open a browser.
- Press Ctrl+Alt+T to open the Terminal app. A window with a command prompt should appear.
- Run the command below to download the TeamViewer installer package. It saves the file in the folder the terminal is currently in, so note that folder. You need to be in the same one for the next step.
wget https://download.teamviewer.com/download/linux/teamviewer_amd64.deb
Once the download finishes, install the package. The commands below refresh your package list first and then install the file.
- Type `sudo apt update` and press Enter. Enter your password if asked. Nothing appears on screen while you type it, which is normal. You should see Ubuntu refresh its package lists.
- Type `sudo apt install ./teamviewer_*.deb` and press Enter. The ./ at the start tells apt to use the local file, and apt also pulls in any dependencies TeamViewer needs. If apt asks whether to continue, type Y and press Enter.
- Wait until the prompt returns. That means the installation is done.
The * in the file name matches whatever version you downloaded. It only works cleanly if there is a single TeamViewer .deb file in the folder. If you have downloaded it more than once, delete the older copies or type the full file name instead. If apt says it cannot find the file, you are in the wrong folder.
sudo apt update
sudo apt install ./teamviewer_amd64.deb
Once TeamViewer is installed, you can start it in either of two ways. No restart is needed.
- To launch it from the terminal, type
teamviewerand press Enter. - To launch it from the desktop, open your Applications menu and click the TeamViewer icon.
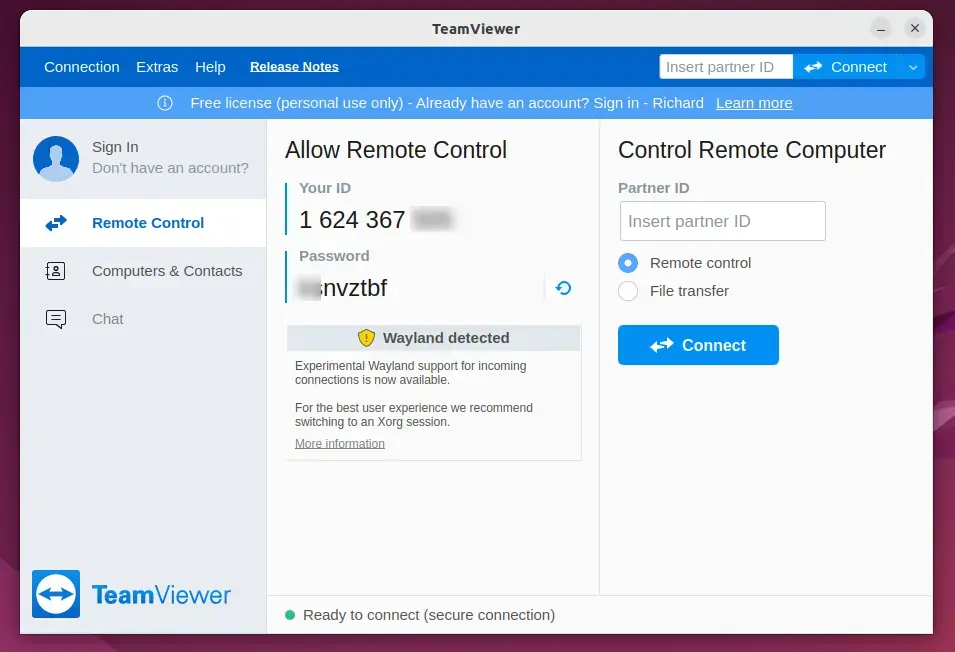
On the first launch, TeamViewer shows its license agreement. Accept it to continue. The main window then shows your ID and a temporary password, which a remote user needs to connect to this machine. If remote control of this machine does not work, check whether you are logged in to a Wayland session. Remote access to the local desktop can be limited there, and an Xorg session may behave better.
During the installation, the official TeamViewer repository is added to your machine. This means that when a newer version is released, your system picks it up with your other package updates. You can install it from Software Updater or through your usual apt update routine, and you don't need to download the file again.
That completes the setup. TeamViewer is installed, you can launch it, and it will stay current through your normal updates.
TeamViewer is a versatile tool for remote access and support. Here is a recap of what you did.
- TeamViewer is a versatile tool for remote access and support.
- Installing TeamViewer via the command line offers more customization options and efficiency, and it is easy to repeat on several machines.
- The process involves downloading the installer package and running terminal commands: one to refresh the package list and one to install the file.
- After installation, TeamViewer can be easily launched from the command line or the Applications menu, and the added repository keeps it updated.
Have a question about this guide?
Answered by AI from this guide. Good questions may be added to this page — please don't include personal details.
Did this guide fix your problem?

About the Author
Richard
Tech Writer, IT Professional
Richard is a writer at Geek Rewind who turns complex IT tasks into clear, step-by-step guides. He draws on years of hands-on experience in system administration and enterprise IT operations, focusing on Windows, Linux and WordPress: the problems people actually run into, and the fixes that work. His server and WordPress guides come from systems he runs himself. Richard builds and maintains the platform behind Geek Rewind, from its Ubuntu servers and Nginx configuration to its custom WordPress plugins. Many new tutorials start with readers' questions, and he's always glad to answer them in the comments.
No comments yet — be the first to share your thoughts!