How to Install ELK Stack on Ubuntu Linux


The ELK Stack is a free collection of open-source tools that lets you collect, search, and view log data from your computer or server in one place. It combines four separate programs—Elasticsearch for searching, Logstash for gathering data, Kibana for drawing charts, and Beats for shipping logs—into a single tracking system.
You can set up version 8.x of the stack on Ubuntu 22.04 LTS to track errors and check how well your system runs.
Install ELK Stack on Ubuntu by first updating package lists and installing Java. Then, add the Elasticsearch repository and install Elasticsearch, followed by installing and enabling Kibana. Finally, install and configure Logstash and Beats for data processing and shipping.
Prepare Ubuntu
Before installing any of the services above, run the commands below on your Ubuntu machine to install packages vital to installing ELK on Ubuntu.
sudo apt update
sudo apt install wget apt-transport-https curl gnupg2
Install Java
You need to install Java because Elasticsearch is built using it. The open-source version, called openjdk-11-jdk, is easy to set up on Ubuntu. Installing this specific Java version ensures it works well with Elasticsearch and is straightforward to get running on your system.
Simply run the commands below to install Java.
sudo apt install openjdk-11-jdk
To verify that Java is installed, run the commands below:
java -version
That should display similar lines as shown below:
openjdk version "11.0.10" 2021-01-19
OpenJDK Runtime Environment (build 11.0.10+9-Ubuntu-0ubuntu1.20.04)
OpenJDK 64-Bit Server VM (build 11.0.10+9-Ubuntu-0ubuntu1.20.04, mixed mode, sharing)
The commands above install OpenJDK version 11.
Install Elasticsearch
Once Java is installed, you can add the official Elasticsearch software source to your Ubuntu system. This involves running a couple of commands in your terminal to add its security key and set up the repository. Doing this makes it easy to install the Elasticsearch software itself.
Run the commands below to add its GPG repository key.
wget -qO - https://artifacts.elastic.co/GPG-KEY-elasticsearch | sudo apt-key add -
Then, follow that by creating its repository file in Ubuntu.
echo "deb https://artifacts.elastic.co/packages/7.x/apt stable main" | sudo tee -a /etc/apt/sources.list.d/elastic-7.x.list
That should create a repository file called elastic-7.x.list.
Once the repository is added, run the commands below to install Elasticsearch.
sudo apt update
sudo apt install elasticsearch
Start and enable Elasticsearch services.
sudo systemctl start elasticsearch
sudo systemctl enable elasticsearch
By default, Elasticsearch should be running on port 9200. Run the commands below from the command line to view Elasticsearch status and details
curl -X GET "localhost:9200"
That should output similar lines as shown below:
{
  "name" : "ubuntu2004",
  "cluster_name" : "elasticsearch",
  "cluster_uuid" : "O1zUDFjJQzyjAaiP5xlwOg",
  "version" : {
    "number" : "7.12.0",
    "build_flavor" : "default",
    "build_type" : "deb",
    "build_hash" : "78722783c38caa25a70982b5b042074cde5d3b3a",
    "build_date" : "2021-03-18T06:17:15.410153305Z",
    "build_snapshot" : false,
    "lucene_version" : "8.8.0",
    "minimum_wire_compatibility_version" : "6.8.0",
    "minimum_index_compatibility_version" : "6.0.0-beta1"
  },
  "tagline" : "You Know, for Search"
}
Install Kibana
Installing Kibana on Ubuntu is simple because its packages are already available in the system's software sources. You just need to open your terminal and run a few commands to install Kibana. After installation, you'll start its service and ensure it automatically runs when your computer starts up.
sudo apt install kibana
sudo systemctl start kibana
sudo systemctl enable kibana
That should get Kibana installed and ready to use.
Kibana provides a web interface that can be secured with a reverse proxy and HTTPS. Kibana communicates over port 5601.
http://localhost:5601/status
You can open your browser and browse to the server's hostname or IP address, then port 5601, and bring up the Kibana web interface.
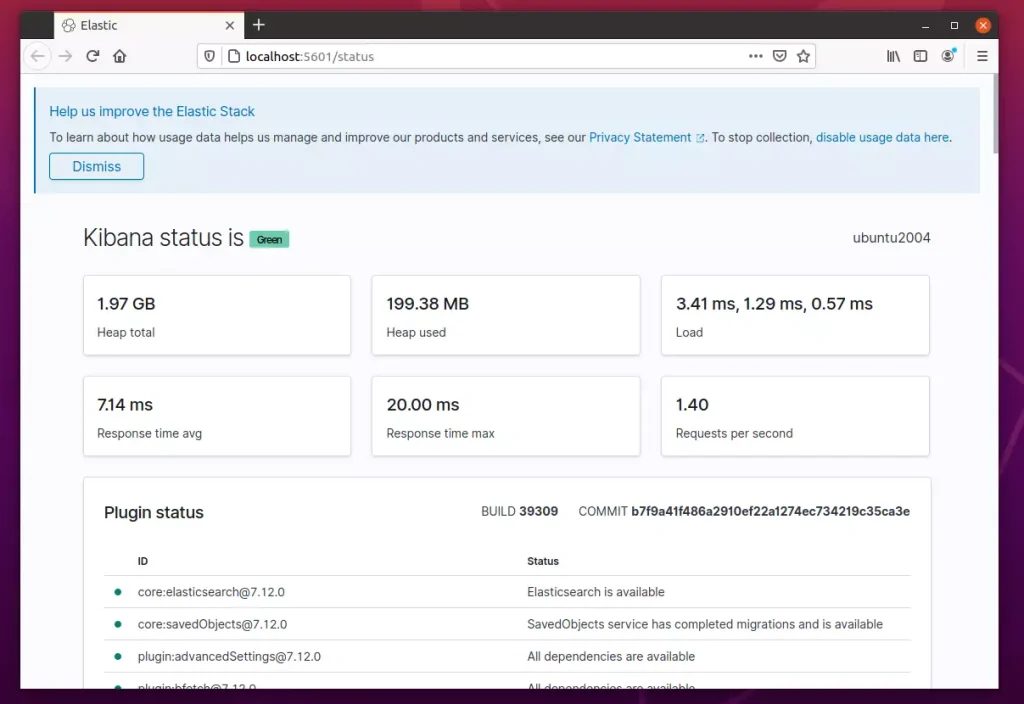
If you'd like to use Nginx reverse proxy and enable HTTPS, then use this Nginx reverse proxy configuration in the virtual host.
server {
    listen 80;
    server_name example.com;
    location / {
        proxy_pass http://localhost:5601;
        proxy_http_version 1.1;
        proxy_set_header Upgrade $http_upgrade;
        proxy_set_header Connection 'upgrade';
        proxy_set_header Host $host;
        proxy_cache_bypass $http_upgrade;
    }
}
You can also use Let's Encrypt further to secure the Kibana web interface with the proxy above.
Install Logstash
Installing Logstash on Ubuntu is easy because its packages are already in the system's default software sources. Simply open your terminal and use the commands to install Logstash. Once installed, you'll start its service and set it to turn on automatically every time your system starts.
sudo apt install logstash
sudo systemctl start logstash
sudo systemctl enable logstash
That should get Logstash installed and ready to be used. The default configuration of Logstash is found in /etc/logstash/conf.d.
sudo nano /etc/logstash/conf.d/02-beats-input.conf
Copy and paste the content below into the file and save.
input {
  beats {
    port => 5044
  }
}
Next, create a file to define output to Elasticsearch.
sudo nano /etc/logstash/conf.d/30-elasticsearch-output.conf
Then copy and paste the content below into the file and save it.
output {
  if [@metadata][pipeline] {
    elasticsearch {
    hosts => ["localhost:9200"]
    manage_template => false
    index => "%{[@metadata][beat]}-%{[@metadata][version]}-%{+YYYY.MM.dd}"
    pipeline => "%{[@metadata][pipeline]}"
    }
  } else {
    elasticsearch {
    hosts => ["localhost:9200"]
    manage_template => false
    index => "%{[@metadata][beat]}-%{[@metadata][version]}-%{+YYYY.MM.dd}"
    }
  }
}
Save the exit.
Make sure the configurations are ok by running the validation commands below:
sudo -u logstash /usr/share/logstash/bin/logstash --path.settings /etc/logstash -t
You should get a success message as below:
Configuration OK
Install Filebeat
Filebeat is simple to install on Ubuntu because it's available directly from the system's software sources. You can run commands in your terminal to install Filebeat, start its service, and make sure it launches automatically when your computer starts. We will adjust its settings later to send data through Logstash.
sudo apt install filebeat
sudo systemctl start filebeat
sudo systemctl enable filebeat
sudo nano /etc/filebeat/filebeat.yml
Make the highlighted changes below:
# Configure what output to use when sending the data collected by the beat.

# ---------------------------- Elasticsearch Output ----------------------------
#output.elasticsearch:
  # Array of hosts to connect to.
#  hosts: ["localhost:9200"]

  # Protocol - either `http` (default) or `https`.
  #protocol: "https"

  # Authentication credentials - either API key or username/password.
  #api_key: "id:api_key"
  #username: "elastic"
  #password: "changeme"

# ------------------------------ Logstash Output -------------------------------
output.logstash:
  # The Logstash hosts
  hosts: ["localhost:5044"]

  # Optional SSL. By default is off.
  # List of root certificates for HTTPS server verifications
After making the changes, save and exit.
Run the commands below to enable Filebeat modules and parsing processes.
sudo filebeat modules enable system
sudo filebeat setup --pipelines --modules system
Load Filebeat template
sudo filebeat setup --index-management -E output.logstash.enabled=false -E 'output.elasticsearch.hosts=["localhost:9200"]'
Also, integrate Filebeat with Kibana.
sudo filebeat setup -E output.logstash.enabled=false -E output.elasticsearch.hosts=['localhost:9200'] -E setup.kibana.host=localhost:5601
Restart all components
sudo systemctl restart elasticsearch
sudo systemctl restart kibana
sudo systemctl restart logstash
sudo systemctl restart filebeat
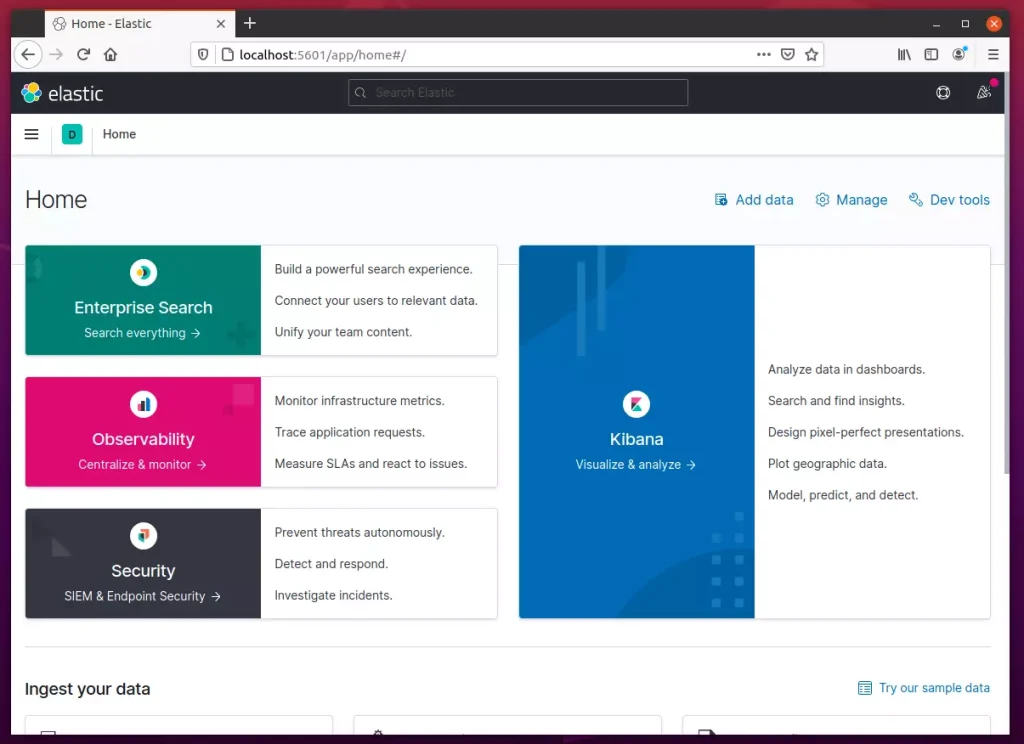
That should do it!
Conclusion:
This post showed you how to install the ELK stack on Ubuntu 20.04 | 18.04. If you find any error above, please use the form below to report.
Was this guide helpful?

About the Author
Richard
Tech Writer, IT Professional
Richard, a writer for Geek Rewind, is a tech enthusiast who loves breaking down complex IT topics into simple, easy-to-understand ideas. With years of hands-on experience in system administration and enterprise IT operations, he’s developed a knack for offering practical tips and solutions. Richard aims to make technology more accessible and actionable. He's deeply committed to the Geek Rewind community, always ready to answer questions and engage in discussions.


No comments yet — be the first to share your thoughts!