How to Install Apache Hadoop on Ubuntu Linux
This article explains how to install Apache Hadoop on Ubuntu Linux. Apache Hadoop is an open-source tool used to manage and process very large amounts of data. It helps your applications run faster and scale up as your needs grow.
Why use Hadoop? It allows you to handle massive datasets across many computers, ensuring your data processing is reliable and fast.
What happens when done? You will have a working Hadoop environment on your system, ready to store and analyze large-scale data.
Install JAVA OpenJDK
Hadoop is built on Java. You need a Java Development Kit (JDK) to run it. We recommend using OpenJDK 17 or 21, which are the current Long Term Support (LTS) versions.
Run these commands to install the latest OpenJDK:
sudo apt update
sudo apt install openjdk-21-jdk
Verify the installation by checking the version:
java -version
For more details on setting up Java, see this guide: How to install OpenJDK on Ubuntu Linux
Create a user account for Hadoop
It is best practice to create a dedicated user for Hadoop. This keeps your system secure and organized.
Run this command to create the user:
sudo adduser hadoop
Once created, switch to the new user:
su - hadoop
Security Note: Ensure the Hadoop folder is not world-readable. Use chown -R hadoop:hadoop /home/hadoop/hadoop and chmod 750 /home/hadoop/hadoop to restrict file access to the Hadoop user only.
Generate an SSH key to allow the system to talk to itself:
ssh-keygen -t rsa
cat ~/.ssh/id_rsa.pub >> ~/.ssh/authorized_keys
chmod 640 ~/.ssh/authorized_keys
Install Apache Hadoop
We will use Hadoop 3.4.x, which is compatible with Java 21.
Download and extract the files:
cd /tmp
wget https://dlcdn.apache.org/hadoop/common/hadoop-3.4.1/hadoop-3.4.1.tar.gz
tar xzf hadoop-3.4.1.tar.gz
mv hadoop-3.4.1 ~/hadoop
Open your bash configuration file to set up environment variables:
nano ~/.bashrc
Add these lines to the bottom of the file:
export JAVA_HOME=/usr/lib/jvm/java-21-openjdk-amd64
export HADOOP_HOME=/home/hadoop/hadoop
export HADOOP_INSTALL=$HADOOP_HOME
export HADOOP_MAPRED_HOME=$HADOOP_HOME
export HADOOP_COMMON_HOME=$HADOOP_HOME
export HADOOP_HDFS_HOME=$HADOOP_HOME
export HADOOP_YARN_HOME=$HADOOP_HOME
export HADOOP_COMMON_LIB_NATIVE_DIR=$HADOOP_HOME/lib/native
export PATH=$PATH:$HADOOP_HOME/sbin:$HADOOP_HOME/bin
export HADOOP_OPTS="-Djava.library.path=$HADOOP_HOME/lib/native"
Save and apply the changes:
source ~/.bashrc
Start and access the Apache Hadoop portal
Format the namenode to prepare the storage:
hdfs namenode -format
Note on Management: Instead of running manual shell scripts, we recommend creating systemd service files for your Hadoop processes. This allows Ubuntu to start and stop Hadoop automatically when the system boots.
Start the services:
start-all.sh
Open your web browser to check the status:
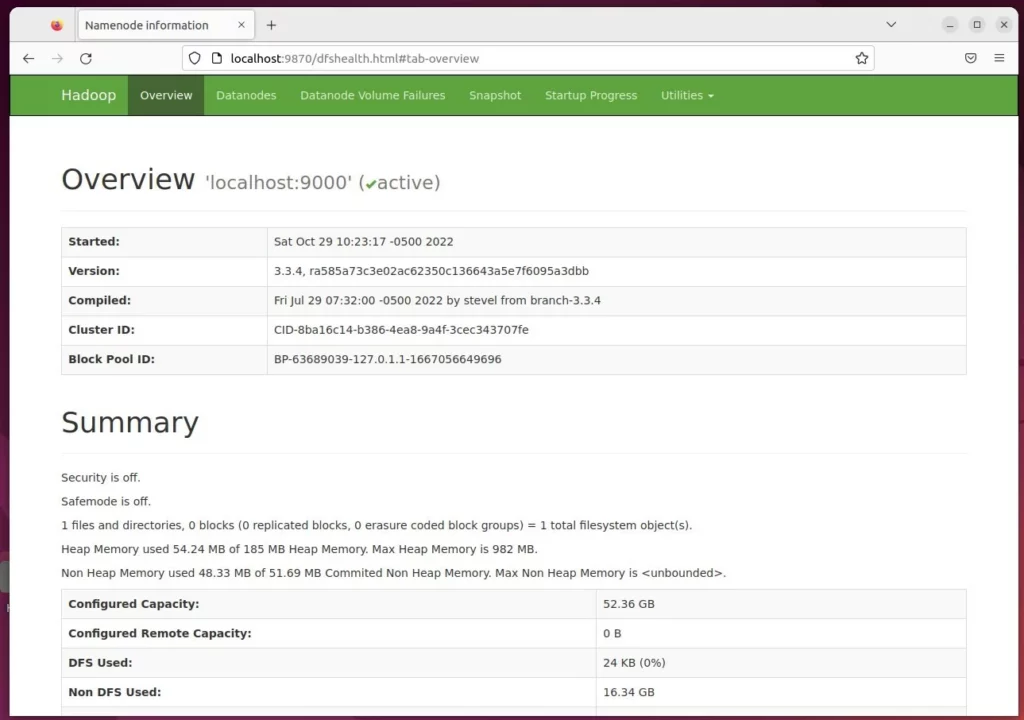
Hadoop Summary: http://localhost:9870
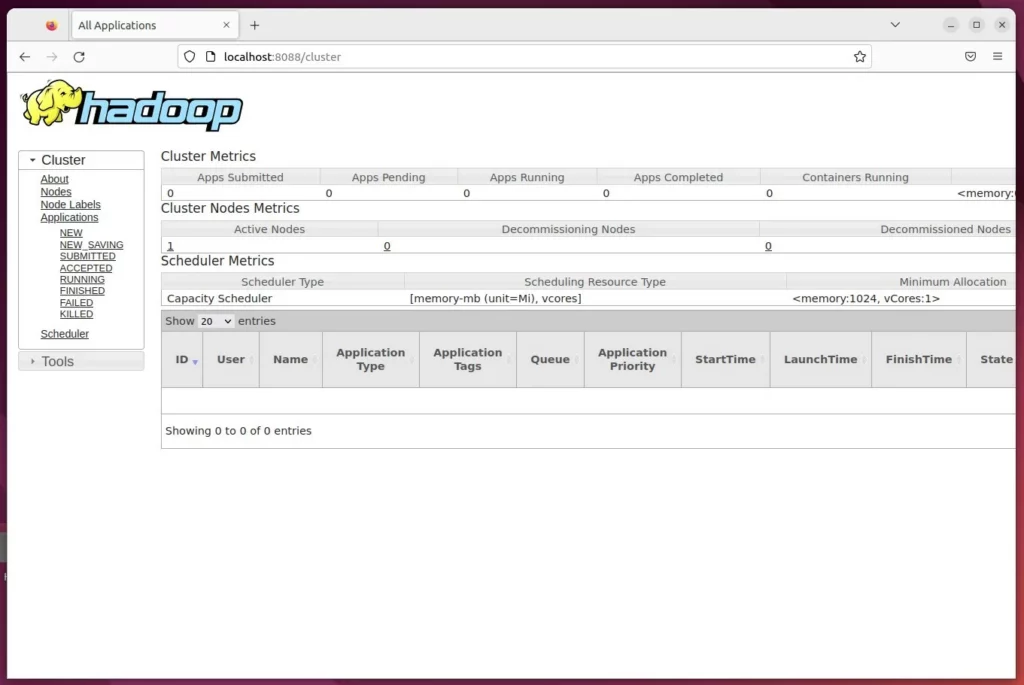
Hadoop Resource Manager: http://localhost:8088
You have successfully installed and started Apache Hadoop.
[Y/n] [fingerprint] [localhost] [Ubuntu2204]
Was this guide helpful?


Leave a Reply Cancel reply