
This post shows students and new users how to install and use Angular CLI on Ubuntu Linux.
If you don’t know about Angular CLI, it’s a command-line interface tool you use to initialize, develop, and maintain Angular applications easily on compatible systems.
Installing Angular CLI is also easy. Significant versions of Angular CLI follow supported major versions. However, minor versions can be scheduled and released separately.
A single workspace configuration file, angular.json, is created at the top level of the workspace. This is where you can set per-project defaults for CLI command options and specify configurations to use when the CLI builds a project for different targets.
Below is how to install and use Angular CLI on Ubuntu Linux.
How to install and use Angular CLI on Ubuntu Linux
As mentioned, Angular CLI is a command-line interface tool to initialize, develop, scaffold, and maintain Angular applications.
Here’s how to install it on Ubuntu Linux.
First, open the Ubuntu command line console and run the commands below to install NVM.
curl https://raw.githubusercontent.com/creationix/nvm/master/install.sh | bash
Next, run the commands to activate the NVM environment within your profile.
source ~/.bashrc
Once the environment is activated, run the commands below to install Node.js.
As of this writing, Angular v14 is the latest LTS version and supports Node.js 14 and 16 LTS versions.
For this post, we will install Node.js version 16 LTS. Run the commands below to do so.
nvm install v16
After installing, you can check the version of Node.js and NPM using the commands below:
node -v
npm -v
Once Node.js and NPM are installed, run the commands below to install the latest Angular CLI.
npm install @angular/cli --location=global
Specify the version with the commands if you wish to install individual versions.
npm install -g @angular/cli@10
npm install -g @angular/cli@11
npm install -g @angular/cli@12
Check the link below to view Angular CLI versions:
https://github.com/angular/angular-cli/releases
Check the Angular version by running the commands below.
ng version
That should display an output similar to the lines below:

To create, build, and serve a new, basic Angular project on a development server, go to the parent directory of your new workspace and use the following commands:
ng new my-first-project
cd my-first-project
ng serve
Replace my-first-project with the name of the project folder you wish to use.
After a successful build, you should see similar lines as below:
? Would you like to add Angular routing? Yes
? Which stylesheet format would you like to use? CSS
CREATE my-first-project/README.md (1068 bytes)
CREATE my-first-project/.editorconfig (274 bytes)
CREATE my-first-project/.gitignore (548 bytes)
CREATE my-first-project/angular.json (2972 bytes)
CREATE my-first-project/package.json (1047 bytes)
CREATE my-first-project/tsconfig.json (863 bytes)
CREATE my-first-project/.browserslistrc (600 bytes)
CREATE my-first-project/karma.conf.js (1433 bytes)
CREATE my-first-project/tsconfig.app.json (287 bytes)
CREATE my-first-project/tsconfig.spec.json (333 bytes)
CREATE my-first-project/.vscode/extensions.json (130 bytes)
CREATE my-first-project/.vscode/launch.json (474 bytes)
CREATE my-first-project/.vscode/tasks.json (938 bytes)
CREATE my-first-project/src/favicon.ico (948 bytes)
CREATE my-first-project/src/index.html (300 bytes)
CREATE my-first-project/src/main.ts (372 bytes)
CREATE my-first-project/src/polyfills.ts (2338 bytes)
CREATE my-first-project/src/styles.css (80 bytes)
CREATE my-first-project/src/test.ts (749 bytes)
CREATE my-first-project/src/assets/.gitkeep (0 bytes)
CREATE my-first-project/src/environments/environment.prod.ts (51 bytes)
CREATE my-first-project/src/environments/environment.ts (658 bytes)
CREATE my-first-project/src/app/app-routing.module.ts (245 bytes)
CREATE my-first-project/src/app/app.module.ts (393 bytes)
CREATE my-first-project/src/app/app.component.css (0 bytes)
CREATE my-first-project/src/app/app.component.html (23364 bytes)
CREATE my-first-project/src/app/app.component.spec.ts (1103 bytes)
CREATE my-first-project/src/app/app.component.ts (220 bytes)
✔ Packages installed successfully.
/bin/sh: 1: git: not found
Then, in your browser, open http://localhost:4200/ to see the new application run.
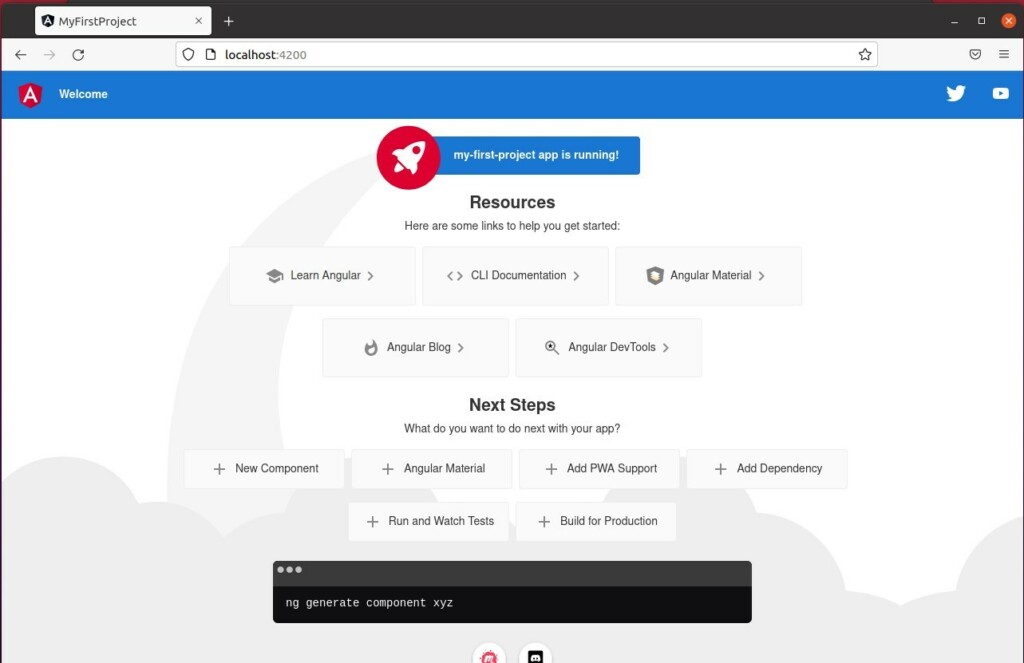
When you use the ng serve command to build and serve an application locally, the server automatically rebuilds the application and reloads the page when you change any source files.
That should do it!
Conclusion:
- Installing and using Angular CLI on Ubuntu Linux is straightforward and involves installing Node.js and NPM, then using NPM to install Angular CLI globally.
- After installation, you can verify the Angular version and create a new Angular project, build, and serve it on a development server using simple CLI commands.
- The development server automatically rebuilds the application and reloads the page when changes are made to any source files.
- With these simple steps, you can quickly set up and start developing Angular applications on your Ubuntu Linux system.
Leave a Reply