
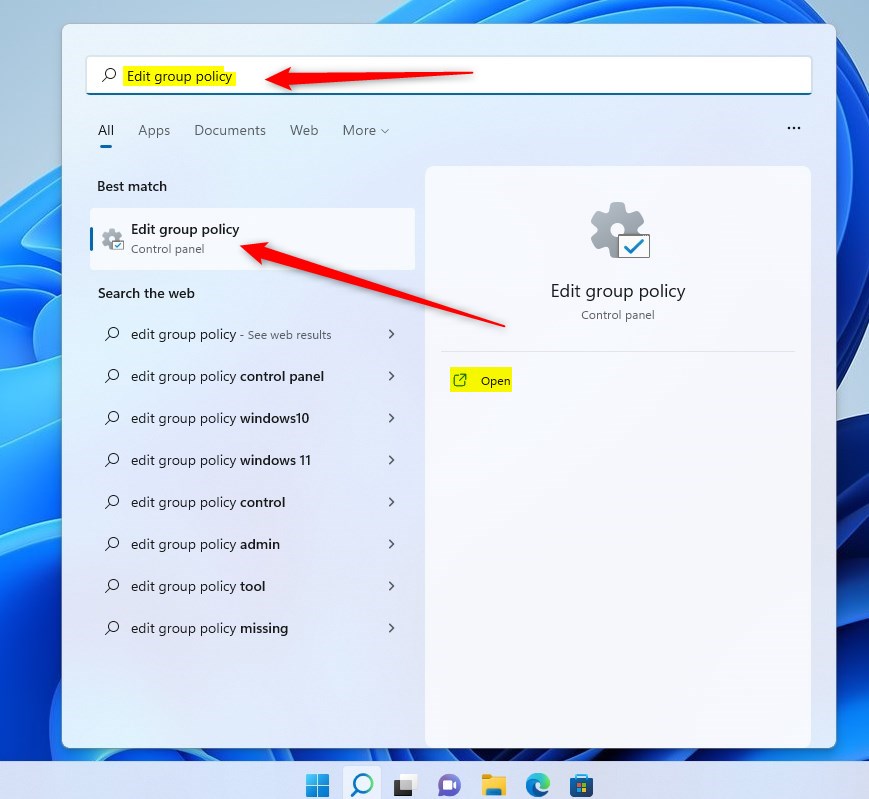
This article describes steps to enable or disable the Virtual Memory Paging File Encryption feature in Windows 11.
In Windows, paging, page file, and virtual memory refer to the exact Windows feature. Windows uses it to remove infrequently accessed modified data from physical memory to let the system use physical memory more efficiently for more frequently accessed data.
Windows also use the page file to store data when physical memory (RAM) is complete.
By default, this location is not encrypted. Encrypting the page file prevents malicious users from reading data paged to disk and adds processing overhead for filesystem operations.
Below is how to enable or disable encrypting virtual memory paging files in Windows 11.
How to encrypt or decrypt virtual memory paging file encryption in Windows 11
As mentioned above, encrypting the page file prevents malicious users from reading data paged to disk and adds processing overhead for filesystem operations.
Below is how to encrypt or decrypt virtual memory paging files in Windows 11.
Enable or disable Virtual Memory Paging File Encryption using Command Prompt
One can use the Command Prompt or Windows Terminal to encrypt or decrypt the virtual memory paging file in Windows.
First, open Windows Terminal as administrator. Then use either the Command Prompt or Windows Powershell.
Run the commands below to see if encryption is enabled or disabled
fsutil behavior query encryptpagingfile
You will see similar output as the one below, indicating the paging file encryption is disabled.
EncryptPagingFile = 0 (PageFile encryption is DISABLED)
Now that you know the virtual memory paging file is disabled, run the commands below to enable it.
fsutil behavior set encryptpagingfile 1
To disable the virtual memory paging file, run the commands below.
fsutil behavior set encryptpagingfile 0
Restart your computer to apply the changes.
Enable or disable virtual memory paging file encryption using the local group policy editor
If you can run the commands above to enable or disable this feature, you can use the Local Group Policy Editor.
First, open the Local Group Policy Editor.
Then navigate to the path below.
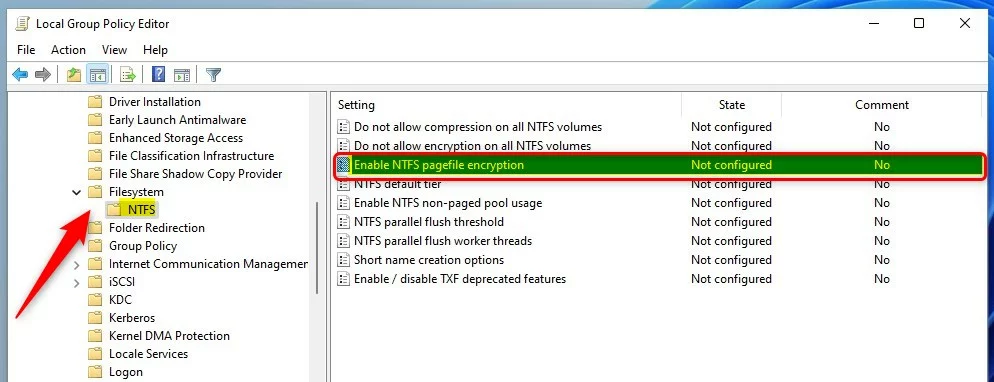
Computer Configuration > Administrative Templates > System > Filesystem > NTFS
In the NTFS details pane on the right, locate and double-click the setting that says “Enable NTFS pagefile encryption. “
On the Enable NTFS pagefile encryption window set the option to Not Configure, Enabled, or Disabled.
- Not Configured (default)
- Enabled – Enable NTFS pagefile encryption.
- Disabled – Disable NTFS pagefile encryption.
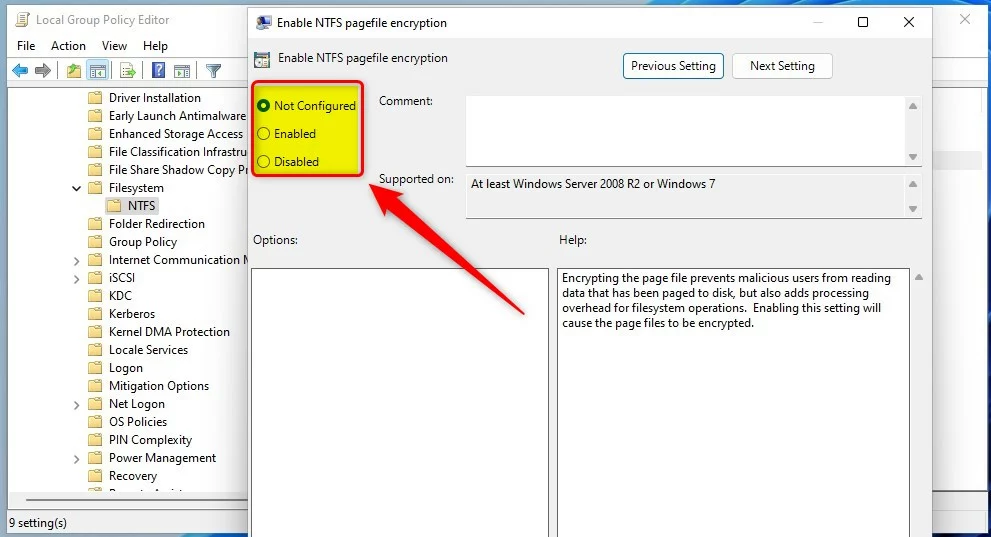
Choose your settings and close.
Enable or disable pagefile encryption via Windows Registry
If you can’t open the Local Group Policy Editor, you can use the Windows Registry instead.
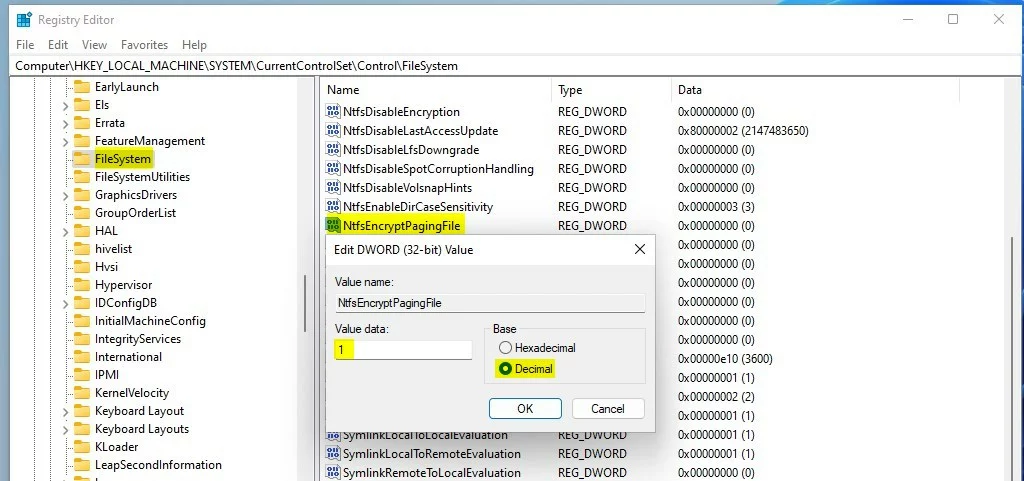
Open the Windows Registry, and navigate to the folder key path as listed below.
HKEY_LOCAL_MACHINE\SYSTEM\CurrentControlSet\Control\FileSystem
On the FileSystem key right pane, double-click the NtfsEncryptPagingFile value name as highlighted below.
Type 1 to enable and 0 to disable virtual memory page file encryption.
Restart your computer to apply.
Reference:
Conclusion:
- Enabling or disabling virtual memory page file encryption in Windows 11 can enhance security and privacy, but it also introduces processing overhead for filesystem operations.
- Users can employ various methods such as the Command Prompt or Windows Terminal, Local Group Policy Editor, and Windows Registry to manage this feature.
- It is essential to consider the potential impact on system performance and security needs before changing virtual memory page file encryption settings.
- Following the guidelines and reference resources can help users configure virtual memory page file encryption according to their requirements.
Leave a Reply Cancel reply