
This tutorial will show you how to turn on or off the pen as mouse feature for your account in Windows 11.
You can pair a pen to your Windows 11 PC via Bluetooth. Then you can customize what your pen does.
Why would you want this? By default, your pen scrolls and pans the screen. But you can change it to act like a mouse instead. This gives you more control over how you use your pen with your computer.
Option One
Enable or Disable Use Pen as Mouse in Settings
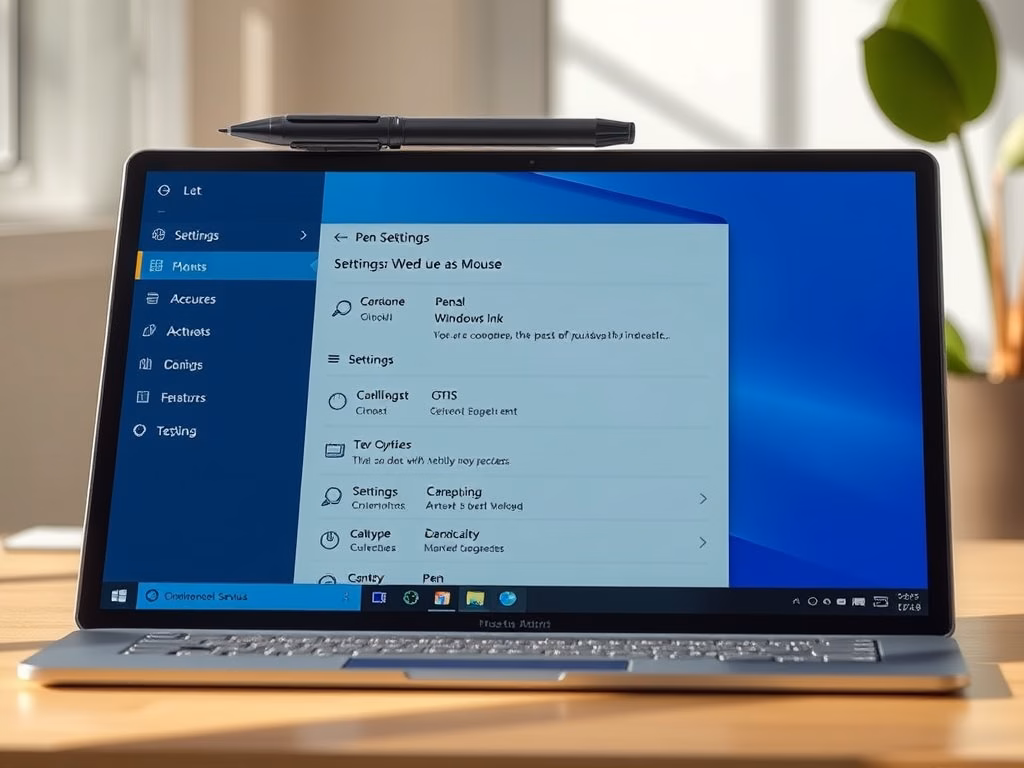
- Open Settings by pressing
Win+Ion your keyboard. - Click on Bluetooth & devices on the left side.
- Click on Pen & Windows Ink on the right side. Open Pen & Windows Ink settings

- Click on Additional pen settings to expand the section.
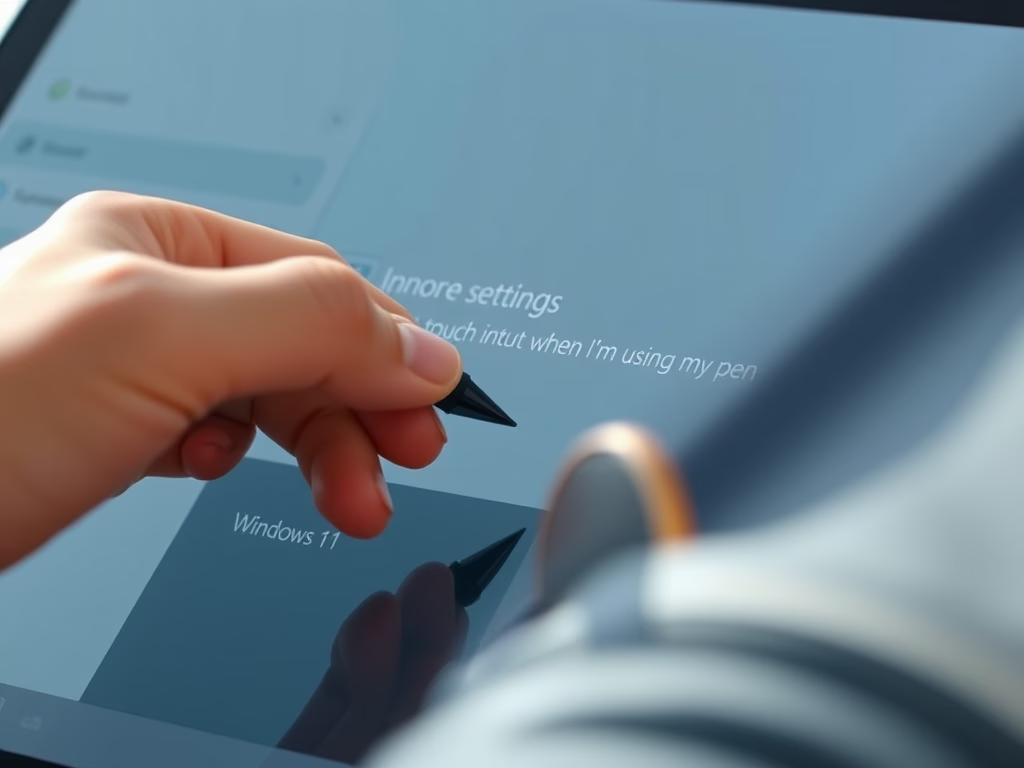
- Check the box next to Let me use my pen as a mouse when it’s available to turn it on. Or uncheck it to turn it off (this is the default setting).

- You can now close Settings.
What happens? Your pen will now work like a mouse when you have this setting turned on.
Option Two
Enable or Disable Use Pen as Mouse Using Registry
⚠️ Admin Privileges Required
To Turn On Use Pen as Mouse:
reg add "HKEY_CURRENT_USER\Software\Microsoft\Windows NT\CurrentVersion\Windows\Pen" /v PenInteractionModel /t REG_DWORD /d 1 /f
To Turn Off Use Pen as Mouse:
reg add "HKEY_CURRENT_USER\Software\Microsoft\Windows NT\CurrentVersion\Windows\Pen" /v PenInteractionModel /t REG_DWORD /d 0 /f
This is the default setting.
Summary
You now know how to enable or disable the pen as mouse feature in Windows 11. You can do this two ways. The easiest way is through Settings. Or you can use the Registry if you prefer the command line. Either way works the same. Once enabled, your pen will act like a mouse instead of scrolling the screen.
Leave a Reply