How to Enable or Disable Title bar window Shake in Windows 11
Go to Settings > System > Multitasking and toggle the “Title bar window shake” option on or off. This feature lets you minimize all other windows by shaking the active window’s title bar.
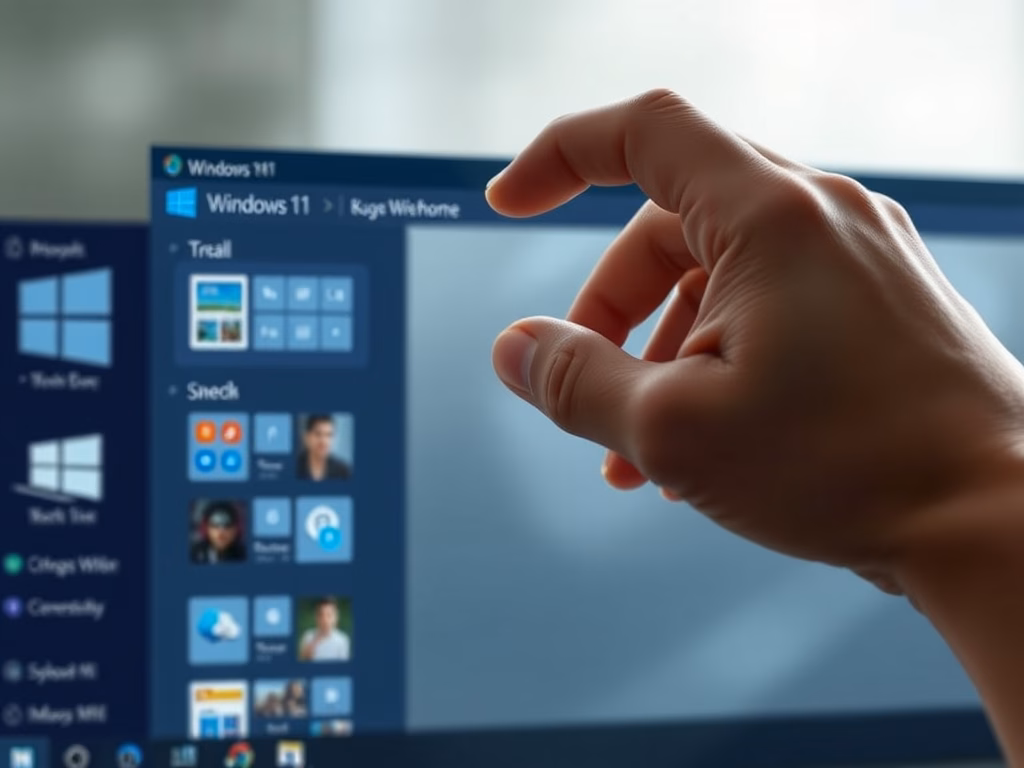
What is Aero Shake?
Aero Shake in Windows 11 is a neat trick that helps you tidy up your screen fast. When you grab a window’s top bar and give it a quick shake, all your other open windows get minimized. This feature helps you focus on the one task you’re working on, free from distractions.
First introduced in Windows 7, the ‘Shake’ window feature helps users focus on a single application. Shaking the mouse’s title bar quickly minimizes all other open windows. This trick proves useful when multiple windows clutter the screen, allowing immediate focus on a single program.
How to Use Aero Shake
- Click and hold the top bar (title bar) of the window you want to keep open.
- Move your mouse quickly back and forth (“shake” the window).
- All other windows will minimize.
- To bring those windows back, shake the same window again.
How to Turn On or Off Aero Shake in 🪟 Windows 11
Aero Shake is a Windows 11 feature that you can turn on or off in the main Settings app. Aero Shake lets you quickly hide other windows by shaking the title bar of the window you want to keep. If Aero Shake is not working or you do not want to use Aero Shake, the Settings app provides options to manage this feature.
Step 1Open Windows Settings
- Click the Start menu (the Windows icon at the bottom left) and select Settings.
- OR press
Windows key + Ion your keyboard to open Settings quickly.

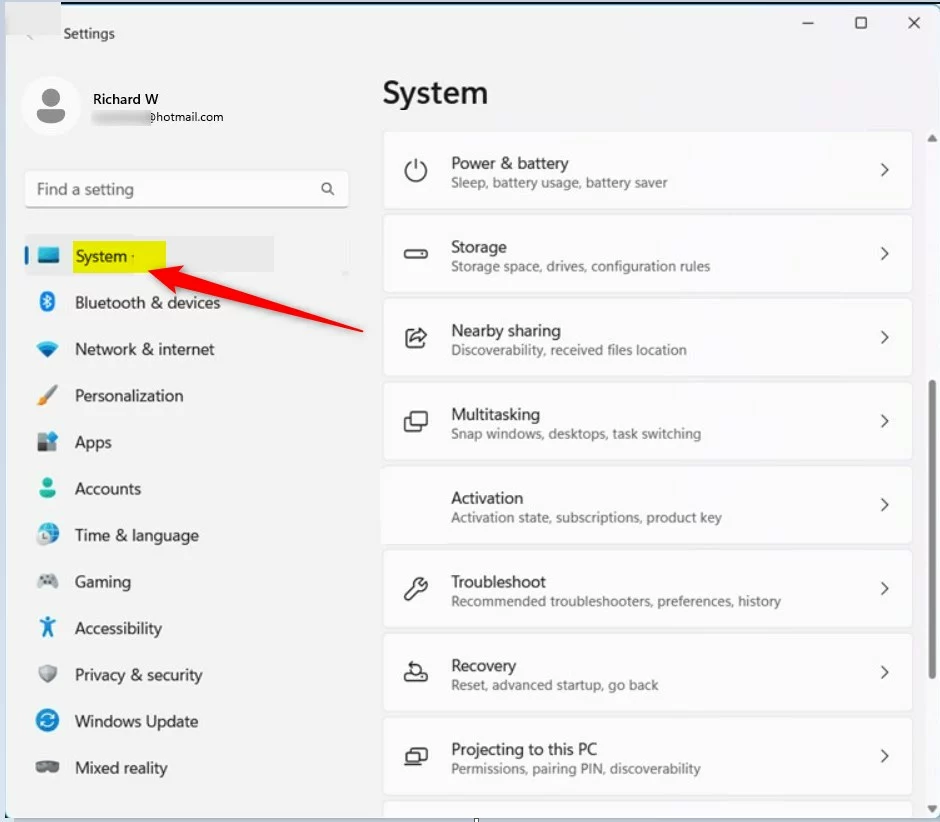
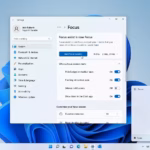
Step 2Go to System Settings
On the left side of the Settings window, click System.
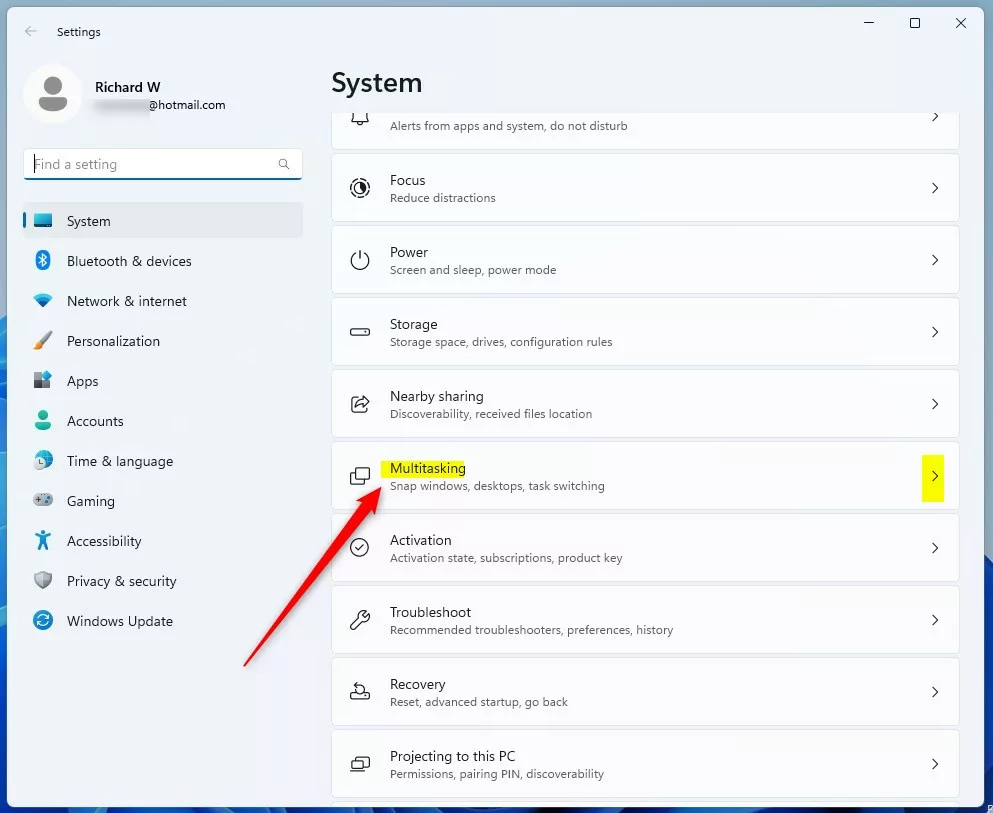
Step 3Open Multitasking Settings
On the right side, find and click the Multitasking section to open it.
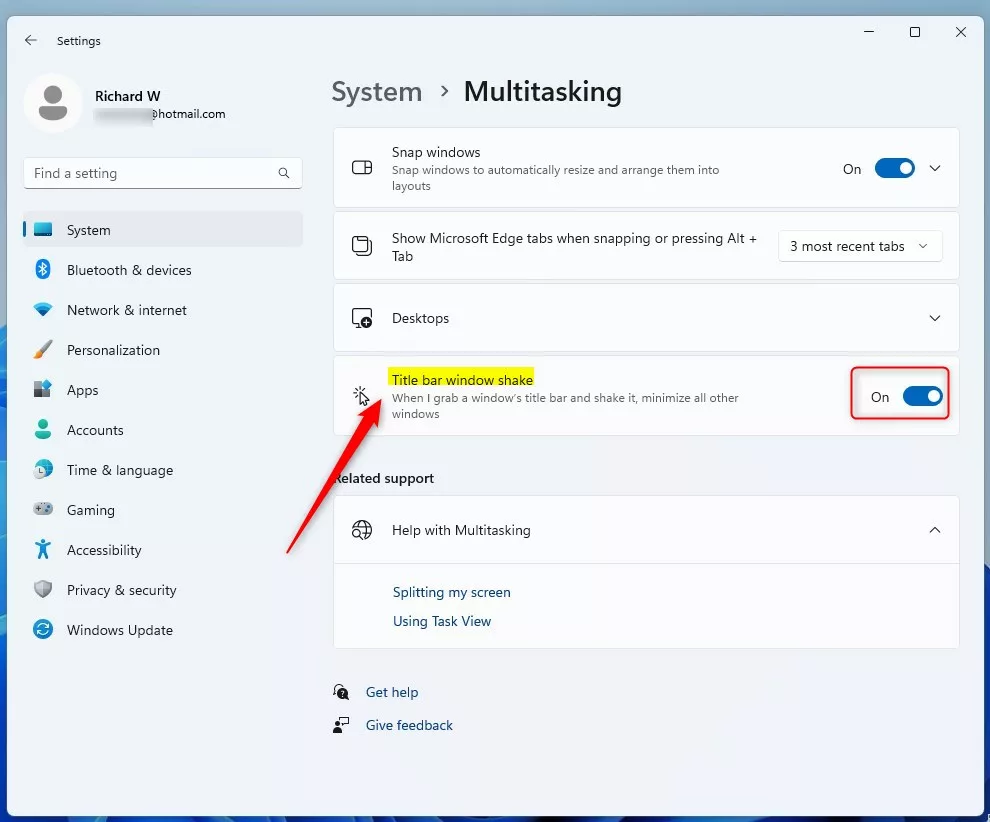
Step 4Enable or Disable Aero Shake
To enable or disable Aero Shake in Windows 11, use the Settings app. Navigate to System, then Multitasking. Find the option for shaking your mouse pointer and flip the switch to ‘On’ to enable it or ‘Off’ to disable it .
- Turn the switch On to enable Aero Shake.
- Turn the switch Off to disable Aero Shake.
You have now turned Aero Shake on or off in Windows 11. Try shaking a window’s title bar to see it in action!
Summary
Aero Shake offers a speedy way to declutter your Windows 11 screen by minimizing all but one window. Grab the title bar of the window you want to keep and give it a shake. You can easily turn this handy Aero Shake feature on or off in the Windows 11 Settings app under System, then Multitasking.- Aero Shake helps you quickly minimize all windows except the one you want to focus on.
- To use it, click and hold a window’s title bar and shake it with your mouse.
- Turn Aero Shake on or off through the Settings app under System > Multitasking.
- This feature is easy to enable and disable, so you can choose what works best for you.
- For more Windows 11 tips, visit Geek Rewind.
Does 🪟 Windows 11 have aero shake?
Yes, Windows 11 has the Aero Shake feature, but it’s not turned on automatically, so you may need to enable it yourself.
Does 🪟 Windows 11 use Aero?
Unfortunately, Windows 11 doesn’t currently offer an official “Aero Glass” theme like Windows 7 did.
Was this guide helpful?

About the Author
Richard
Tech Writer, IT Professional
Richard, a writer for Geek Rewind, is a tech enthusiast who loves breaking down complex IT topics into simple, easy-to-understand ideas. With years of hands-on experience in system administration and enterprise IT operations, he’s developed a knack for offering practical tips and solutions. Richard aims to make technology more accessible and actionable. He's deeply committed to the Geek Rewind community, always ready to answer questions and engage in discussions.


No comments yet — be the first to share your thoughts!