
This article will show you how to turn on or off Skype push notifications on multiple devices using Windows 11.
Skype is a popular video chat and messaging application by Microsoft. It allows users to make voice and video calls, send instant messages, and share files with other Skype users for free over the internet.
One can configure many settings with Skype, including turning contact-only Skype calls on or off, hiding or unhiding the Today tab, turning Auto-download photos and files on or off, pasting copied messages as quotes, changing text size, sending messages with Enter key, showing the mini menu when selecting text, turning notifications on or off, showing or hiding your account in Skype search results, enabling or disabling your phone number in search results, automatically answering incoming calls and starting videos, turn reduce data usages on or off, enable or disable contact online notifications, and more.
A new feature allows you to receive push notifications even while using Skype on another device. You can turn it on or off from the app in Windows.
Enabling or disabling push notifications across multiple Skype devices can help you better manage your notifications. For example, if you have Skype installed on your phone, tablet, and computer, you may receive the same notification multiple times.
Enabling push notifications on only one device can avoid notification overload and ensure you receive notifications only on your preferred device. Additionally, disabling push notifications can help you preserve battery life on your devices.
Turn push notifications on or off across multiple devices in Skype
As mentioned above, you can enable or disable push notifications across multiple devices in Skype.
Here’s how to do it.
First, launch the app by clicking the Start menu and selecting it on the All Apps list.

You can also launch the app from the Taskbar or Taskbar overflow.

Click the Settings and more ( …) button in the Skype window next to your profile picture and select Settings on the menu.

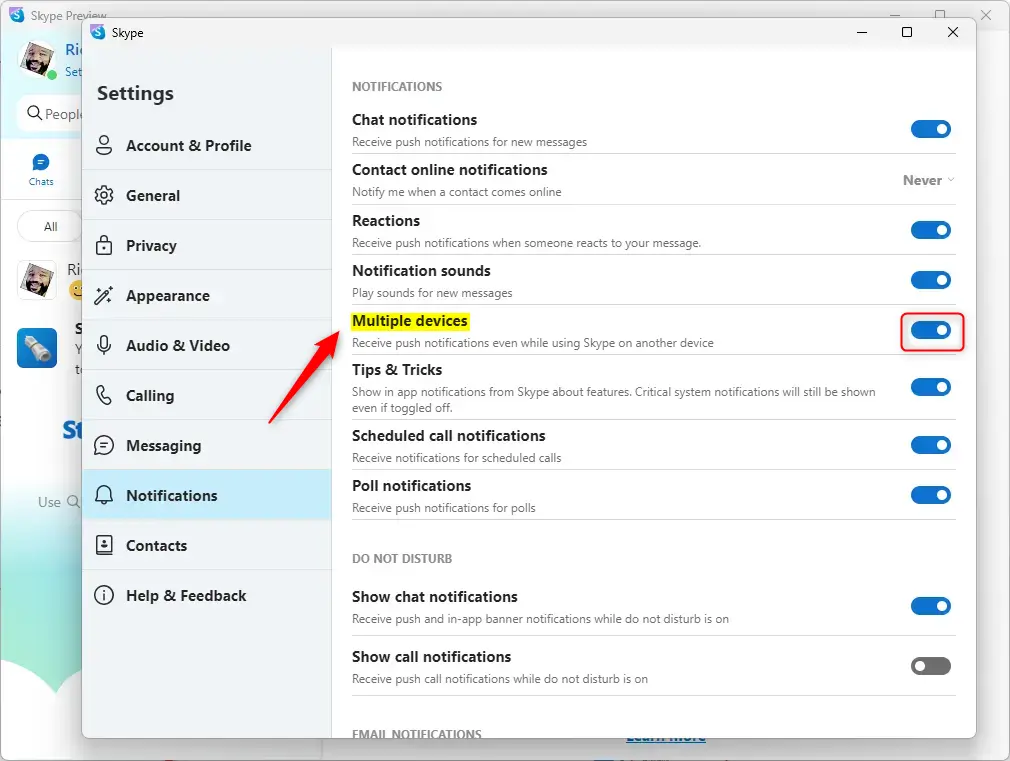
On the Settings page, select the Notifications on the left.

Next, select the “Multiple devices” tile under NOTIFICATIONS. Then, toggle the switch button to the On position to enable it.
To disable it, toggle the switch button to the Off position.
Exit the Settings page when you’re done.
That should do it!
Conclusion:
- Enabling or disabling push notifications across multiple devices in Skype on Windows 11 is a useful feature for managing notifications effectively.
- Enabling push notifications on only one device allows users to avoid notification overload and ensure they receive notifications only on their preferred device.
- Conversely, disabling push notifications can help preserve device battery life and prevent the same notification from being received multiple times on different devices.
- This feature gives users greater control over their notification preferences and enhances their Skype experience on Windows 11.


Leave a Reply Cancel reply