
This brief tutorial shows students and new users how to enable the Network Discovery and Sharing option in Windows 10.
Network Discovery is a feature in Windows that allows Windows computers to find and discover other computers and devices on a network. The discovery feature is automatically turned on when connected to a private network, like your home or workplace.
Public networks like guest Wi-Fi or networks that are not trusted are disabled so that other machines do not automatically discover your devices.
In some instances, Network Discovery is disabled in private networks as well and won’t automatically allow other machines to be discovered.
If Network Discovery is disabled in a private network and wishes to enable it, the steps below should help you.
To get started with turning Network Discovery in Windows on or off, follow the steps below:
Enable Network Discovery
If your Windows devices cannot see or discover each other on your private network, Network Discovery will likely be disabled.
To enable Network Discovery:
Click Start and go to Settings.
When the Settings window appears, click Network & Internet.
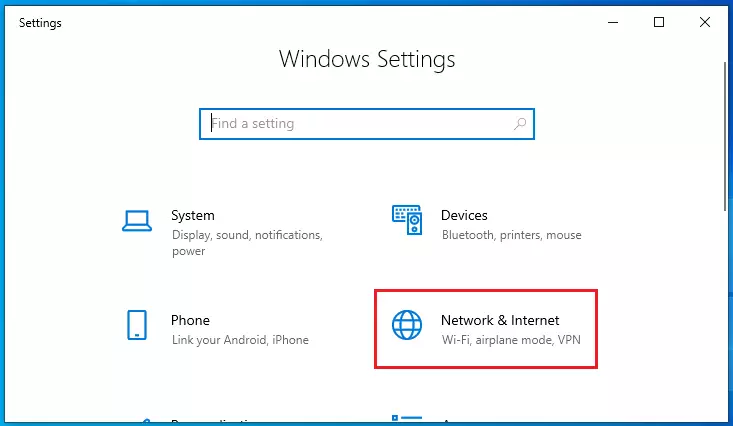
The Network & Internet page will display your Network and Internet-related settings.
In the panel on the left, click Wi-Fi (if you’re connected to a wireless network) or Ethernet (if you’re connected to a network using a network cable).
A window with settings for your network will appear on the right, as shown below.
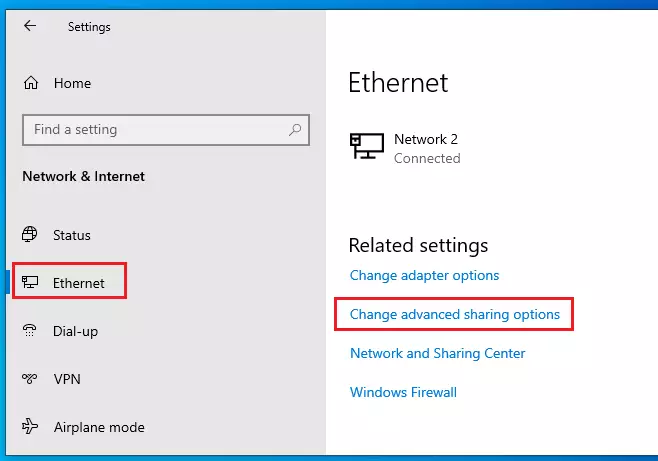
Under Related settings, click Change Advanced Sharing options.
Expand the profile assigned to your network connection in the Advanced Sharing option pane.
It should be labeled “current profile” when on a designated network. Since I’m on my home network, it shows Private as my current profile.
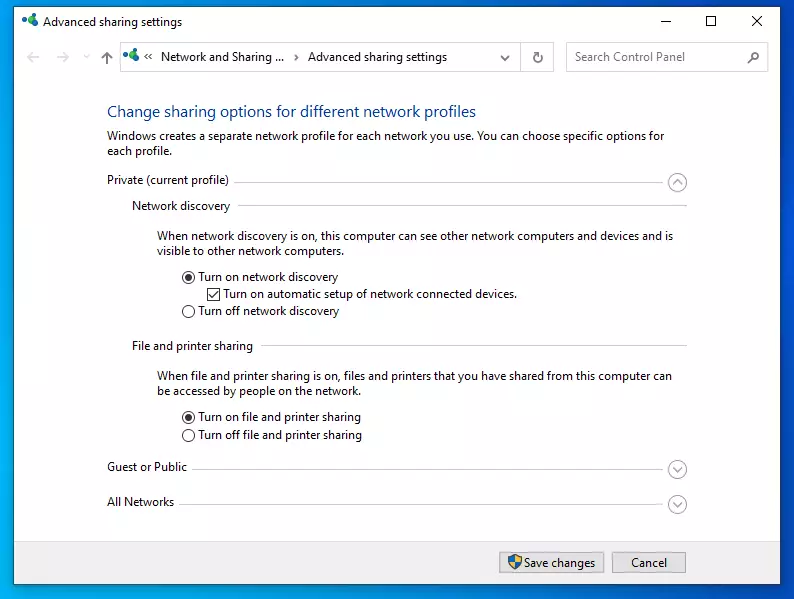
Check the boxes to Turn on network discovery and File and printer sharing.
When you’re done, click Save Changes and exit.
Public Folder Sharing
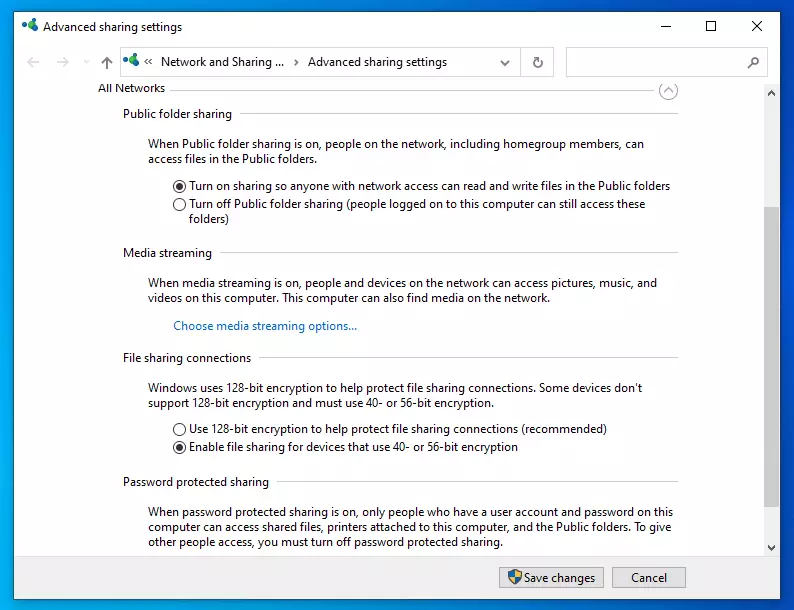
On the same Advance sharing options page, scroll down All networks.
You should see settings for Public folder sharing, Media streaming, File sharing connections, and Password-protected sharing.
Windows should automatically turn on File and printer sharing in private networks. However, in some instances, this will not be enabled.
If you can not automatically find printers and shared resources in your private network, the File sharing option may be disabled.
Only people with accounts on the local computer or in the domain environment can access shared files and printers if you enable password-protected sharing.
Make your changes and save, then exit.
Command Line
The settings above can quickly be done using the commands below as administrator.
netsh advfirewall firewall set rule group="File and Printer Sharing" new enable=Yes
netsh advfirewall firewall set rule group="Network Discovery" new enable=Yes
It would be best to open the command prompt as administrator to run the above commands.
Conclusion:
This post showed you how to enable Network Discovery and File and printer sharing in Windows. If you find any error above, please use the form below to report.


Leave a Reply Cancel reply