This guide will help you turn on BitLocker, a tool built into Windows 11 that keeps your files safe by locking your whole drive with encryption. This means if someone tries to access your computer without permission, they won’t be able to see your data.
Note: BitLocker is not available on Windows 11 Home edition. You need Windows 11 Pro, Enterprise, or Education edition.
What is BitLocker?
BitLocker protects your computer by locking the entire drive where your files are stored. Even if someone steals your computer or hard drive, they won’t be able to open your files without the right password or key.
Step 1: Make Sure You Are Using an Administrator Account
To turn on BitLocker, you need to be signed in as an administrator. If your account is not an administrator, ask the person who manages your PC to help you.
Step 2: Check for TPM Chip
Most computers that support BitLocker have a special chip called a TPM (Trusted Platform Module). This chip helps keep your encryption keys safe.
If your PC does not have TPM, don’t worry — we will show you how to set up BitLocker without it later.
Step 3: Turn on Device Encryption (Easy Way)
Follow these steps to turn on BitLocker Device Encryption on supported devices:
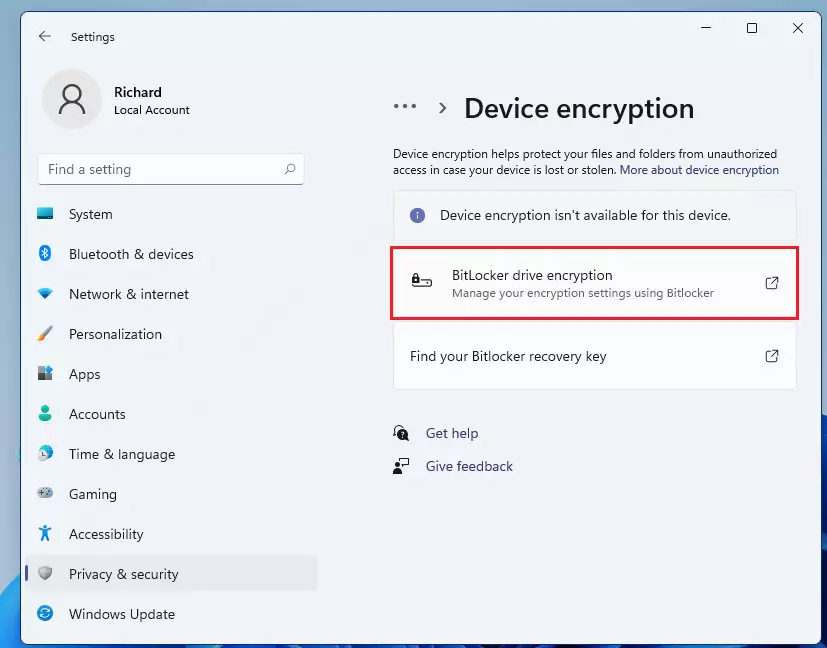
- Open the Settings app. You can do this by clicking the Start menu and selecting Settings, or by pressing Windows key + I on your keyboard.
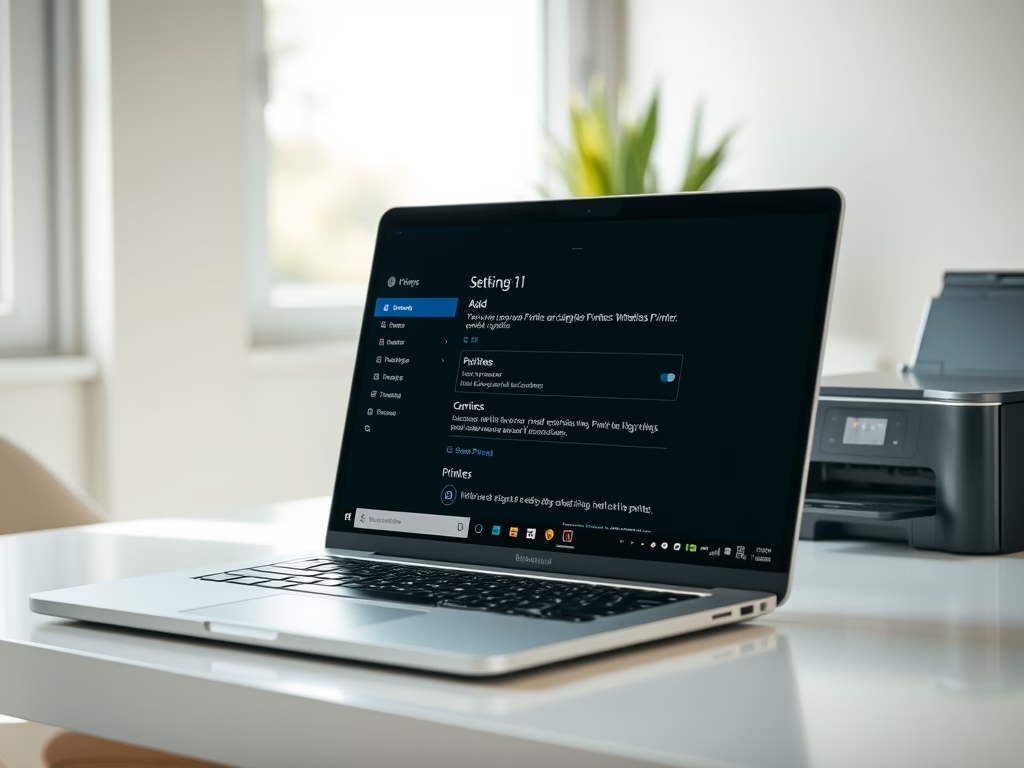
- Click Privacy & security on the left side.
- Find and click Device encryption on the right side.
- Toggle the switch to On.
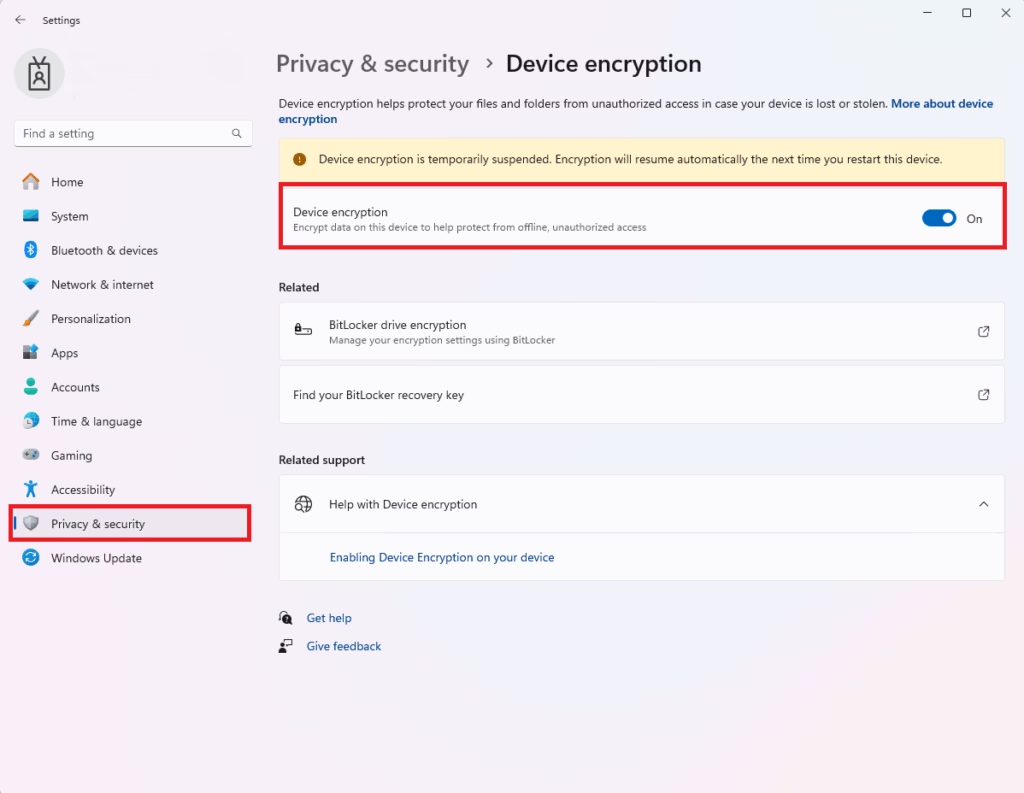
Once you turn it on, your drive will start encrypting and your data will be protected.
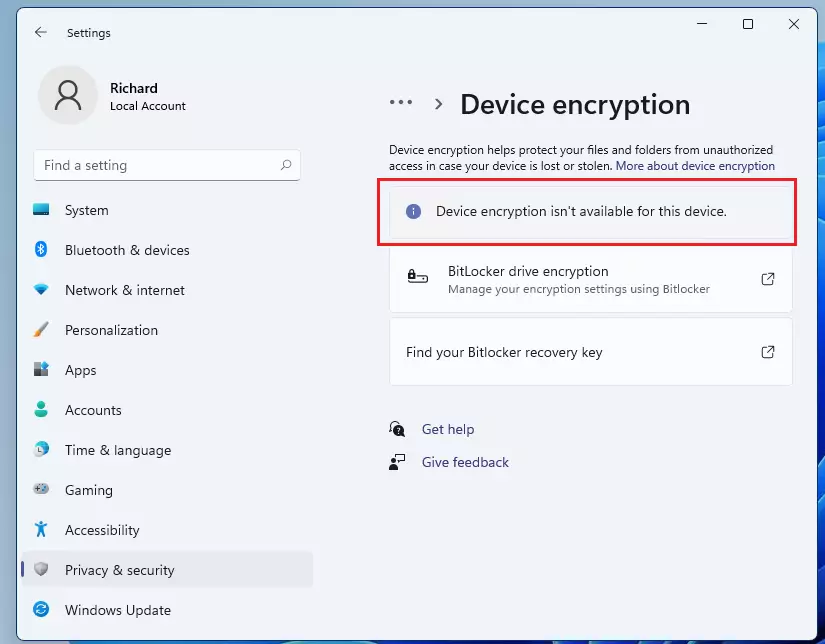
What if You See “Device encryption isn’t available for this device”?
This means your PC doesn’t have a TPM chip or doesn’t support device encryption directly. You can still use BitLocker with a simple workaround.
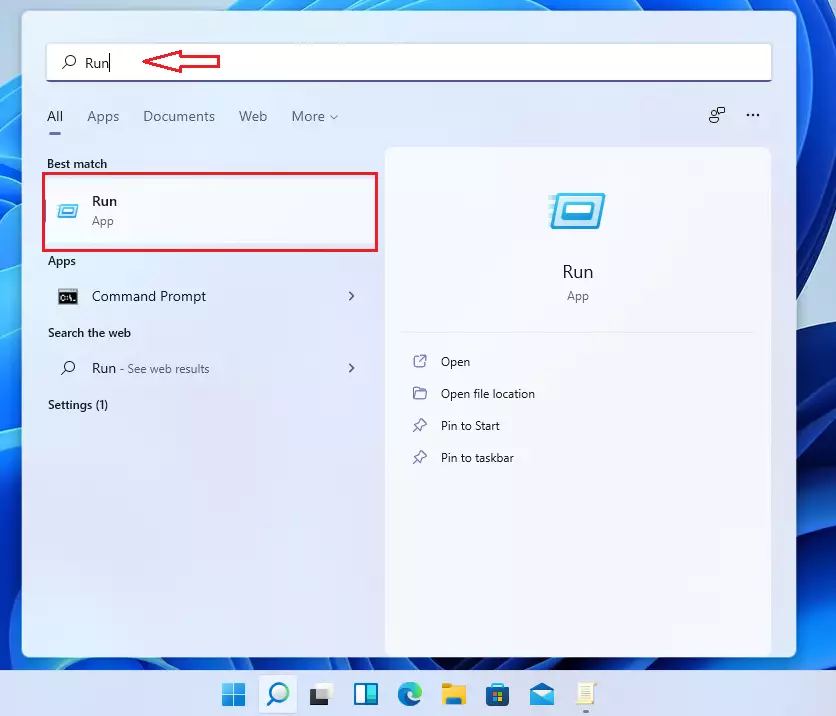
Step 4: Use BitLocker without a TPM Chip (Workaround)
Here’s how to allow BitLocker to work on your PC without TPM:
- Click the Start button, type Run, and open the Run app.
- In the Run box, type
gpedit.mscand press Enter. This opens the Group Policy Editor. 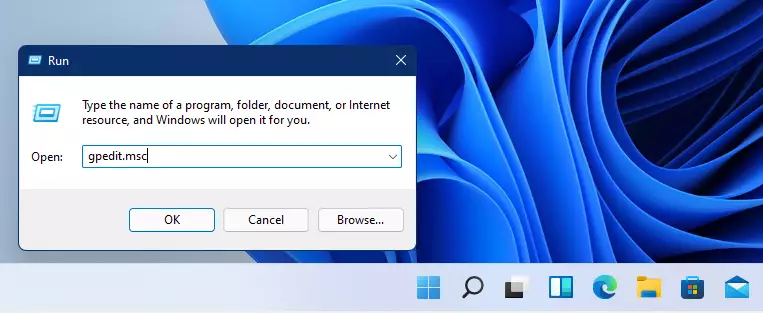
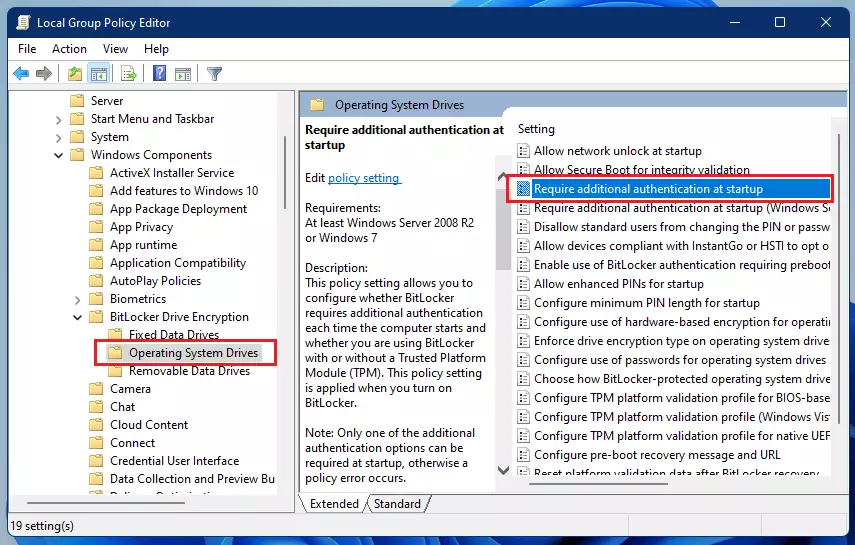
- In Group Policy Editor, follow this path:
Local Computer Policy > Computer Configuration > Administrative Templates > Windows Components > BitLocker Drive Encryption > Operating System Drives - Double-click Require additional authentication at startup.
- Select Enabled.
- Below that, check the box: Allow BitLocker without a compatible TPM (requires a password or a startup key on a USB flash drive).
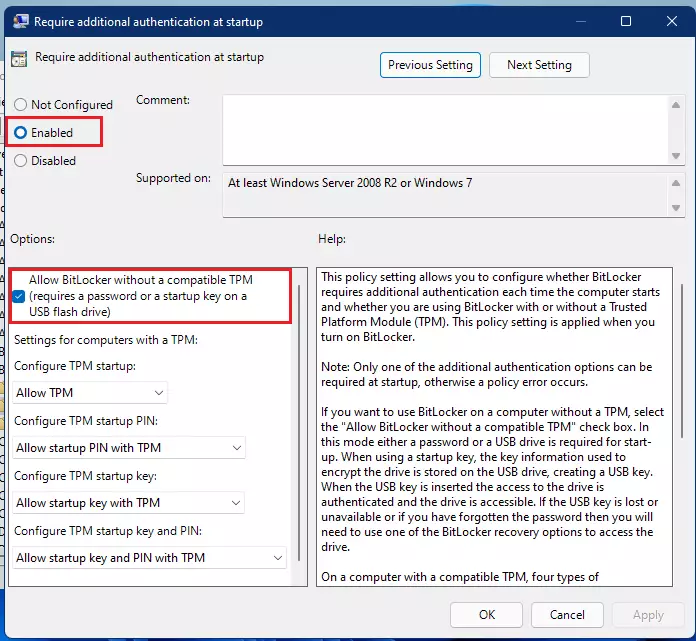
- Click Apply and then OK. Close the Group Policy Editor.
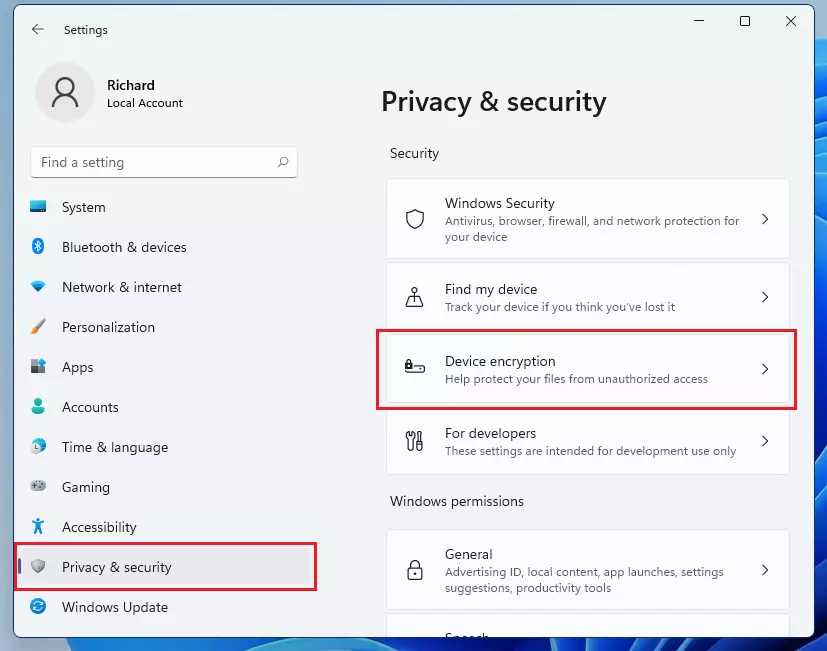
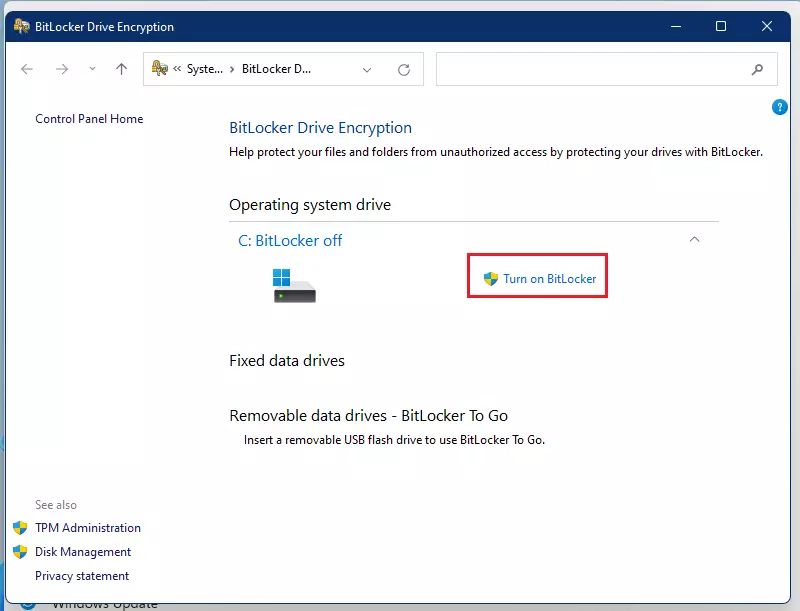
Now, go back to Settings > Privacy & security > Device encryption or alternatively:
- Open Settings → System → Privacy & security → Device encryption.
- If you don’t see Device encryption, open Control Panel → BitLocker Drive Encryption.
Click Turn on BitLocker.
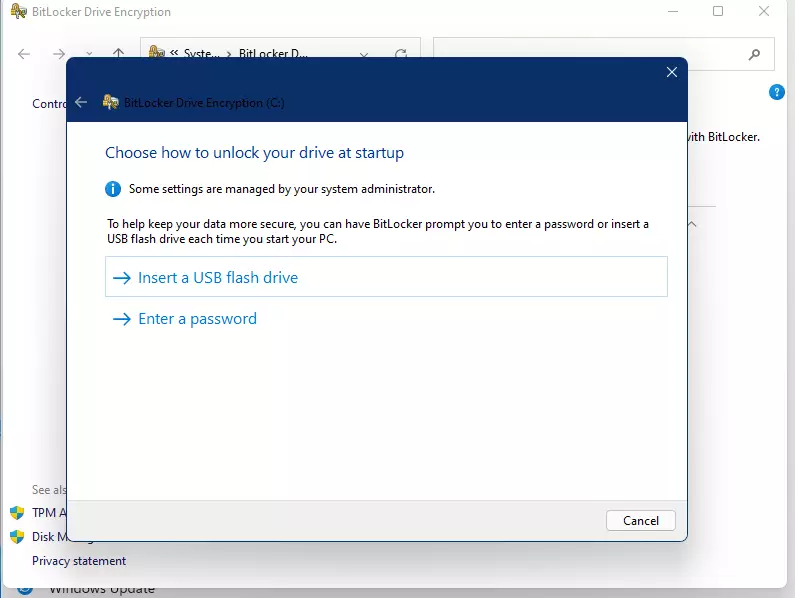
Since you don’t have TPM, you will need either a password or a USB flash drive with a startup key every time you start your PC.
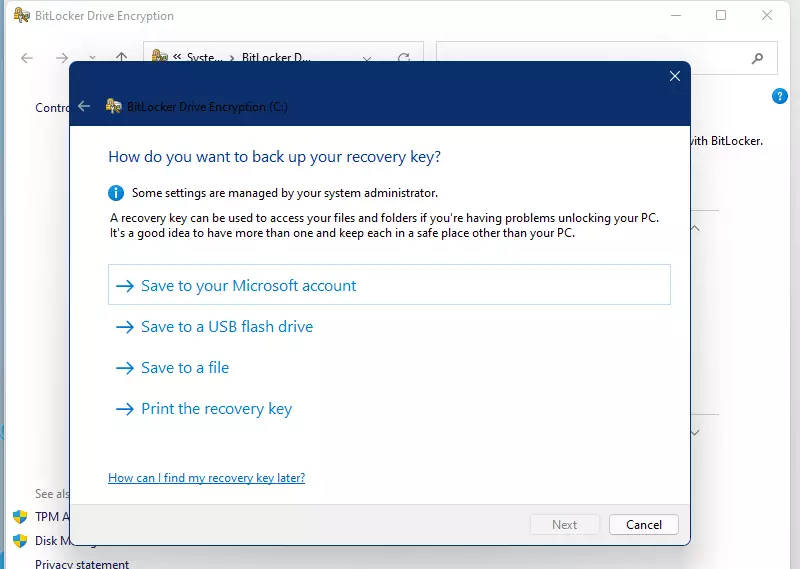
Insert a USB flash drive when asked, and save your BitLocker key there:
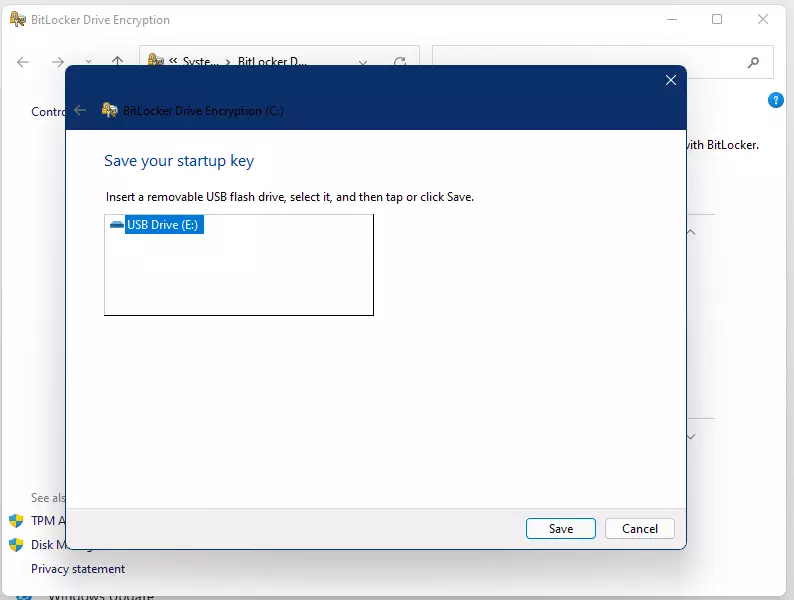
You will also be asked to save a recovery key. This key is very important. Keep it somewhere safe (print it or save it to a secure cloud storage). It helps you unlock your PC if you forget your password or lose your USB key.
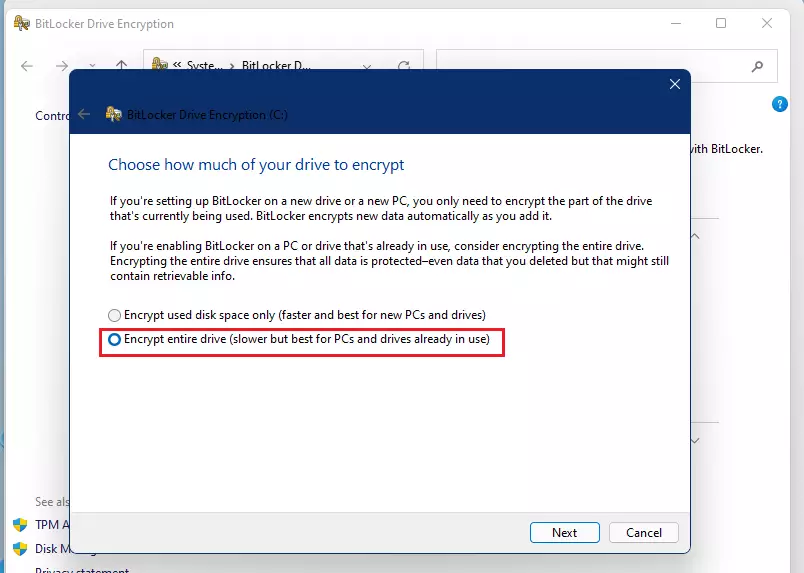
Finally, choose to encrypt the entire drive, not just used space, for better security.
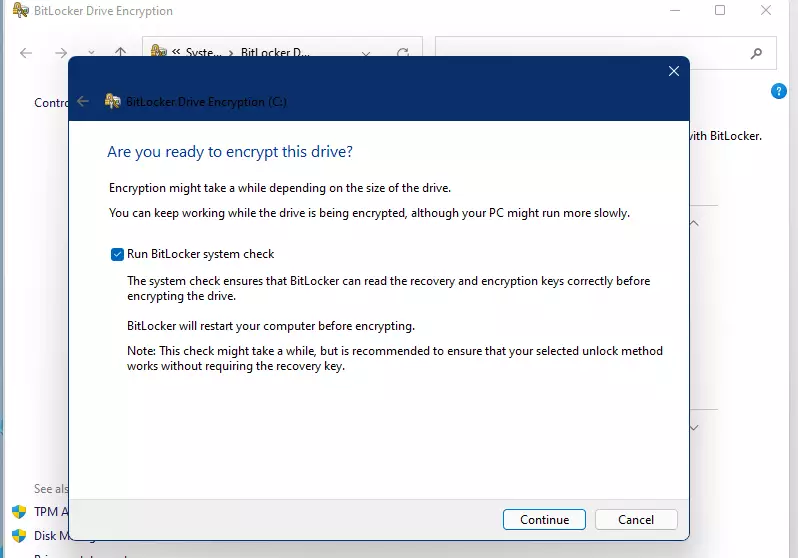
Complete the wizard and wait for the encryption to finish. This may take some time depending on your drive size.
What Happens After BitLocker Is On?
When you start your PC, you will need to enter your password or plug in the USB flash drive that contains the startup key. Without these, you won’t be able to log into Windows or access your files.
Summary
- BitLocker helps keep your files safe by locking your entire drive with encryption.
- It’s available on Windows 11 Pro, Enterprise, and Education editions (not Home).
- If your PC has a TPM chip, turning on Device encryption is quick and easy.
- If your PC does NOT have TPM, you can still use BitLocker by changing a setting in Group Policy Editor.
- Always save your recovery key safely — it’s essential if you ever lose access to your PC.
If you want to learn more about checking your TPM version or resetting Windows Settings, here are helpful guides:
Stay safe and keep your data protected!
Leave a Reply Cancel reply