
This post shows students and new users how to disable and remove the Google Accelerated Mobile Pages (AMP) feature from WordPress websites and pages.
AMP speeds up your website loading time and provides performance boots for your audience and visitors. It does this by cutting out many HTML and JavaScript elements that tend to make websites load slowly.
However, not everyone has seen these benefits championed by Google and others. Some webmasters have reported that AMP hurts user engagement and performs poorly with AMP-enabled advertisements.
If you feel your AMP pages are useless and hurting your users’ engagement with your website, disable and remove them.
If you disable AMP from WordPress without adding appropriate redirects, it may cause a lot of trouble, including 404s, missing pages, and more.
To get started with disabling and removing AMP from WordPress, follow the steps below:
Disable AMP for WordPress
With AMP for WordPress installed, simply go to the Plugins page and deactivate the installed AMP plugin.
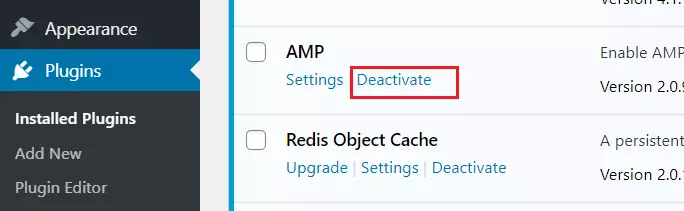
Once the plugin is deactivated, click the “Delete” link to remove it from WordPress.
Deleting the plugin will clean out its records, which are stored in the databases and related data from WordPress.
Setup redirect
Deactivating AMP and deleting the plugin are only halfway done. You can’t just remove the AMP plugin without adding redirects.
If Google is sending searchers to your AMP pages and none are available, they will all be shown error 404 pages. This isn’t good.
You want users visiting AMP pages to be redirected to the correct non-AMP pages. To do that, follow the steps below:
First, go to your Plugins page ==> Add New
Then, search for Redirection, as shown in the image below. When you find the Redirection plugin, click Install Now.

After installing the plugin, activate it.
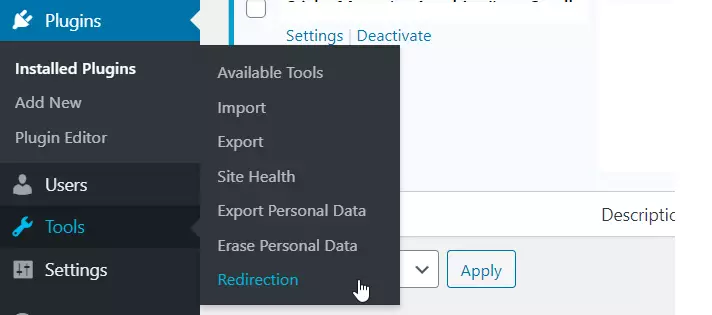
Once enabled, go to Tools ==> Redirection to set up the plugin. You may be prompted with a setup wizard. Follow through with the default options and finish.
On the settings page, add a new Redirection with the settings below:
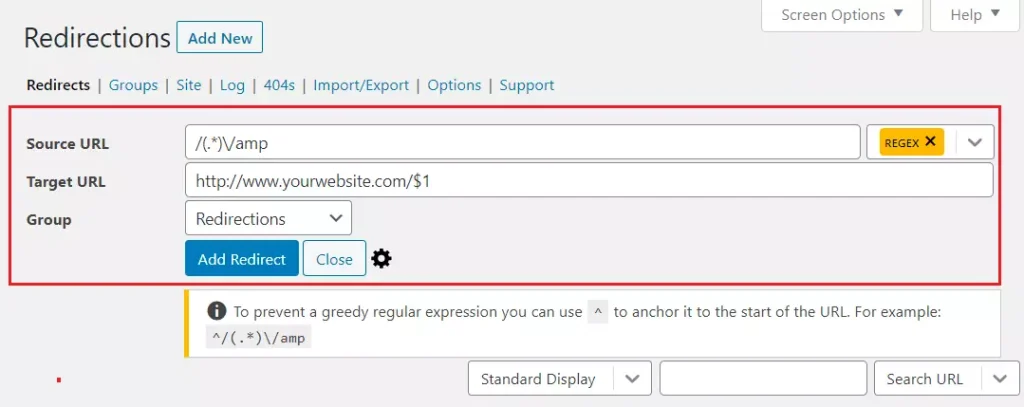
In the Source URL, type the line below
/(.*)\/amp
Then, select REGEX from the drop-down option to the right of the input box.
In the Target URL, type the line below:
http://www.yourwebsite.com/$1
Next, select the Group drop-down window and click Redirections.
When you’re done, click the Add Redirect button to complete the setup.
That should do it!
Conclusion:
This post showed you how to remove the AMP plugin from WordPress and enable redirects for AMP pages.
If you find any error above, please use the form below to report.
You may also like the post below:
Leave a Reply