
This article explains how to create a recovery drive in Windows 11.
We recently wrote a post that showed you how to create a system image in Windows 11. A system image is no good unless you can use it to restore your system.
You can read that post here.
In that post, we said that creating a system image takes a complete backup of everything on your PC’s hard drive, similar to taking a snapshot of your entire drive, system files, and everything.
You can then take that image and store it somewhere safe and secure. If you need to restore your computer, use the backup image.
To restore a PC using a Windows system image, you’ll need a recovery disk that helps boot Windows into advanced startup options when your PC doesn’t boot or you want to restore a system from a backup image.
It is recommended that whenever you create a system image, you should also create a recovery disk to restore Windows when disaster strikes.
Create a recovery drive to restore the system image in Windows 11
As mentioned above, you’ll need a recovery drive to restore a system image in Windows. You should also create a recovery disk whenever you create a system image.
Follow the steps below to create a recovery drive.
Windows recommends having at least 8GB of storage, and 16GB is recommended. Insert the drive into the computer’s USB slot.
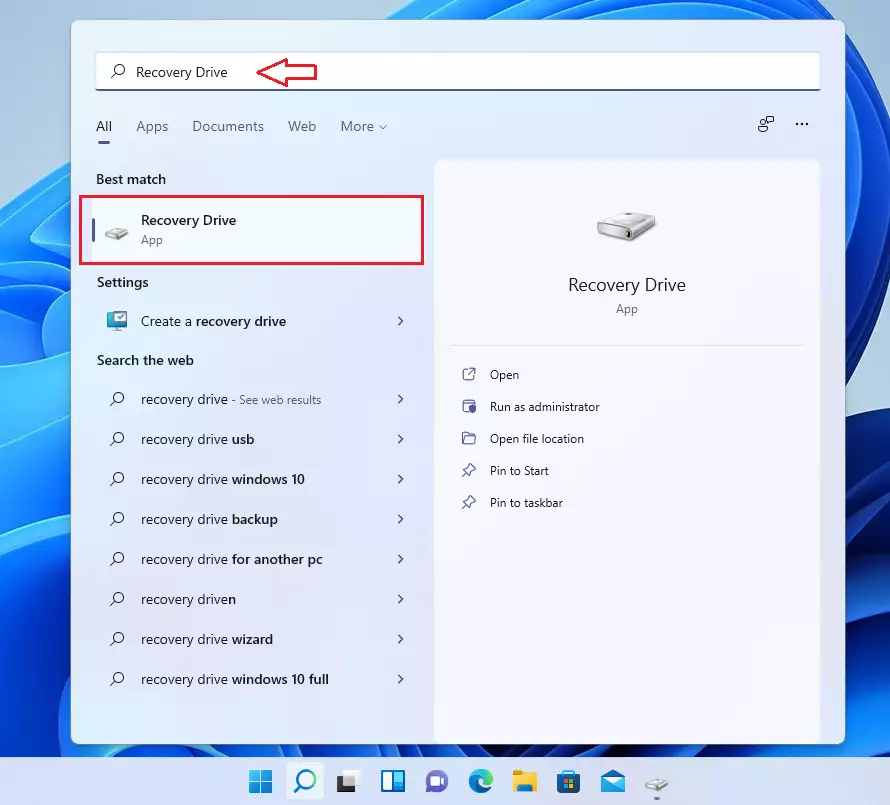
In Windows 11, click on the Start menu, then search “Recovery Drive,” as highlighted below. Select the app to open.
When the app opens, Windows will automatically search your computer for a suitable drive. Once the drive is located, click Next to continue.
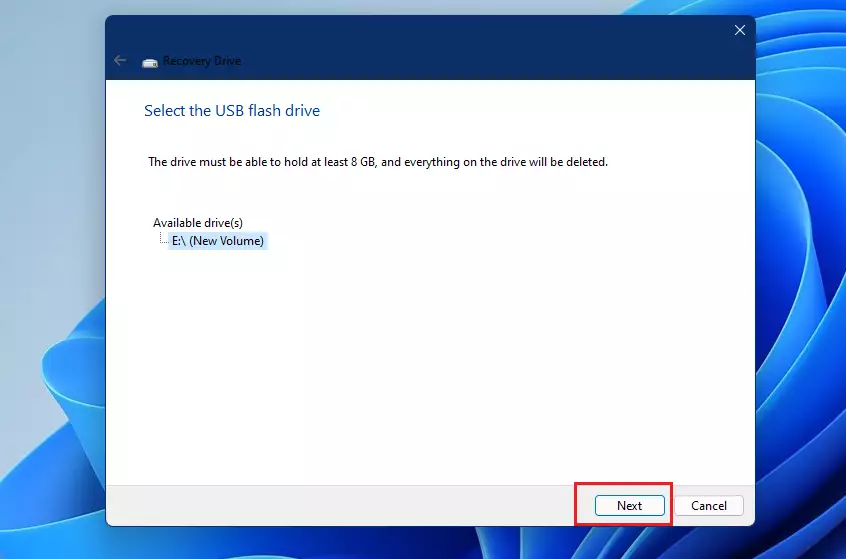
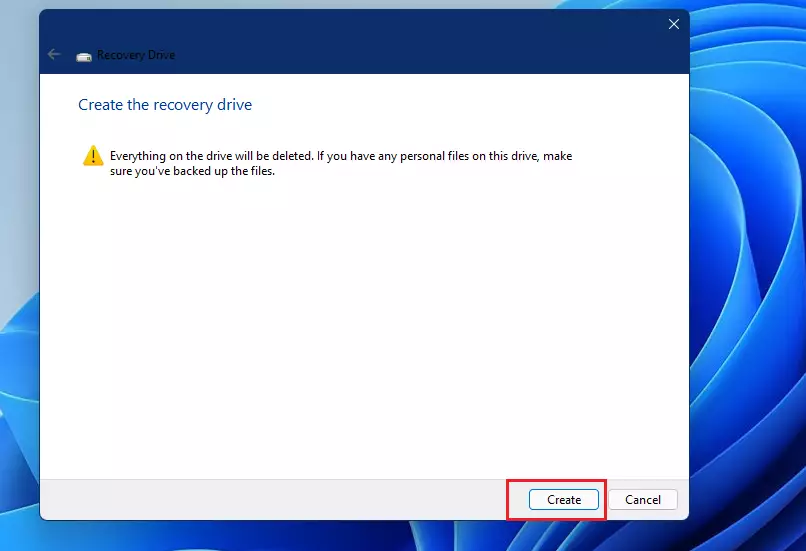
When will it prompt you that the drive will be formatted and everything on it will be deleted? If the drive contains personal files and data, back them up before erasing them.
Once ready, click the “Create” button.
Depending on the speed of your computer, this process might take hours. After that, the drive should be created and ready to use.
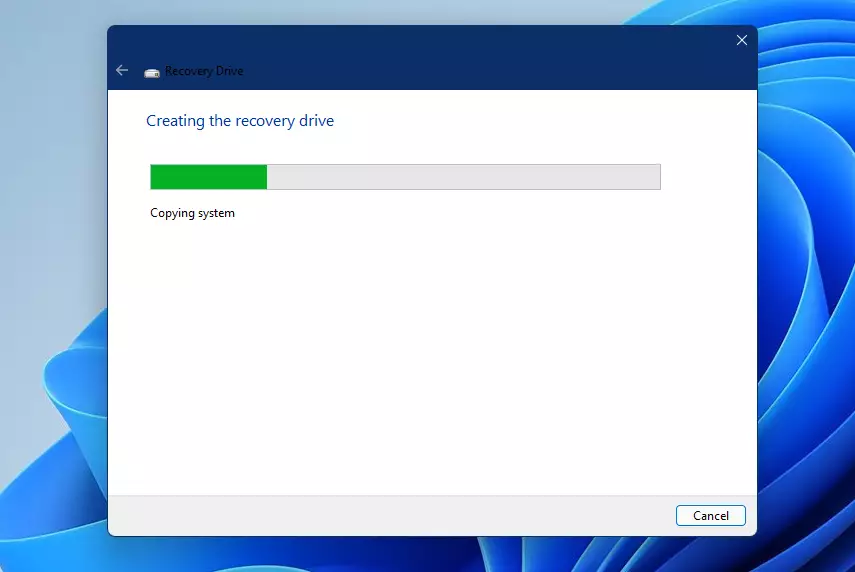
Once complete, store the recovery disk and the system image backup in a secure and safe place.
How to recover the system image in Windows 11
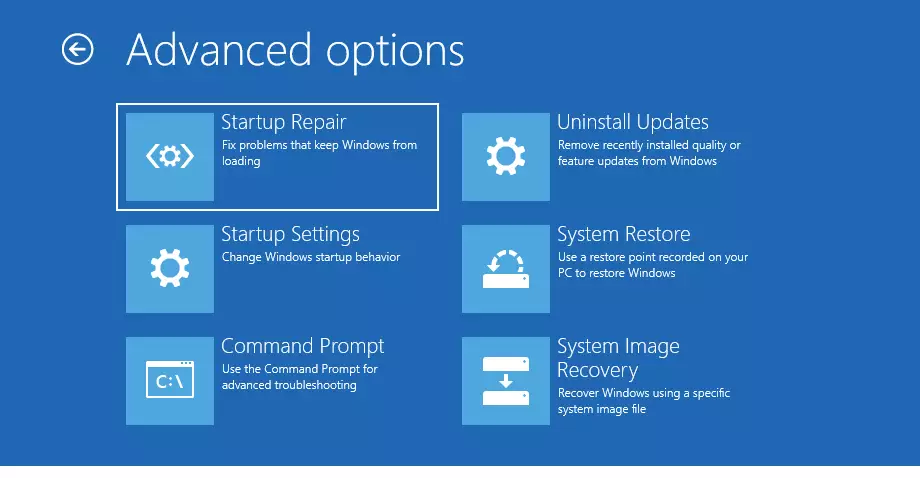
If you want to recover from a disaster or rebuild a new PC using the system image, use the recovery disk to boot. The recovery disk will help you boot into Windows Advanced options.
The advanced startup options have many tools, including System Restore, System Image Recovery, Automatic Repair, Command Prompt, and Windows Startup Settings.
That’s it!
Conclusion:
- Creating a recovery drive is essential for restoring your system during a disaster.
- A recovery disk allows you to access advanced startup options, which include various repair tools.
- Regularly back up your data and create system images to ensure your information is safe.
- Store your recovery drive and system image backup in a secure location.
- Following the outlined steps can prepare you for unexpected system failures and improve your Windows 11 experience.


Leave a Reply to Dave Tschanz Cancel reply