
This article provides a step-by-step guide on how to create a full system backup in Windows 11.
Creating a system image makes a complete backup of everything on your PC’s hard drive, similar to taking a snapshot of your entire drive, including system files and other data.
Creating a system image backup is beneficial when you need to restore your entire PC to a specific point in time, which is when the image was created. Typically, a complete system image is made once the PC has been tested and is functioning properly.
A system image backup is ideal for an important PC that has critical applications and a complex setup, which can be difficult and time-consuming to recreate. In this situation, creating a complete backup of the system and storing it in a safe location is the best approach.
The backup strategy in this post below should be considered for most users.
How to Backup and Restore in Windows 11
For complete image backup, continue below:
Create a complete system backup in Windows 11
As previously mentioned, system image backups are not suitable for most situations. They tend to be very large and include numerous unnecessary files.
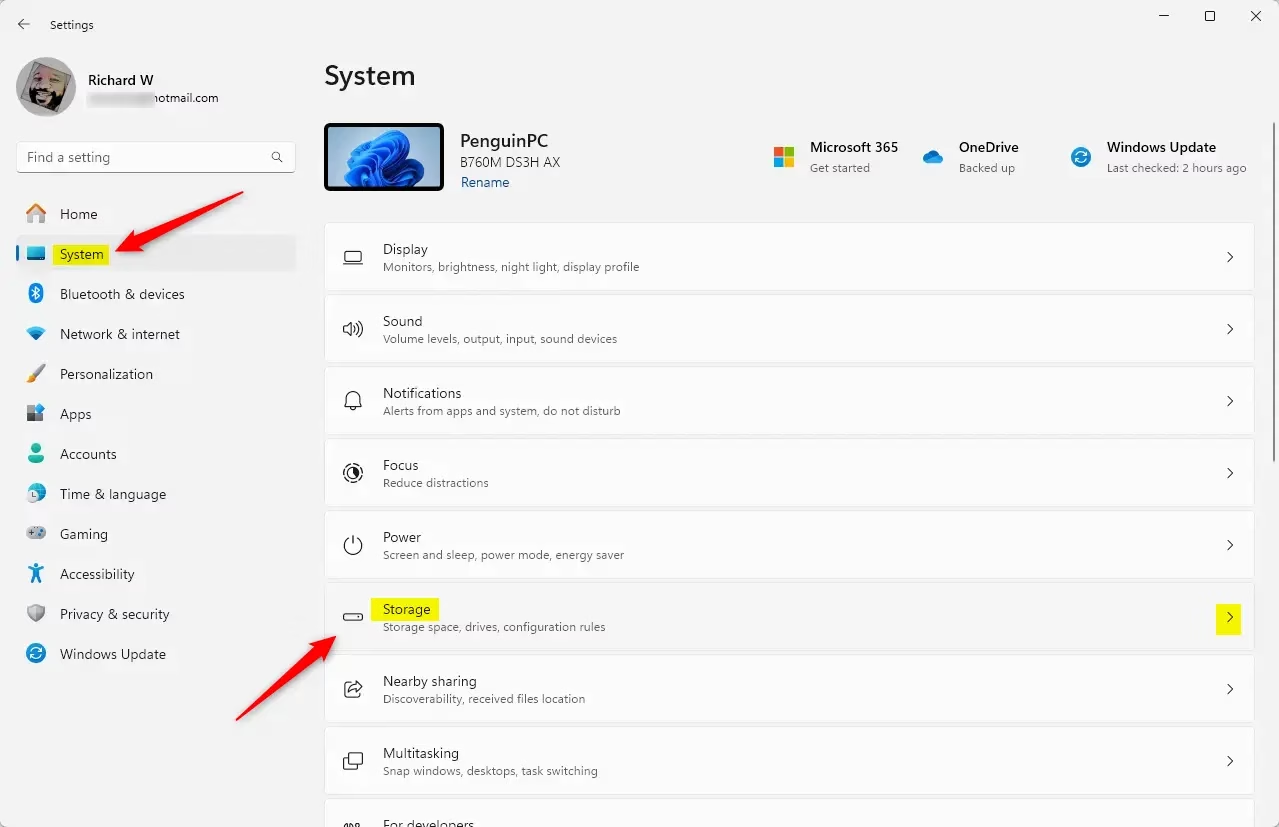
Windows 11 provides a centralized location for most of its settings. Users can manage system configurations, create new accounts, and update Windows from the System Settings pane.
To get to System Settings, you can use the Windows key + I shortcut or click on Start ==> Settings, as shown in the image below:

Alternatively, you can use the search box on the taskbar to search for Settings. Then select to open it.
In Windows Settings, navigate to System and select Storage from the right pane of your screen as shown in the image below.
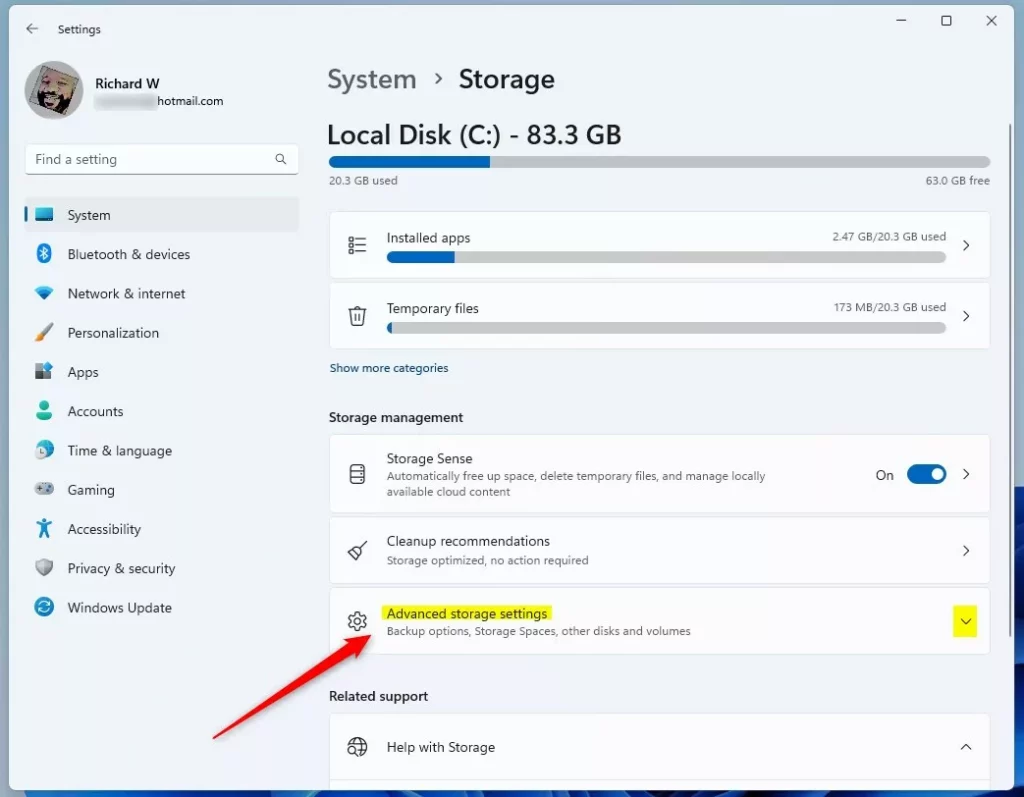
Select Advanced storage settings under Storage Management on the Storage settings pane to expand more storage options.
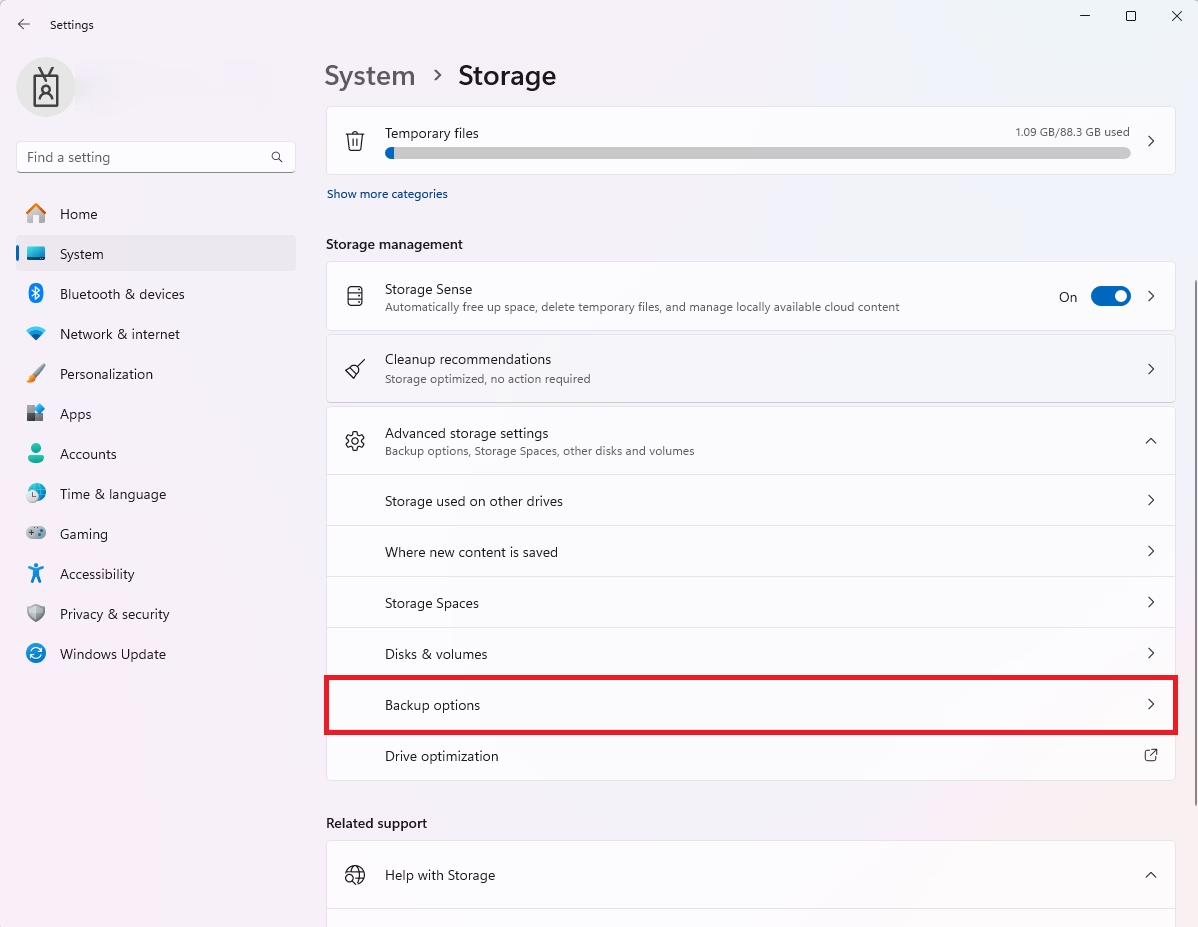
Next, select the Backup options
Toggle the button to enable File History backup.
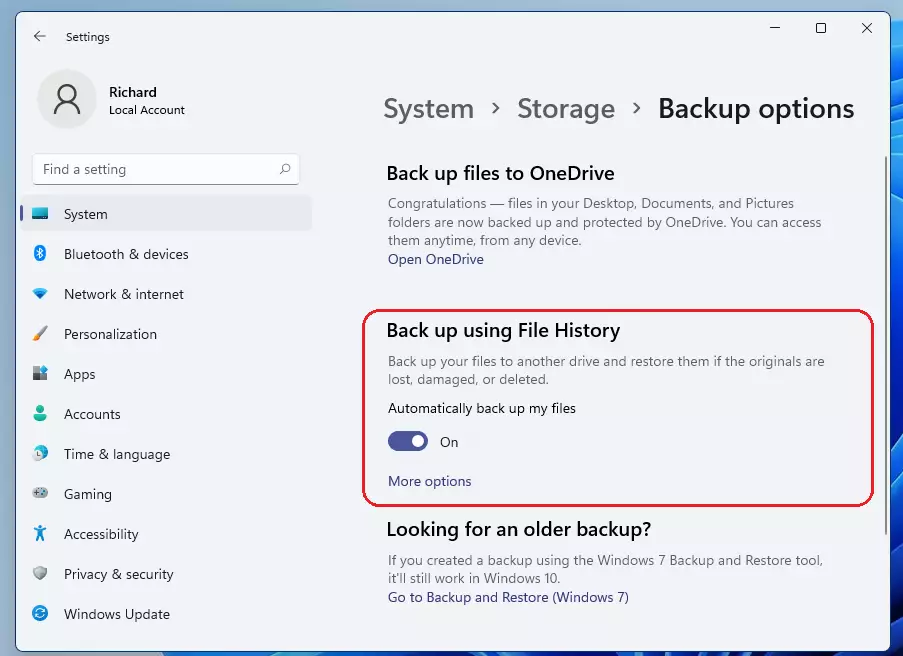
Then click Add a Drive to select the drive to back up the system image. A system image can only be saved on an external drive, CD/DVD, or network location.
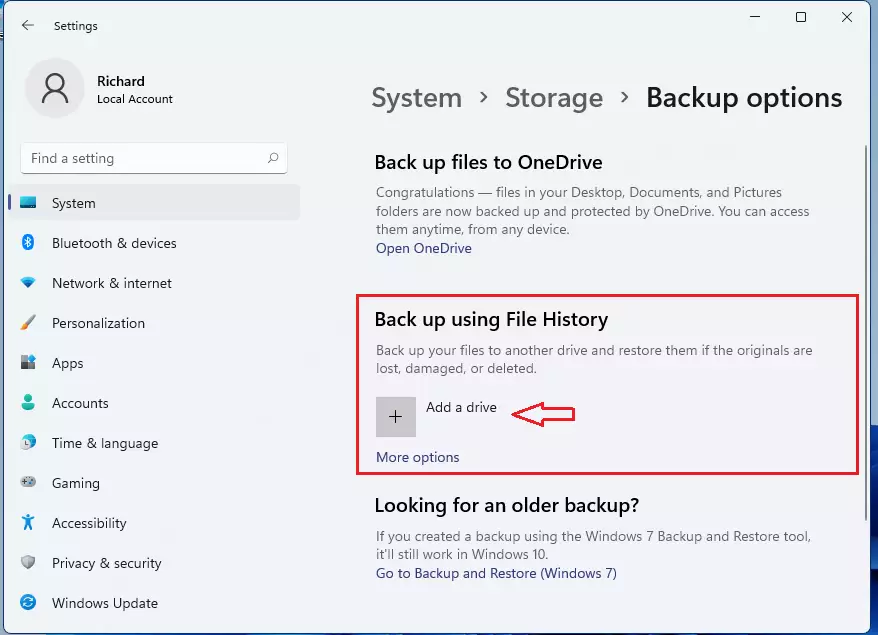
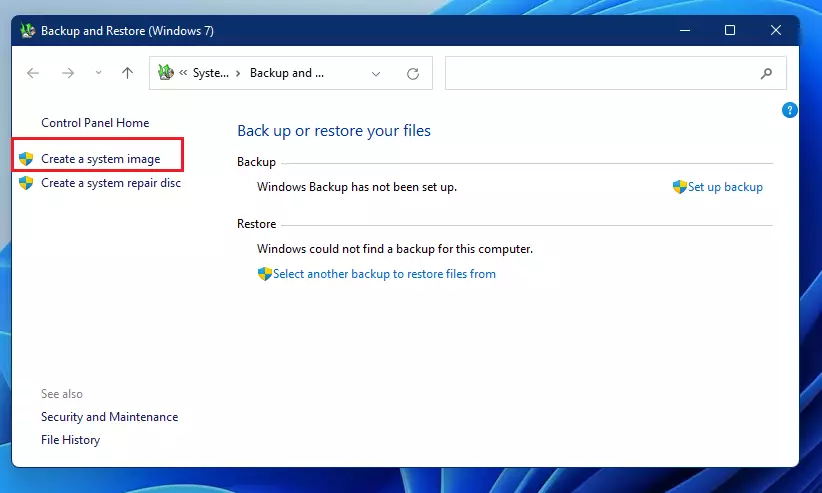
Next, click the link to Backup and Restore (Windows 7). Doing that will open another window in Control Panel.
Click on Create a system image.
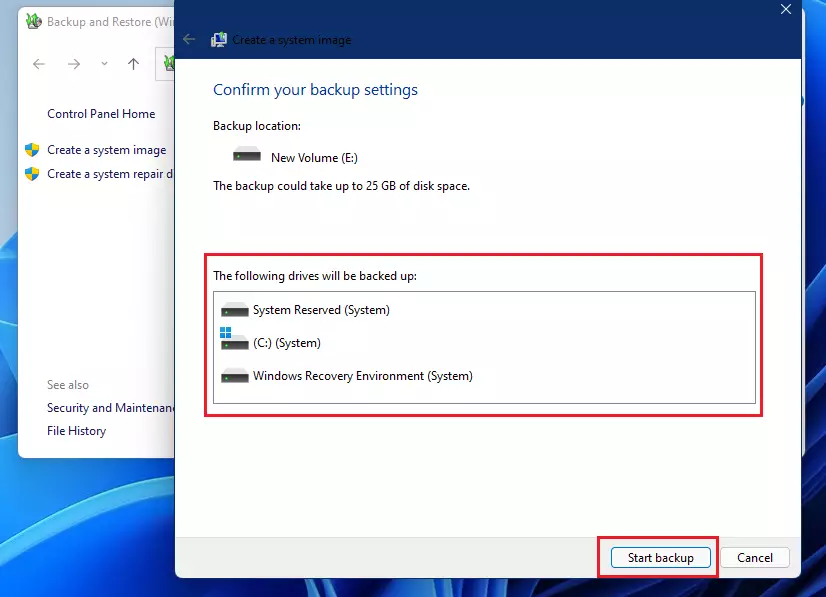
Next, select the destination to save the system image. For this post, we will be saving on an external hard disk.
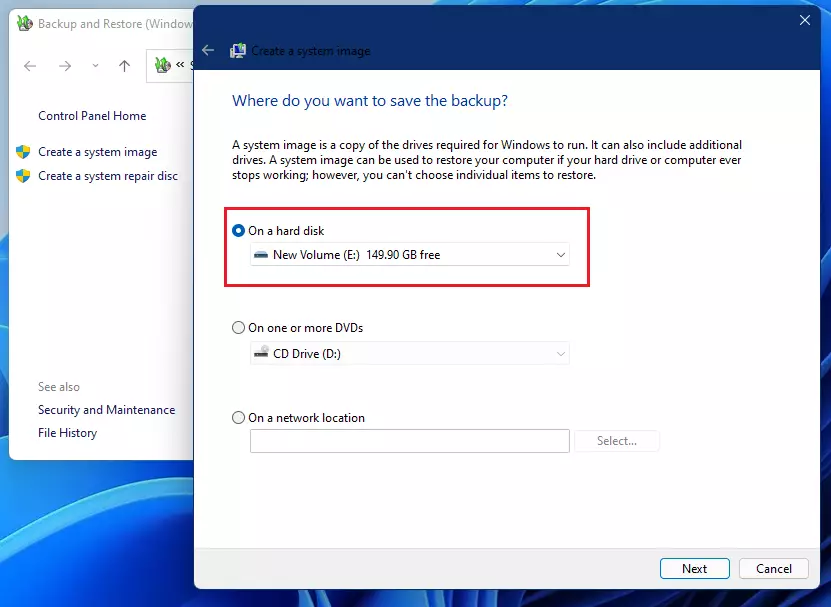
Finally, click Start Backup to begin the Backup process.
Wait for the process to complete. Depending on the size of your hard drive, this could take hours.
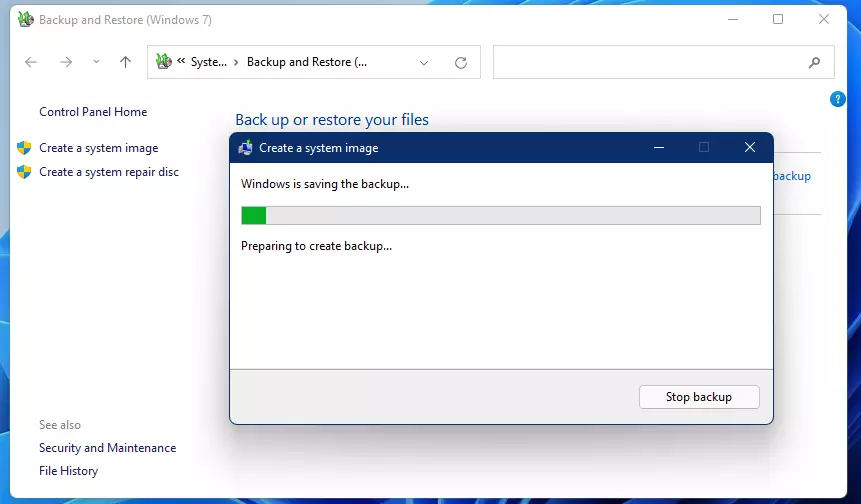
Once the Backup is complete, remove the drive and store it safely. The image on the drive can be used to restore your PC to the date and time of the creation.
Conclusion:
- Creating a complete system backup in Windows 11 is essential for safeguarding your data and ensuring you can restore your PC effectively.
- A system image backup benefits critical systems containing complex applications and settings.
- Updating your backups to capture recent changes and data regularly is recommended.
- Be aware that a system image backup may consume significant storage space, so evaluate your needs before proceeding.
- Always store your backup drive in a safe location to prevent data loss.
- For everyday users, supplementing a full backup with regular backups of important documents may be sufficient.


Leave a Reply to norman lawson Cancel reply