How to Check Wi-Fi Network Signal Strength in Windows 11
This guide explains how to check your Wi-Fi signal strength on Windows 11. Wi-Fi WLAN uses radio waves to connect your device to the internet. The quality of this connection signal strength determines how fast and reliable your internet feels.
Why check this? A weak signal causes slow speeds, buffering, or dropped connections. Walls and distance from the router are common causes of a weak signal.
What happens when done? You will know exactly how strong your connection is, helping you decide if you need to move closer to your router or buy a signal booster.
Option One : Taskbar Corner
Look at the Wi-Fi icon in the bottom right corner of your screen. The number of bars shown tells you the signal strength. More bars mean a stronger connection.

Option Two : Quick Settings
- Press Win+A to open Quick Settings.
- Click the arrow next to the Wi-Fi button.
- You will see a list of networks with their current signal strength shown by bars.


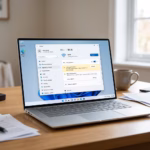
Option Three : Settings Menu
- Open Settings by pressing Win+I.
- Select Network & internet on the left, then click Wi-Fi on the right.
Here you can see the signal strength for your current connection. Click Show available networks to see the strength of all nearby networks.


Option Four : Task Manager
- Press Ctrl+Shift+Esc to open Task Manager.
- Click the Performance tab.
- Select Wi-Fi from the list on the left.
- The signal strength is displayed at the bottom of the window.

Option Five : Network and Sharing Center
- Open the Control Panel and click Network and Sharing Center.
- Your current network name is listed next to Connections. The bars next to it indicate your signal strength.
- Click the network name to open a status window that shows signal quality.


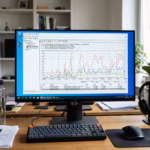
Option Six : Command Prompt
You can see the exact signal strength percentage using the command line. Note: This does not require admin privileges.
- Right-click the Start button and select Terminal or Command Prompt.
- Type the following command and press Enter:
netsh wlan show interfaces- Alternatively, for a simpler view, use:
- powershell
(netsh wlan show interfaces) -match '^\s+Signal' -replace '^\s+Signal\s+:\s+',''
The resulting percentage shows how strong your connection is. A higher number is better.

Troubleshooting Poor Signal
If your signal is weak, try these steps:
- Move your computer closer to the router.
- Avoid placing the router behind large metal objects or inside cabinets.
- Switch between 2.4GHz and 5GHz bands. 2.4GHz travels through walls better, while 5GHz is faster but has a shorter range.
- Check for channel interference by using a Wi-Fi analyzer app.
Advanced Diagnostics
Windows 11 can generate a detailed report of your wireless history. This helps identify why your connection might be failing. You can learn more about this in the official Microsoft Wireless Network Report documentation.
Summary: Checking your Wi-Fi signal helps you diagnose connectivity issues. You can use simple visual bars in the taskbar or detailed dBm metrics via the command line. Maintaining a signal above -70 dBm ensures a smooth experience. If you face issues, try moving your router or switching frequency bands before buying new equipment.
What is a good dBm signal strength for Wi-Fi?
A signal between -30 dBm and -50 dBm is considered excellent. Anything between -60 dBm and -70 dBm is good and sufficient for most tasks. If your signal drops below -80 dBm, you will likely experience significant lag, buffering, and frequent disconnections from your wireless network.
Why does my Wi-Fi signal strength fluctuate in Windows 11?
Fluctuations happen due to physical obstacles like walls, distance from the router, or electronic interference from other devices. Channel congestion, where neighbors use the same Wi-Fi channel, also causes drops. Moving your router to an open, central location often stabilizes these signal variations significantly.
How do I improve my Wi-Fi signal strength without buying new hardware?
You can improve signal by updating your network adapter drivers in Device Manager. Also, change your router’s wireless channel to one that is less crowded. Ensure your router firmware is updated and keep the device in an elevated, central position away from other electronics to minimize interference.
Was this guide helpful?

About the Author
Richard
Tech Writer, IT Professional
Richard, a writer for Geek Rewind, is a tech enthusiast who loves breaking down complex IT topics into simple, easy-to-understand ideas. With years of hands-on experience in system administration and enterprise IT operations, he’s developed a knack for offering practical tips and solutions. Richard aims to make technology more accessible and actionable. He's deeply committed to the Geek Rewind community, always ready to answer questions and engage in discussions.
No comments yet — be the first to share your thoughts!