

This article explains how to check if a PC supports “Device Encryption” in Windows 11.
Device Encryption is a security feature in Windows that automatically encrypts a device’s hard drive using BitLocker encryption. This ensures that the data on the device is protected in case it is lost or stolen.
However, to support this feature, the device must meet certain hardware and firmware requirements, such as having a TPM (Trusted Platform Module) 2.0 chip and UEFI (Unified Extensible Firmware Interface) firmware with Secure Boot support.
If a device does not meet the hardware and firmware requirements, it can use a standard BitLocker encryption instead.
BitLocker automatic device encryption is available and enabled on a device that supports Modern Standby or HSTI-compliant hardware running any Windows edition. The standard BitLocker encryption is only available on Windows 11 Pro, Enterprise, or Education.
Check Device Encryption support in Windows using System Information
One way to check if your device supports “Device Encryption” in Windows is to use the System Information (msinfo32) tool.
To do that, use the steps below.
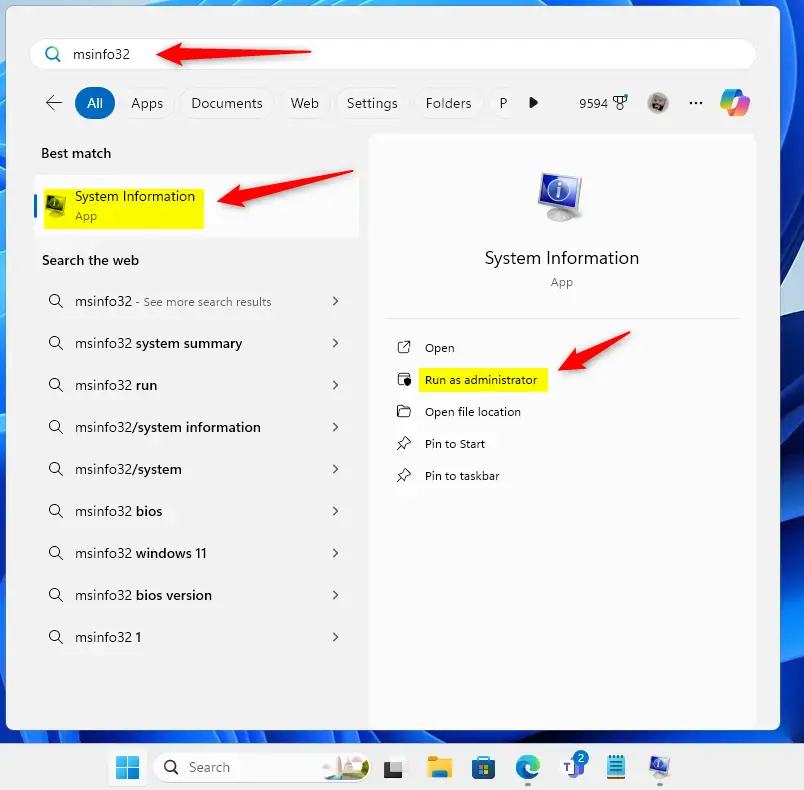
First, click the Start menu and search for the “msinfo32” command. You can also use the keyboard shortcut to launch Windows Search (Win+S).
Next, select the “System Information” app under Best match and click the “Run as administrator” to open it.
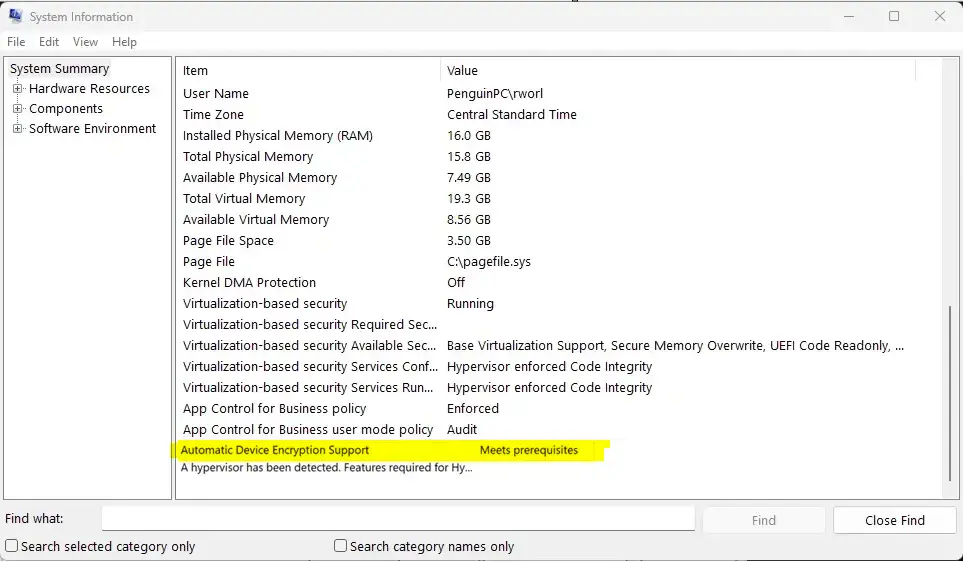
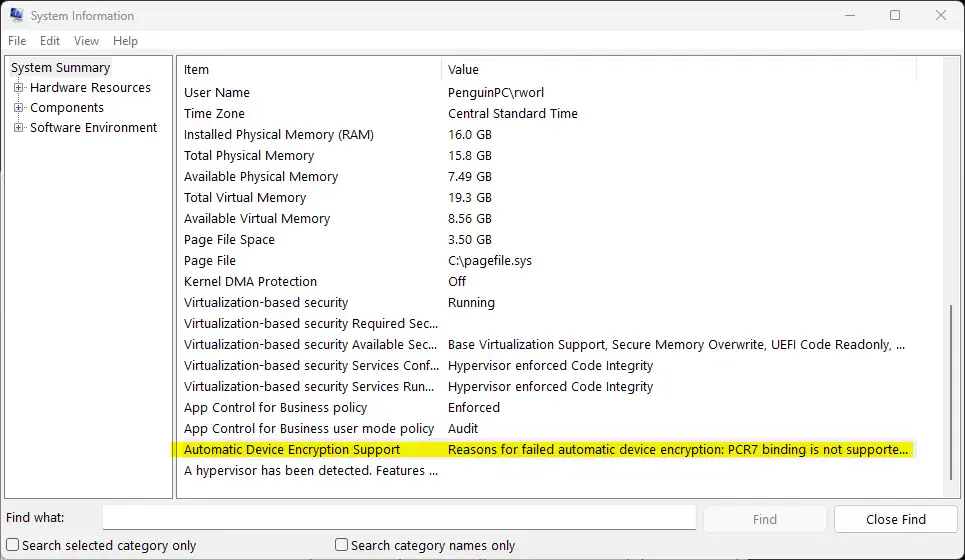
When the app opens, scroll and locate “Automatic Device Encryption Support” to see if your device meets the requirements.
When a device meets the requirements, the line will read “Meet prerequisites.” If not, a reason will be given why the device does not meet the requirements.
Close and exit the “System Information” when you’re done.
Check Device Encryption support using the Windows Settings app
Another way to check if your device supports Device Encryption is to use the Windows Settings app.
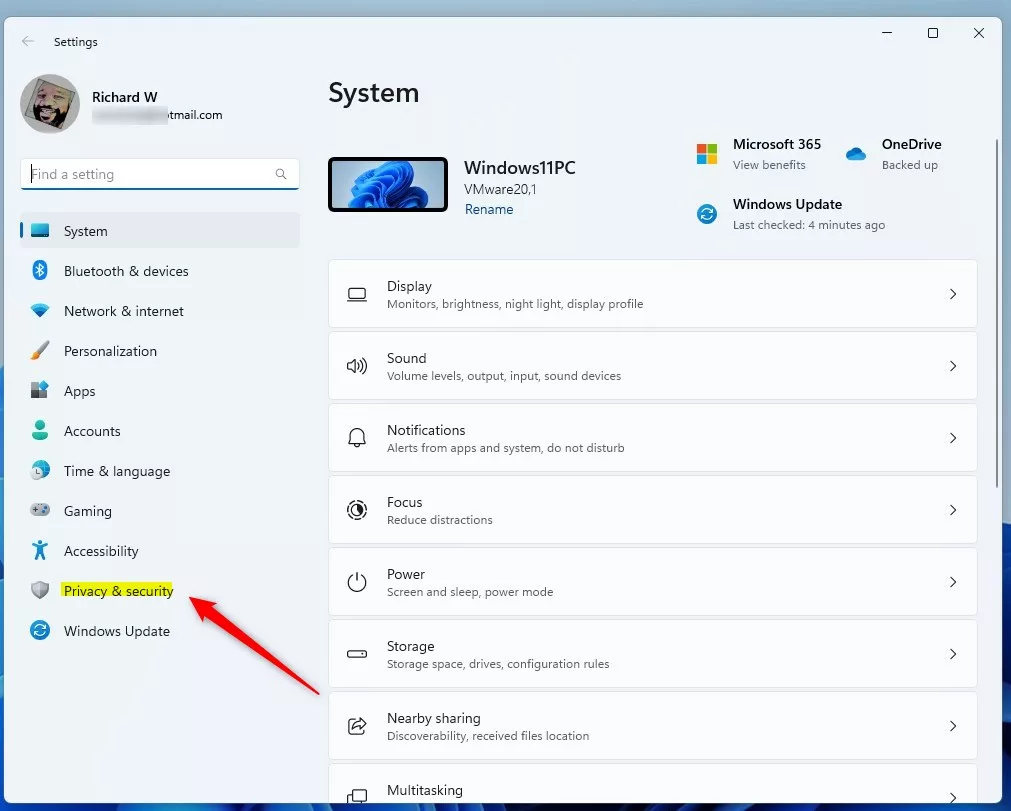
First, open the Windows Settings app.
You can do that by clicking on the Start menu and selecting Settings. Or press the keyboard shortcut (Windows key + I) to launch the Settings app.
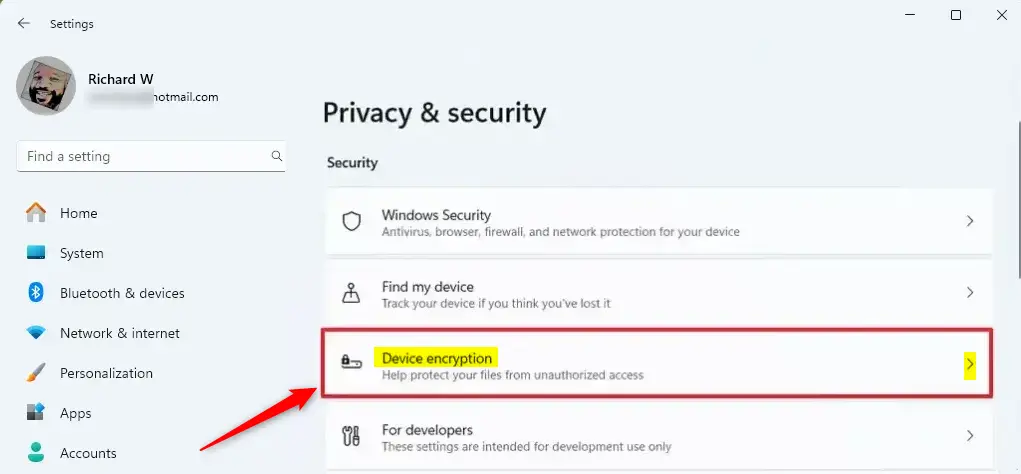
When the Setting app opens, click the Privacy & security button on the left.
Select the “Device encryption” tile on the Privacy & security on the right to expand it.
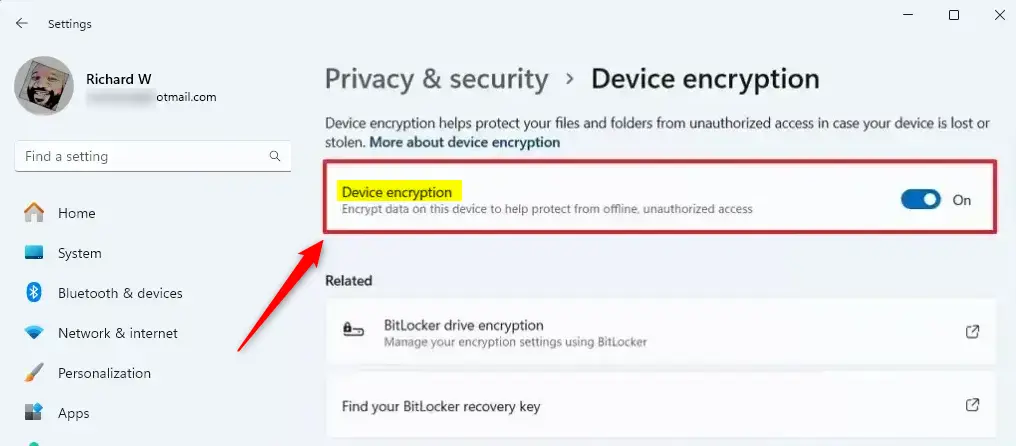
On the “Device encryption” settings page, you will be able to turn on or off Drive encryption signalling support for your device.
Close the Settings app when you’re done.
That should do it!
Reference:
Conclusion:
- Checking for device encryption support in Windows 11 is essential to ensure data security.
- Tools like System Information (msinfo32) and the Windows Settings app can help verify whether a device meets automatic encryption requirements.
- Understanding the hardware and firmware prerequisites for Device Encryption, such as the TPM 2.0 chip, UEFI firmware with Secure Boot support, and Modern Standby compatibility.
- In cases where a device doesn’t meet the requirements, standard BitLocker encryption can be used as an alternative.
- Verifying Device Encryption support is a proactive step towards maintaining device data security in Windows 11.
Leave a Reply Cancel reply