How to Free Up Space by Moving SoftwareDistribution Folder
You free up disk space on your Windows PC by moving the SoftwareDistribution folder to a different drive.
The SoftwareDistribution folder, found at 📁C:\Windows\SoftwareDistribution, stores downloaded Windows updates. This folder can grow significantly, often consuming tens of gigabytes of space, which is crucial when you have a smaller primary SSD.
Relocating this folder to a larger secondary drive, like a D: or E: drive, immediately recovers valuable space on your main C: drive. This action is especially helpful if you’re nearing your drive’s capacity and prevents potential issues with installing future Windows updates.
After moving the folder, Windows automatically creates a new one at the specified location for all subsequent downloads. Your system continues to update without interruption, and you gain immediate relief from low disk space warnings.
Move the SoftwareDistribution folder by stopping Windows Update services, renaming the old folder to SoftwareDistribution.old, creating a new folder on a secondary drive (e.g., 📁E:\NewSoftwareDistribution), and then using `mklink /j 📁C:\Windows\SoftwareDistribution E:\NewSoftwareDistribution` in an administrator Command Prompt. Finally, copy files to the new location and restart services.
When to use this method
You should move the SoftwareDistribution folder if your main C: drive is always full, especially if you have a small SSD.
Risks and Considerations
Moving the SoftwareDistribution folder using a symbolic link has risks, like Windows Update stopping if your new drive disconnects.
Step 1Create a New Folder
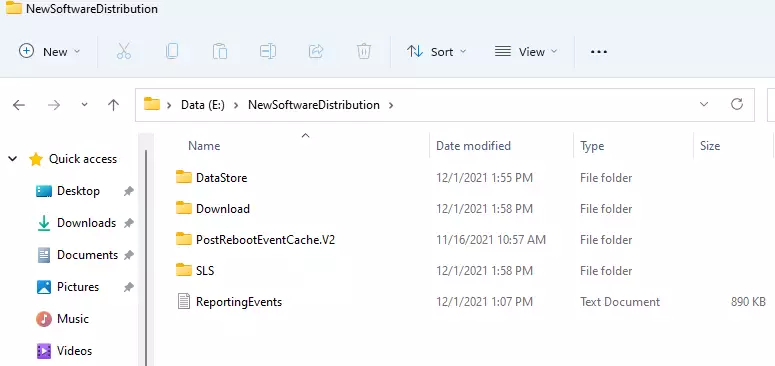
Pick a drive that has plenty of space. Create a new folder there and name it something like NewSoftwareDistribution. For this example, we’ll use the 📁E:\ drive.
📁E:\NewSoftwareDistribution
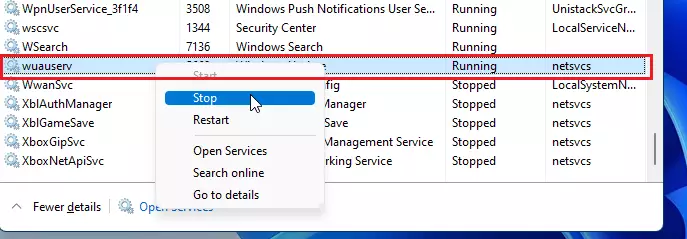
Step 2Stop the Windows Update Services
Stopping the Windows Update services is a crucial step before you move the SoftwareDistribution folder to avoid any problems.
Open Command Prompt with administrator rights and type this command to stop the necessary services:
mklink /j c:\windows\SoftwareDistribution e:\NewSoftwareDistributionThis stops both the wuauserv ( Windows Update) and bits (Background Intelligent Transfer Service) services, ensuring no files are in use.
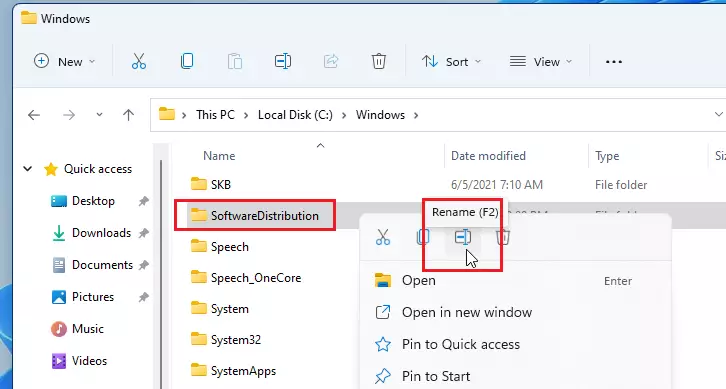
Step 3Rename the Old Folder
Open File Explorer and navigate to 📁C:\Windows. Find the SoftwareDistribution folder, right-click it, and choose Rename. Change its name to SoftwareDistribution.old. Requires admin privileges.
Step 4Create a Symbolic Link
Creating a symbolic link is how you tell Windows where to find your SoftwareDistribution folder after moving it, so everything keeps working.
mklink /j C:\Windows\SoftwareDistribution E:\NewSoftwareDistribution
If successful, you’ll see a message confirming the junction was created. You will then notice a shortcut icon on the original folder in 📁C:\Windows.

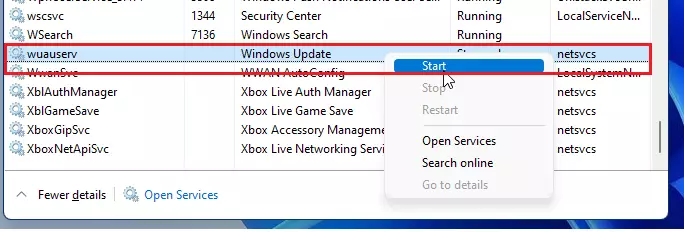
Step 5Move Files and Restart Services
Copy the contents from your old folder (SoftwareDistribution.old) to your new folder (📁E:\NewSoftwareDistribution). Once finished, restart your services by running this command in your admin Command Prompt:
net start wuauserv
net start bits
Summary
Moving your Windows update cache is an effective way to reclaim space on a crowded C: drive. By using the mklink command, you create a seamless bridge between your system and a secondary drive. For more information on how Windows manages these files, visit the official Microsoft documentation.
Will moving the SoftwareDistribution folder break Windows Update?
No, it will not break Windows Update if done correctly. By using a symbolic link, you are simply redirecting the path. Windows will continue to see the folder in its original location, but the data will be physically stored on your secondary drive, allowing updates to proceed normally.
Can I delete the old SoftwareDistribution folder after moving it?
Yes, once you have successfully moved the files and verified that Windows Update is working, you can safely delete the SoftwareDistribution.old folder. This will finalize the process of freeing up space on your primary drive. Ensure you have a backup of your files before deleting anything.
Was this guide helpful?

About the Author
Richard
Tech Writer, IT Professional
Richard, a writer for Geek Rewind, is a tech enthusiast who loves breaking down complex IT topics into simple, easy-to-understand ideas. With years of hands-on experience in system administration and enterprise IT operations, he’s developed a knack for offering practical tips and solutions. Richard aims to make technology more accessible and actionable. He's deeply committed to the Geek Rewind community, always ready to answer questions and engage in discussions.


No comments yet — be the first to share your thoughts!