How to Change Where Windows 11 Saves Your Files and Apps
Want to save your new documents, music, videos, and apps to a different drive instead of your main C: drive? This easy guide will show you how to change the default save locations in Windows 11.
By default, Windows saves everything to the C: drive. But if your C: drive is running low on space, you can tell Windows to save new files and install new apps on another drive.
Step-by-Step: Change Default Save Location in 🪟 Windows 11
Follow these simple steps to pick where Windows saves your new files and installs apps:
- Open Windows Settings: Press Windows key + I on your keyboard. Or click Start and then Settings.
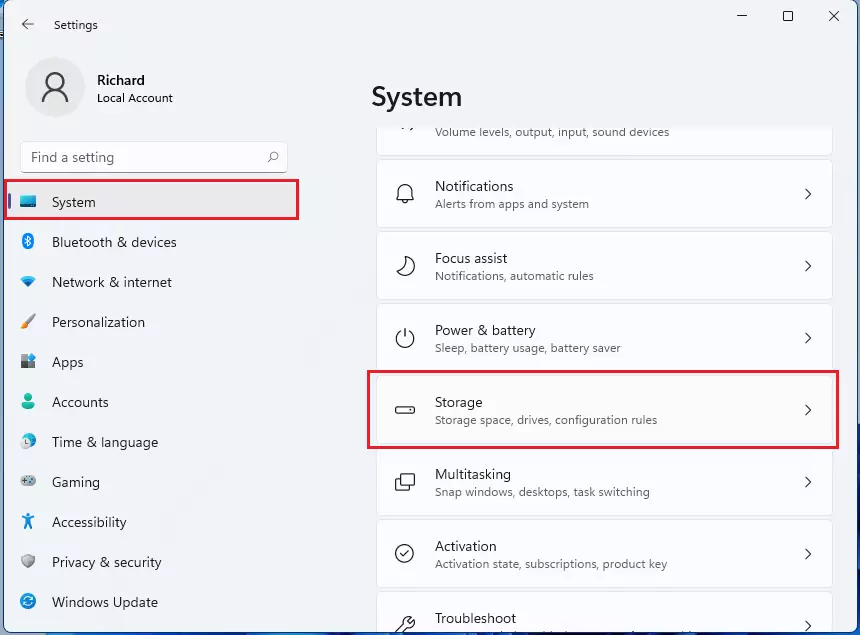
- In Settings, click on System.
- On the right side, select Storage.
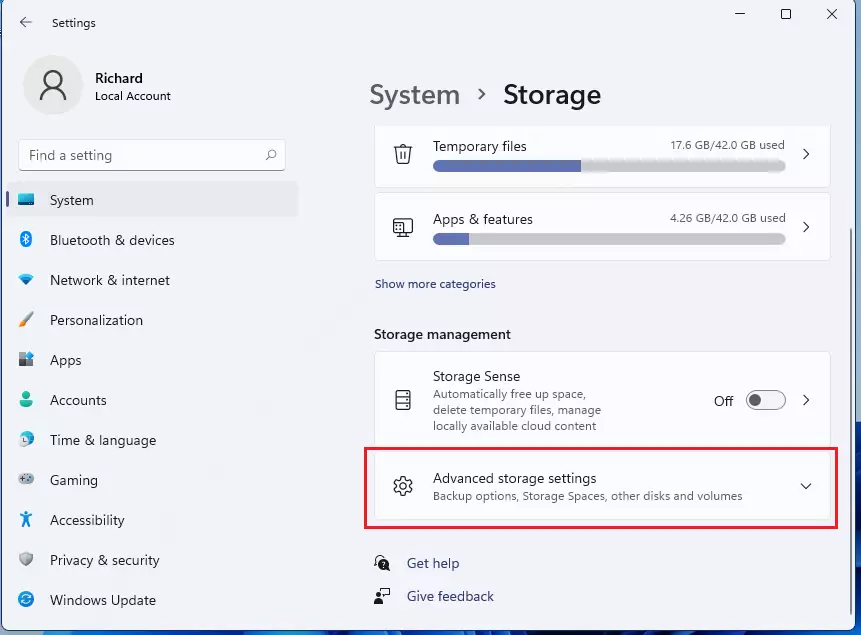
- Click Advanced storage settings.
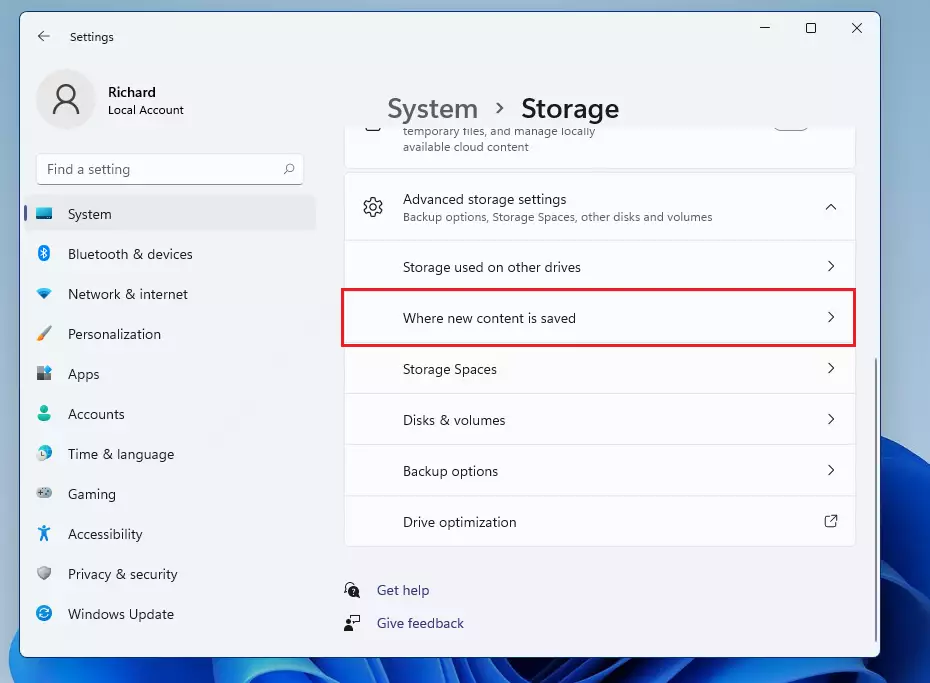
- Choose Where new content is saved.
Here, you will see options for Documents, Music, Pictures, Videos, and Apps. Each one defaults to Local Disk (C:).
If you have another drive (like D: or E:) with more space, click the dropdown menu for each category and select the drive you want.
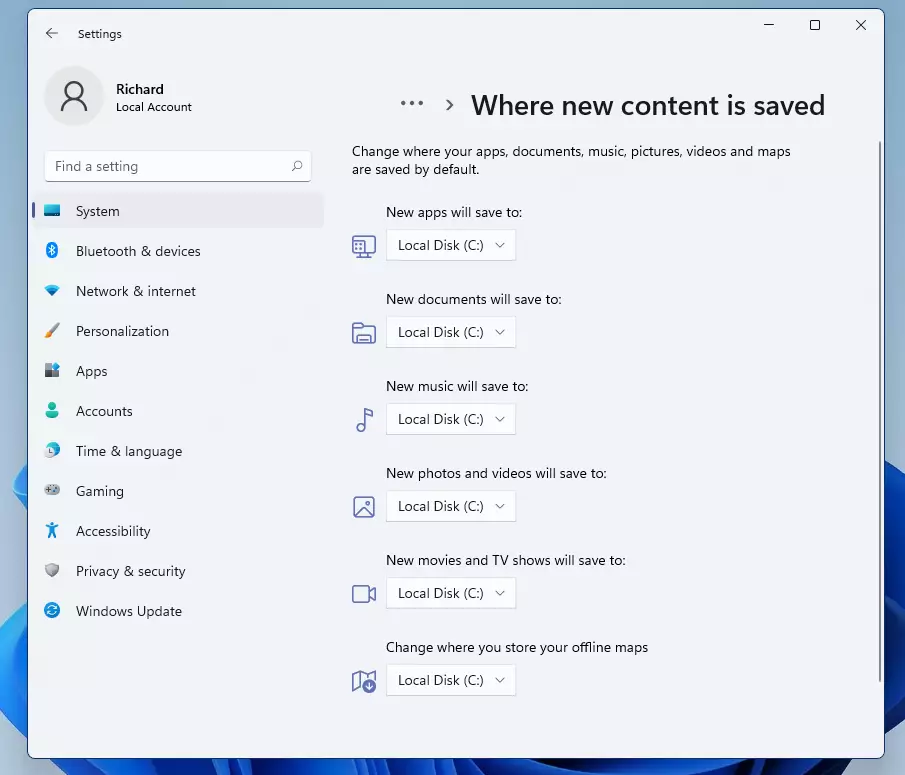
After choosing your new save locations, click the Apply button to save your changes.

Important Things to Know
- You can only pick one location at a time for each type of file (documents, music, etc.).
- You cannot install apps on network drives (shared drives over the internet or local network).
- Only new apps you install after changing the location will save to the new drive. Old apps stay where they are.
- You can install apps on external USB drives, but the drive must be plugged in whenever you use those apps.
- If the external drive is removed, apps installed on it won’t work until you reconnect the drive.
Why Change the Default Save Location?
Changing the default save location helps if your main C: drive is almost full. It helps keep your computer running smoothly and avoids errors caused by low disk space.
- More Space: Use a bigger or faster drive for your files and apps.
- Better Organization: Keep your files separated by drive.
- Easy Setup: You don’t have to move files manually every time you save something new.
Give this a try the next time your C: drive is getting full. It’s quick and can free up a lot of space!
Need more help? Visit the official Microsoft guide here: Change where new content is saved in Windows 11
Summary
Changing where Windows 11 saves your files and apps is simple and helpful. In just a few clicks, you can move your Documents, Music, Pictures, Videos, and new Apps to a different drive. This is especially useful when your main C: drive is running out of space. Remember that only new files and apps will go to the new location. Old files and apps will stay where they are. You cannot save apps to network drives, but you can use external USB drives if needed.
Was this guide helpful?

About the Author
Richard
Tech Writer, IT Professional
Richard, a writer for Geek Rewind, is a tech enthusiast who loves breaking down complex IT topics into simple, easy-to-understand ideas. With years of hands-on experience in system administration and enterprise IT operations, he’s developed a knack for offering practical tips and solutions. Richard aims to make technology more accessible and actionable. He's deeply committed to the Geek Rewind community, always ready to answer questions and engage in discussions.

No comments yet — be the first to share your thoughts!