How to Change Where New Apps will Save to in Windows 11
This tutorial will show you how to change where new apps from the Microsoft Store will save to in Windows 11.
In Windows 11, you can pick which drive new apps from the Microsoft Store will install to. By default, apps save to your Windows drive (usually called “Local Disk (C)”). You might want to change this if your Windows drive is running out of space, or if you just prefer to keep apps somewhere else.
You can install new apps to any internal or external NTFS drive. This includes SD cards and USB drives.
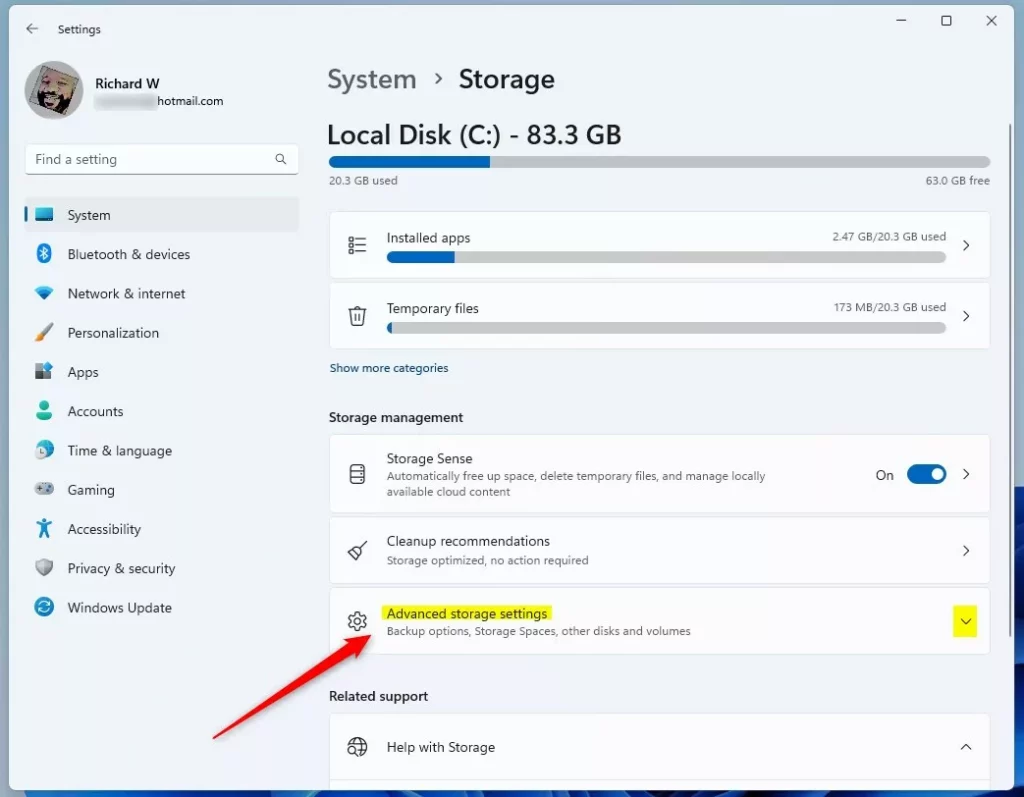
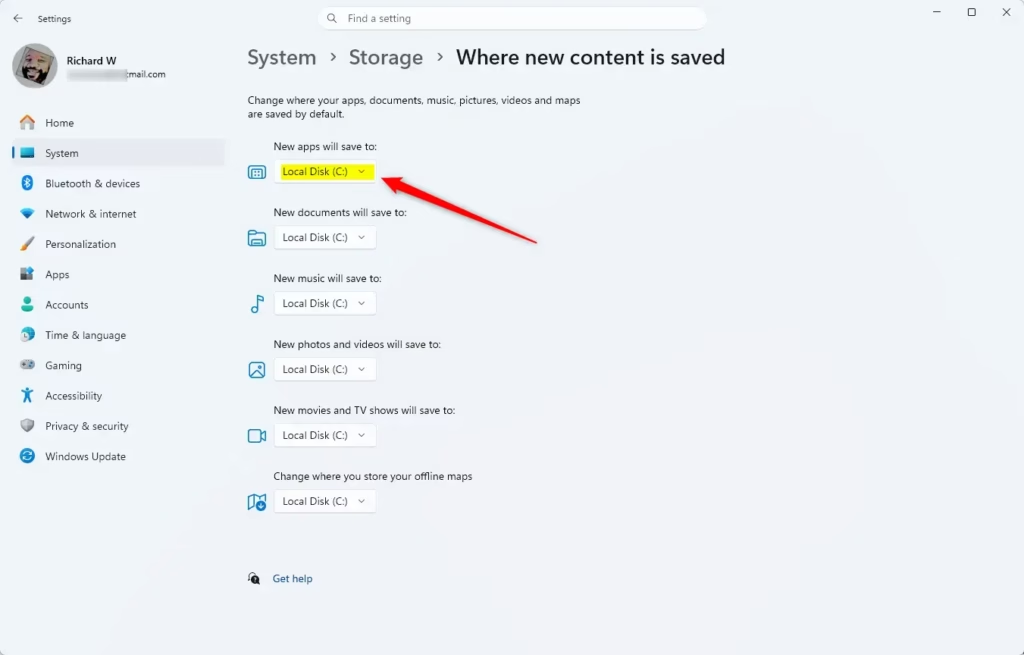
Go to Settings > System > Storage > Advanced storage settings > Where new content is saved. Select your preferred drive from the “New apps will save to” drop-down menu and click Apply. This change only affects newly installed Microsoft Store apps.
Important Things to Know:
When you change where new apps will save to in Windows 11, remember it only affects apps you download after making the change; already installed apps stay put.- Windows 11 only installs new apps to your selected location. It will not move apps that are already installed.
- If you unplug the drive you selected, apps on that drive will stop working until you plug it back in.
- If you unplug the drive, Windows will install new apps back to your “Local Disk (C)” drive until you reconnect it. Apps installed during this time will stay on your C drive.
- Windows will create a WindowsApps folder on the root of your selected drive when you install a new app there.
Here’s How:
- Open Settings. Press
Win+Ion your keyboard. - Click on System on the left side. Then click on Storage on the right side.
- [ADMIN PRIVILEGES REQUIRED] Click on Yes if prompted by User Account Control. Starting with Windows 11 build 26100.7705 (24H2) and build 26200.7705 (25H2), Windows now shows a User Account Control (UAC) prompt when you open Storage settings to protect system files. Open Storage settings UAC
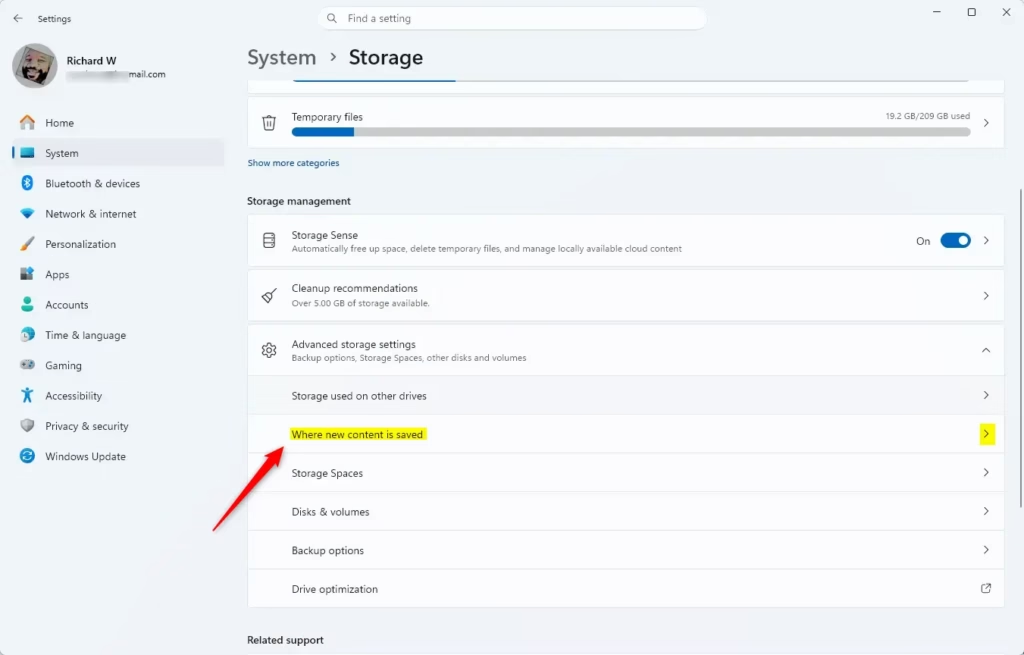
- Click on Advanced storage settings on the right side to expand it. Then click on Where new content is saved. Open “Where new content is saved” settings
- Click on the New apps will save to drop-down menu. Select the drive you want to use.
- Click on Apply to save your changes.
- If you see a prompt asking “Delete other apps?”, click Yes or No depending on what you want to do. If you click No, this drive will not be used to save new apps.
- When you’re done, you can close Settings.
To change where new apps will save to in Windows 11, start by opening your Settings app, which you can do by pressing the Windows key and ‘I’ together.
Summary
You can easily change where new apps will save to in Windows 11 if your C drive is running low on space, by adjusting a simple setting.
Was this guide helpful?

About the Author
Richard
Tech Writer, IT Professional
Richard, a writer for Geek Rewind, is a tech enthusiast who loves breaking down complex IT topics into simple, easy-to-understand ideas. With years of hands-on experience in system administration and enterprise IT operations, he’s developed a knack for offering practical tips and solutions. Richard aims to make technology more accessible and actionable. He's deeply committed to the Geek Rewind community, always ready to answer questions and engage in discussions.
No comments yet — be the first to share your thoughts!