
This guide will help you easily change a user account on your Windows 11 PC to either a Standard User or an Administrator.
When multiple people use the same PC, each person can have their own account. This means everyone has their own files, settings, and favorites.
You can use either a Local Account (works only on your PC) or a Microsoft Account (sign in with your email). Both account types can be either Standard or Administrator.
What’s the Difference?
- Standard User – Good for everyday use. You can run apps and change your own settings but can’t make big changes that affect other users. If you try something that needs admin permission, Windows will ask for an administrator’s password.
- Administrator – Has full control of the PC. Administrators can install software, change settings for all users, and approve permission requests.
Note: You must be signed in as an administrator to change account types. If you don’t have an admin account, you can turn on the built-in “Administrator” account to help (usually for advanced users).
How to Change Account Type
Option 1: Change Account Type Using Settings
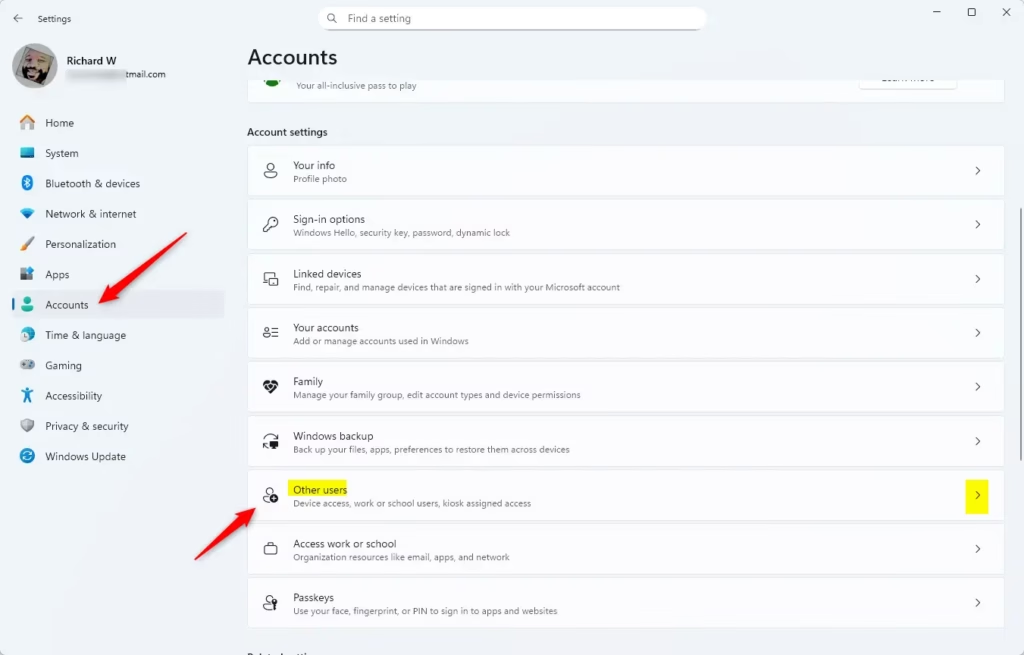
- Press Win + I to open Settings.
- Click Accounts on the left side, then select Other users on the right.
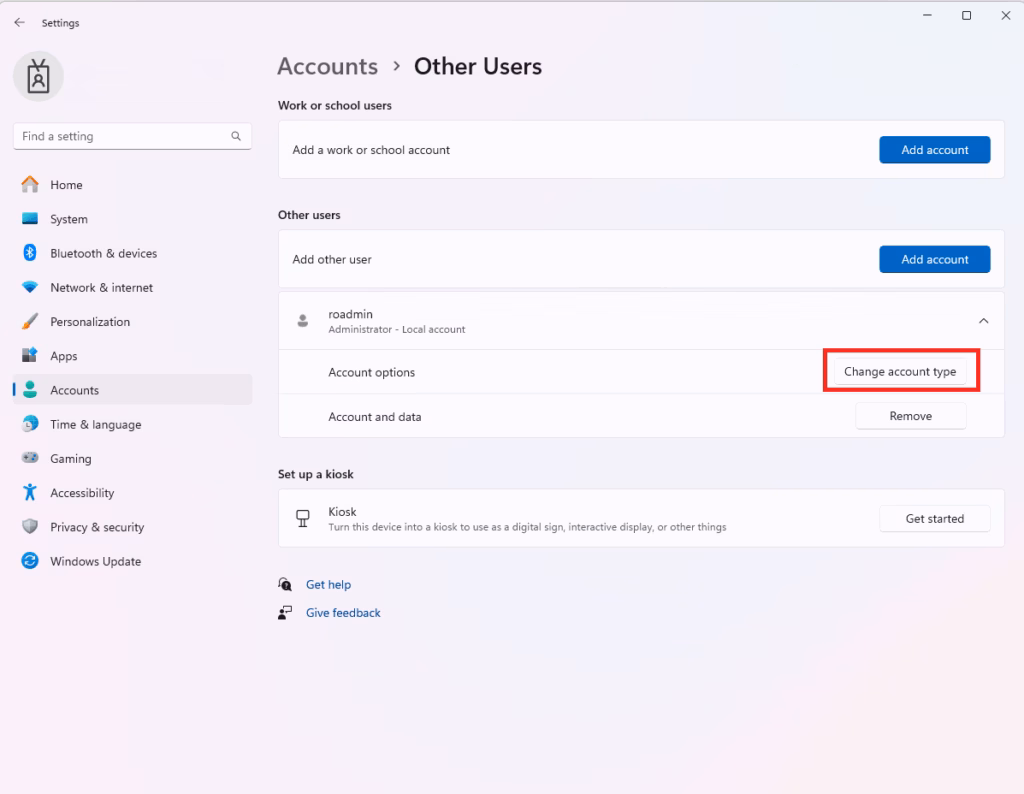
- Find the user account you want to change, click on it to expand, then click Change account type.
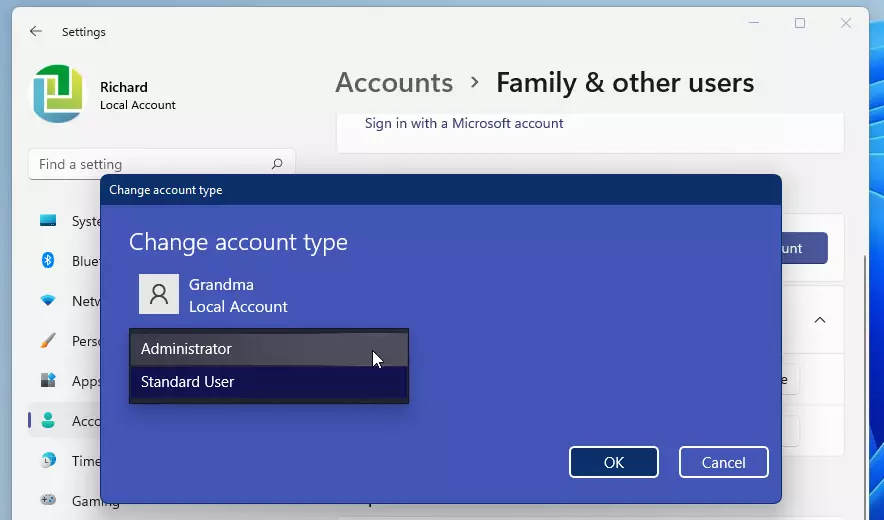
- Choose Standard User or Administrator from the dropdown menu, then click OK.
- Close Settings when you’re done.
Option 2: Change Account Type Using Control Panel
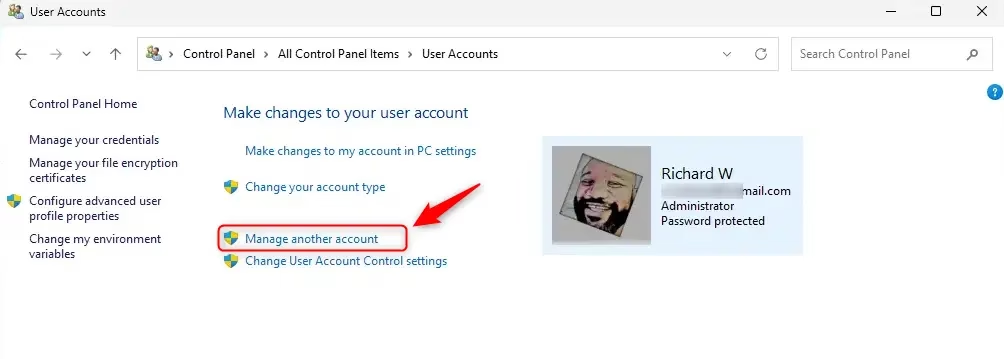
- Open Control Panel (you can search it from the Start menu).
- Make sure the view is set to Small icons or Large icons, then click User Accounts.
- Click Manage another account.
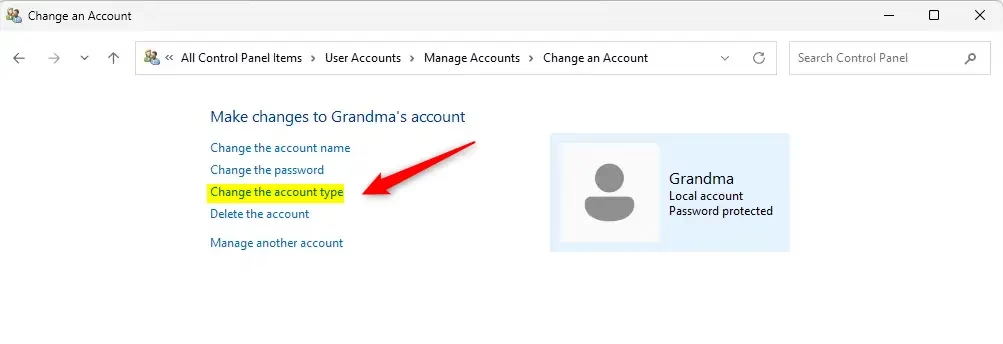
- Select the user account you want to change.
- Click Change the account type.
- Choose Standard User or Administrator, then click Change Account Type.
- Close the Control Panel when finished.
Option 3: Change Account Type Using netplwiz (User Accounts Window)
- Press Win + R, type
netplwiz, and press Enter to open the User Accounts window. - If available, make sure the box Users must enter a user name and password to use this computer is checked.
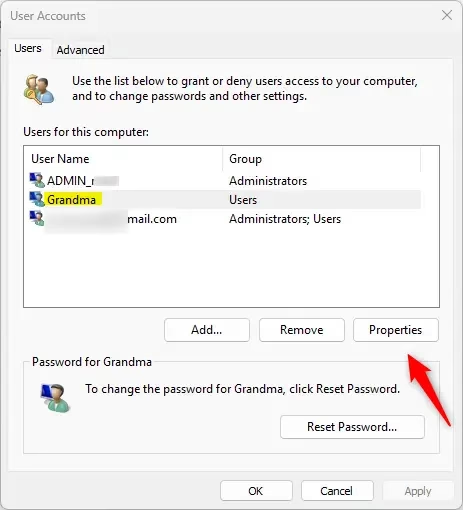
- Select the user account you want to change, then click Properties.
- Go to the Group Membership tab.
- Select either Standard User or Administrator, then click OK.
- Click OK again to close the User Accounts window.

Note: If your PC is set to sign in without a password (Windows Hello), you might need to turn off that setting to see these options.
Option 4: Change Account Type Using Command Prompt or PowerShell
This is for users comfortable with typing commands.
- Right-click the Start button and select Windows Terminal (Admin) or Command Prompt (Admin).
- To see which users are in each group, type these commands and press Enter after each:
net localgroup users
net localgroup administrators - To make someone a Standard User, type:
net localgroup users "UserName" /addReplace
UserNamewith the actual user name (for example, “Brink2”).
- To make someone an Administrator, type:
net localgroup administrators "UserName" /add - To remove a user from a group (for example, if you want to remove admin rights), type:
net localgroup administrators "UserName" /delete
net localgroup users "UserName" /delete
net localgroup guests "UserName" /delete - Close the terminal when done.
Summary
- Standard User accounts are for regular PC use without full control.
- Administrator accounts have full control and can change system settings.
- You can change account types in many ways: Settings, Control Panel, netplwiz, or Command Prompt.
- You must be signed in as an administrator to make these changes.
- Always keep at least one administrator account active on your PC.
- Managing accounts carefully helps keep your PC safe and running smoothly.
By following these simple steps, you can easily manage user permissions on your Windows 11 computer.
Frequently Asked Questions
How do I change my account type in Windows 11?
What is the difference between a Standard User and an Administrator in Windows 11?
Can I change my account type using Control Panel in Windows 11?
What should I do if I can't change the account type in Windows 11?
Is it safe to change my account type to Administrator in Windows 11?
Leave a Reply