How to Cast to an External Display from Windows 11
You can cast your Windows 11 screen to an external display wirelessly using Miracast technology.
Miracast lets devices connect directly over Wi-Fi for screen mirroring, no cables needed. You can project your laptop’s display onto a compatible TV, projector, or monitor.
To begin, ensure your external display is powered on and set to the correct input mode. If your display doesn’t natively support Miracast, you’ll need a Miracast adapter plugged into its HDMI port.
Press Windows key + K to open the Connect panel. Select your external display from the list of available devices to wirelessly cast your Windows 11 screen. Ensure your display is on and set to the correct input mode.
Step 1Get Your External Display Ready
To cast your Windows 11 display, first make sure your external screen, like a TV or projector, is turned on and ready to receive a connection.
Action: Turn on your external display (like your TV or projector). If you’re using a special device called a Miracast dongle or adapter (this plugs into your TV’s HDMI port to add wireless display features), make sure it’s plugged in and turned on too.
Why? Miracast is the technology Windows uses to send your screen signal wirelessly. Your TV or projector must be on and searching for a Miracast connection. If you’re using an adapter, it acts as the receiver for your PC’s signal, so it needs to be connected and active.
Tip: Some TVs have different ways to select inputs. You might need to switch your TV to “Screen Mirroring,” “Miracast,” or “Wireless Display” mode so your PC can find it. Check your TV’s manual if you’re not sure.
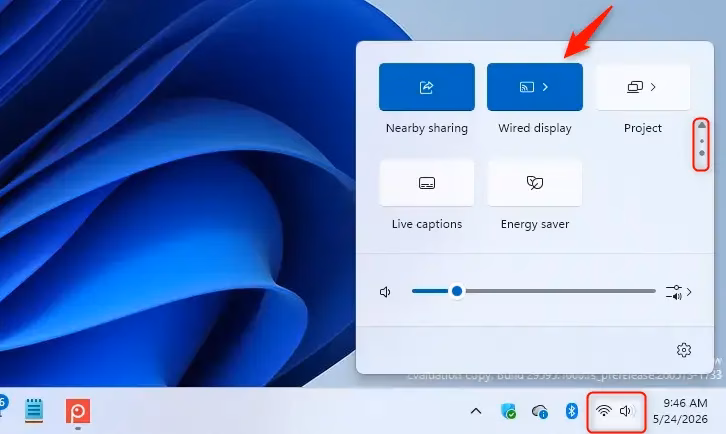
Step 2Tell 🪟 Windows 11 to Look for Displays
Once your external display is ready, you can tell Windows 11 to find it by opening the Cast panel using a simple keyboard shortcut.
Action: Press the Windows logo key (the key with four squares) and the K key on your keyboard at the same time. This opens the “Cast” or “Connect” panel.
Why? This keyboard shortcut is your fast track to wireless display connections. It quickly lists devices your computer can connect to for screen sharing. It’s built for speed and convenience.
Warning: Make sure your computer’s Wi-Fi is turned on! Wireless projection needs a Wi-Fi connection, even if the devices aren’t connected to the internet. You can check your Wi-Fi status by clicking the network icon near the clock in your system tray.
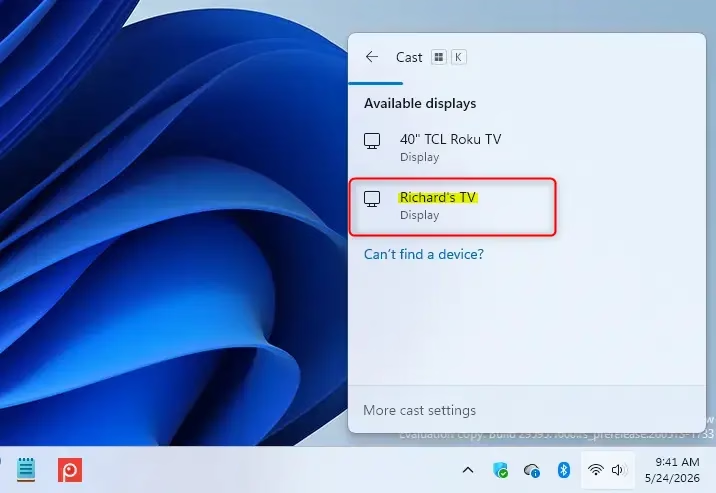
Step 3Select Your Display and Connect
After opening the Cast panel, you’ll see a list of nearby devices; simply click on the name of your TV, projector, or Miracast adapter to connect your Windows 11 display.
Action: Look at the list of devices in the panel that appeared. Click on the name of the TV, projector, or Miracast adapter you want to connect to.
Why? Windows scans your local network for Miracast-compatible devices and lists them for you to choose from. If other wireless displays are nearby, they’ll all appear here.
Tip: If your display doesn’t show up, check again that it’s powered on and set to the correct input mode (like in Step 1). Also, make sure your computer is close enough to the display for a good Wi-Fi signal.
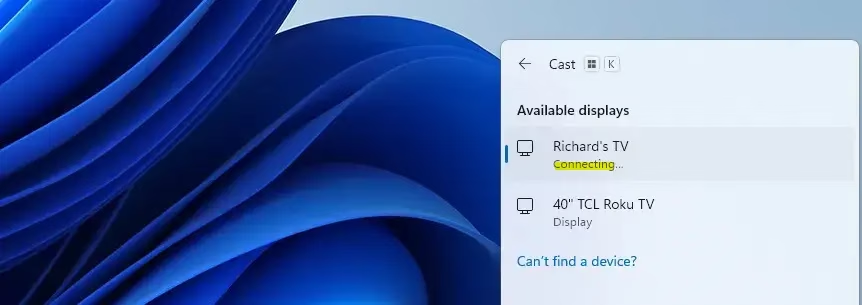
Step 4Follow Any On-Screen Prompts
Your external display might ask you to confirm the connection from your Windows 11 computer, so watch the screen and follow any prompts to allow it.
Action: Watch your external display. You might see a message asking you to allow the connection from your computer. If you do, follow the instructions on the TV or projector screen to accept it.
Why? Some devices need you to give permission before they will show your computer’s screen. This is good because it means someone can’t just start showing things on your TV without you knowing.
Tip: If you’re using a projector for a presentation, make sure to accept the connection quickly before your audience gets impatient!
Step 5Choose How You Want to Display
After connecting your Windows 11 display, you can choose how you want your screens to work together using the Project menu, which opens with a quick keyboard shortcut.
Action: Press the Windows logo key + P. This opens the “Project” menu, which shows different display modes.
Why? This shortcut helps you manage how your computer handles multiple displays. Here are the common options:
- PC screen only: This turns off the external display, showing everything only on your laptop. This is useful if you accidentally connected to the wrong screen.
- Duplicate: This shows the exact same content on both your laptop screen and the external display. It’s perfect for presentations where you want everyone to see what you’re doing.
- Extend: This gives you more space! Your computer’s desktop will spread across both screens, giving you more room to work. You can drag windows from one screen to the other.
- Second screen only: This turns off your laptop screen and shows everything only on the external display. This is great if you want to focus on the big screen and save your laptop’s battery.
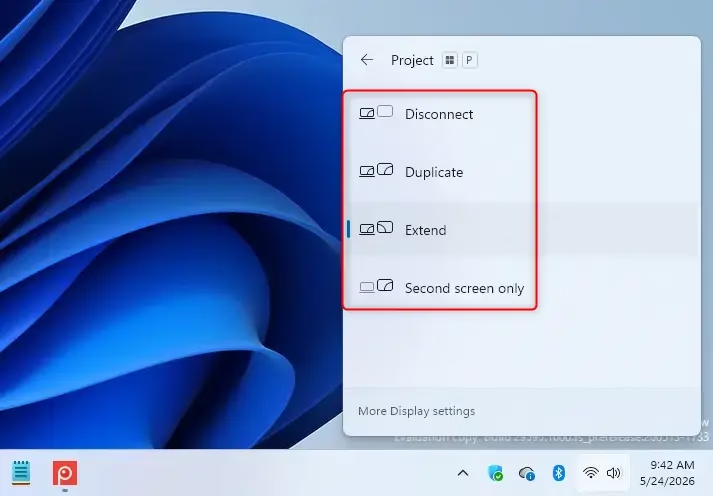
Tip: For the “Extend” mode, you can even set up where the external monitor appears compared to your laptop screen in your PC’s Settings, under System and then Display. Just drag the display boxes to match how they are physically arranged.
Summary
Casting your Windows 11 display to an external screen involves turning on your display, using Windows key + K to connect, confirming if needed, and then using Windows key + P to pick your preferred display mode.
How do I cast to an external display in 🪟 Windows 11?
To cast to an external display in Windows 11, press Windows key + K. This opens the Cast menu. Select your desired external display from the list of available devices. Ensure your external display is powered on and set to the correct input mode for a successful connection.
How do I display my computer screen on my TV using HDMI?
To display your computer screen on your TV using HDMI, connect an HDMI cable from your computer’s HDMI port to your TV’s HDMI input. Select the corresponding HDMI input on your TV. Your computer should automatically detect the display, or you may need to adjust display settings in Windows.
How to extend display wirelessly?
To extend your display wirelessly in Windows 11, press Windows key + K to open the Cast menu. Ensure your external display supports Miracast or has a Miracast adapter connected. Select your display from the list. Choose ‘Extend’ from the projection options to use it as an extended desktop.
How do I turn on screen cast on 🪟 Windows 11?
To turn on screen cast on Windows 11, press the Windows key + K simultaneously. This action opens the ‘Cast’ flyout menu. Your PC will then search for available wireless displays. Ensure your target display is on and ready to receive the cast signal.
Was this guide helpful?

About the Author
Richard
Tech Writer, IT Professional
Richard, a writer for Geek Rewind, is a tech enthusiast who loves breaking down complex IT topics into simple, easy-to-understand ideas. With years of hands-on experience in system administration and enterprise IT operations, he’s developed a knack for offering practical tips and solutions. Richard aims to make technology more accessible and actionable. He's deeply committed to the Geek Rewind community, always ready to answer questions and engage in discussions.

No comments yet — be the first to share your thoughts!