How to Back up and restore with Windows Backup in Windows 11
Windows Backup in Windows 11 creates a copy of your important files and system settings, acting as a digital safety net for your PC.
This built-in tool lets you save your files, personal data, and even your entire system image to an external drive. You can then use this backup to restore your PC to its previous state if something goes wrong.
For example, Windows Backup can save a full system image, which includes your operating system, applications, and all your files. This is different from just copying files, as it captures your entire PC setup from a specific point in time, for instance, from July 2023.
Learning to use Windows Backup gives you peace of mind, knowing your digital life is protected and easily recoverable.
Open Settings, go to Accounts, then Your info, and sign in with a Microsoft account. Next, open Windows Backup from the Start menu search and toggle on the folders you want to back up.
Why Back Up Your PC?
Backing up your PC is like taking a snapshot of your important files. If something bad happens to your computer, like it breaks or gets lost, you can use that backup to get your files and settings back. It’s like having a spare copy of everything important.
What Happens When You Back Up?
Backing up your PC with Windows Backup copies your important files, like photos and documents, and your settings, such as wallpaper and Wi-Fi passwords, to a safe place.
Step 1Get Your Microsoft Account All Set
To use Windows Backup for cloud storage, you first need to sign in with your Microsoft account.
Here’s how to check or switch to a Microsoft account:
- Open the Settings app. You can do this by clicking the Start button and then selecting the gear icon, or by pressing
Windows key + Ion your keyboard. - In the Settings window, click on Accounts in the left-hand sidebar.
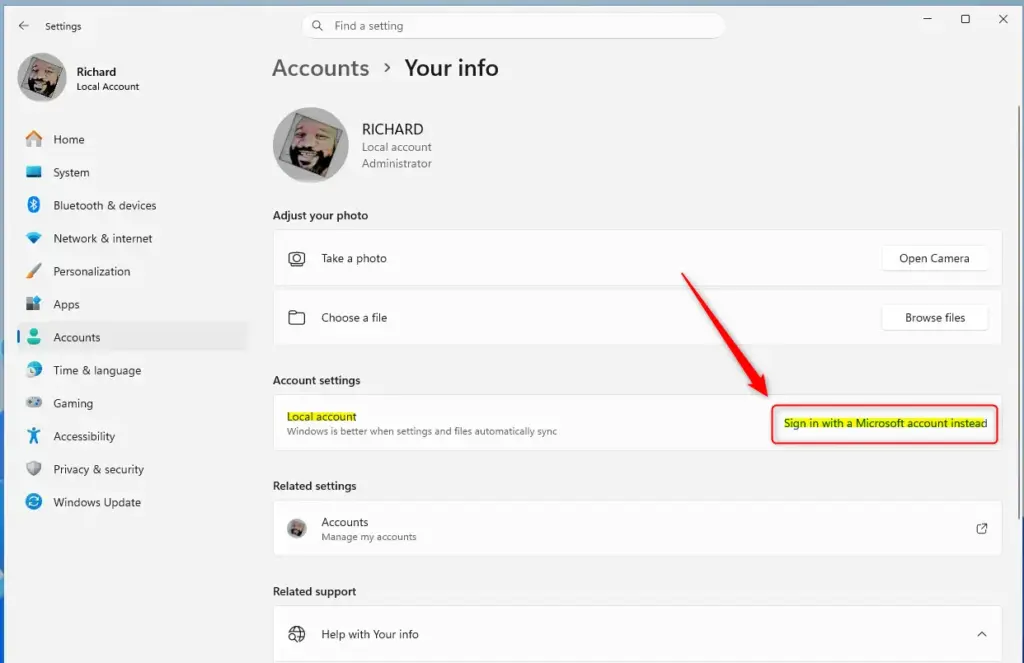
- Select Your info from the main Accounts panel.
- Look for an option that says “Sign in with a Microsoft account instead.” If you see this, click it and follow the prompts. You’ll need your Microsoft account email and password.
Step 2Back Up Your Most Important Folders
Backing up your most important folders in Windows 11 is simple using the Windows Backup tool to sync them to OneDrive.
Let’s get those folders protected:
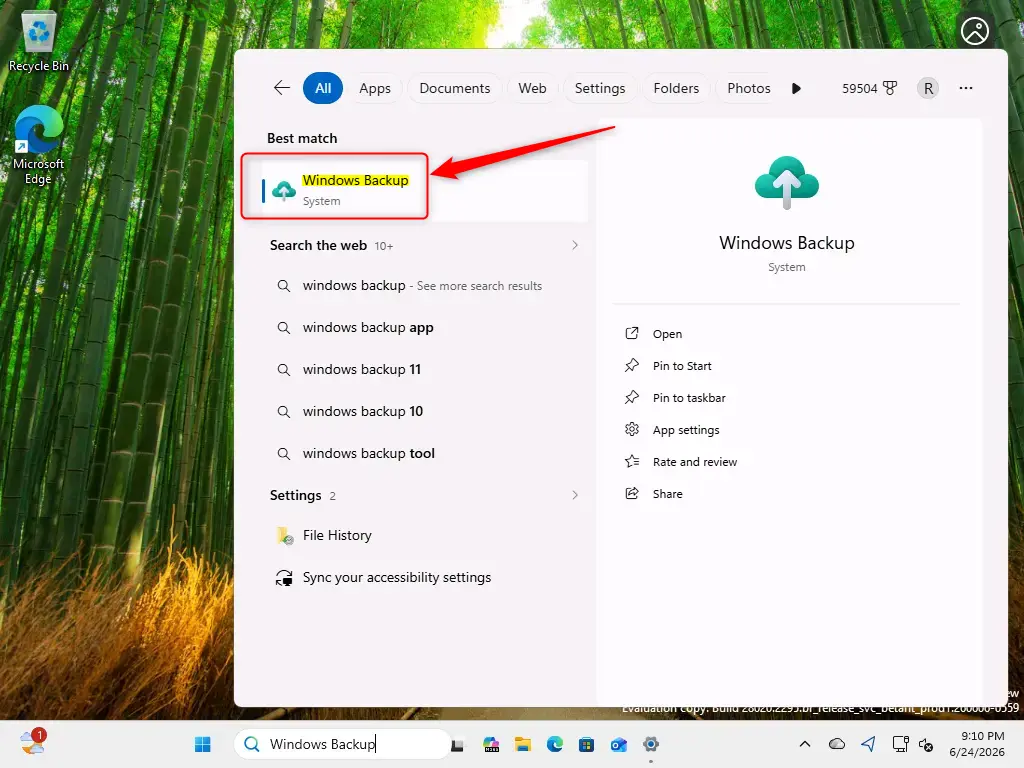
- Click the Start button.
- Type “Windows Backup” into the search bar and select Windows Backup from the results.
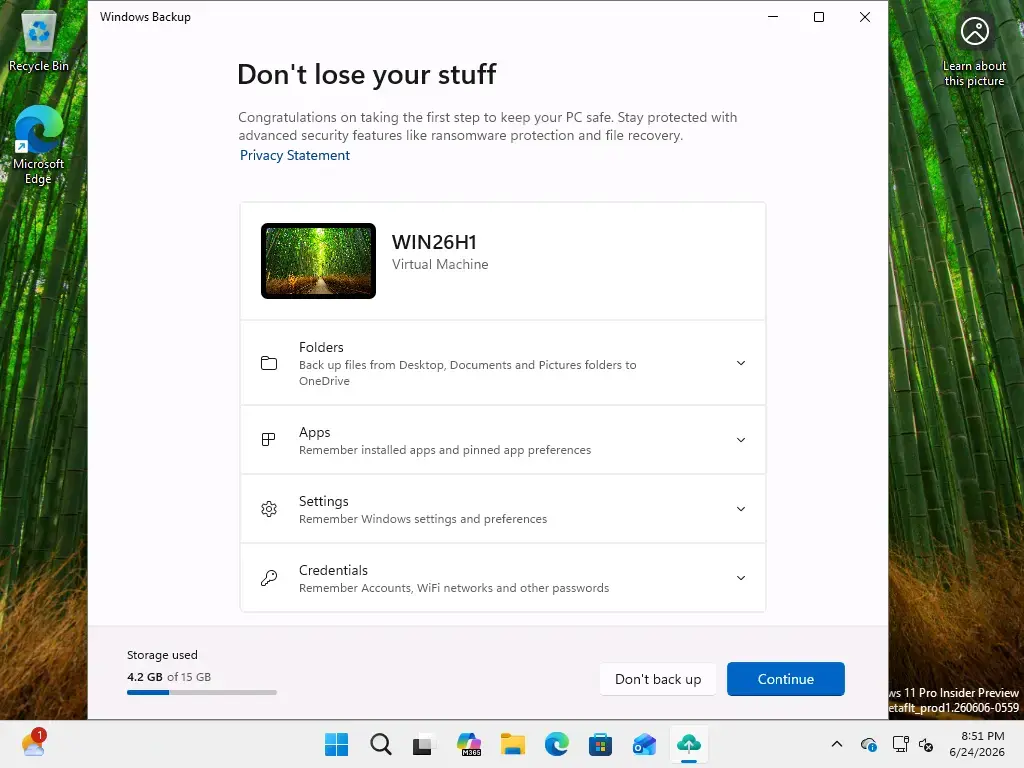
- In the Windows Backup app, you’ll see a section for Folders. Click to expand it.
- You’ll see a list of common user folders: Desktop, Documents, Pictures, Videos, and Music. For each folder you want to back up, simply toggle the switch next to it to the On position.
Step 3Saving Your Settings and Preferences
Windows Backup lets you save your important settings and preferences, like your wallpaper and Wi-Fi passwords, so your new PC feels familiar right away.
Here are the kinds of settings you can back up:
- Installed apps: Windows can remember which apps you had installed, making it quicker to set up a new machine.
- Accessibility settings: This includes things like your display settings, text size, and other options that make your PC easier to use.
- Accounts, Wi-Fi network and passwords: Your saved Wi-Fi networks and passwords can be backed up.
- Personalization: This is where the magic happens for your look and feel! It includes your wallpaper, accent colors, themes, and the layout of your Start menu.
- Language preferences and dictionary: Your chosen language settings and any custom words you’ve added to your dictionary.
- Other Windows settings: This can include a range of other system settings that help tailor Windows to your liking.
To back these up:
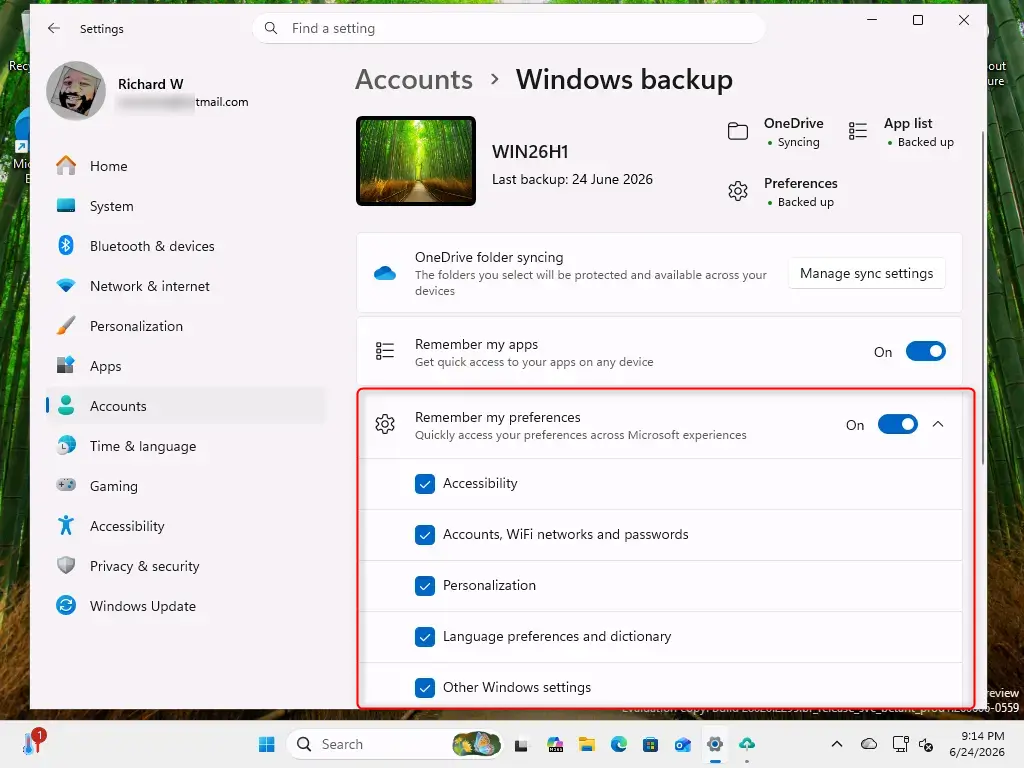
- In the Windows Backup app (or via Settings > Accounts > Windows backup), find the section for Settings.
- Expand each category of settings you want to back up.
- Toggle the switch to On for each setting you wish to protect.
- Once you’ve selected all the folders and settings you want to back up, click the Back up now button. Windows will then start the process of saving everything to your Microsoft account.
Warning: If you run into an error message related to OneDrive when trying to back up, don’t panic. It usually means one of a few things: you might not be signed into OneDrive, you could be out of storage space, or there might be a temporary sync issue with OneDrive itself. Check your OneDrive status, ensure you have enough storage, and try again. If problems persist, you might need to look into fixing OneDrive sync issues.
Step 4Sit Back and Relax – You’re All Set!
Once you’ve completed the steps, your important files and settings are safely backed up and accessible on any computer by signing in with your Microsoft account.
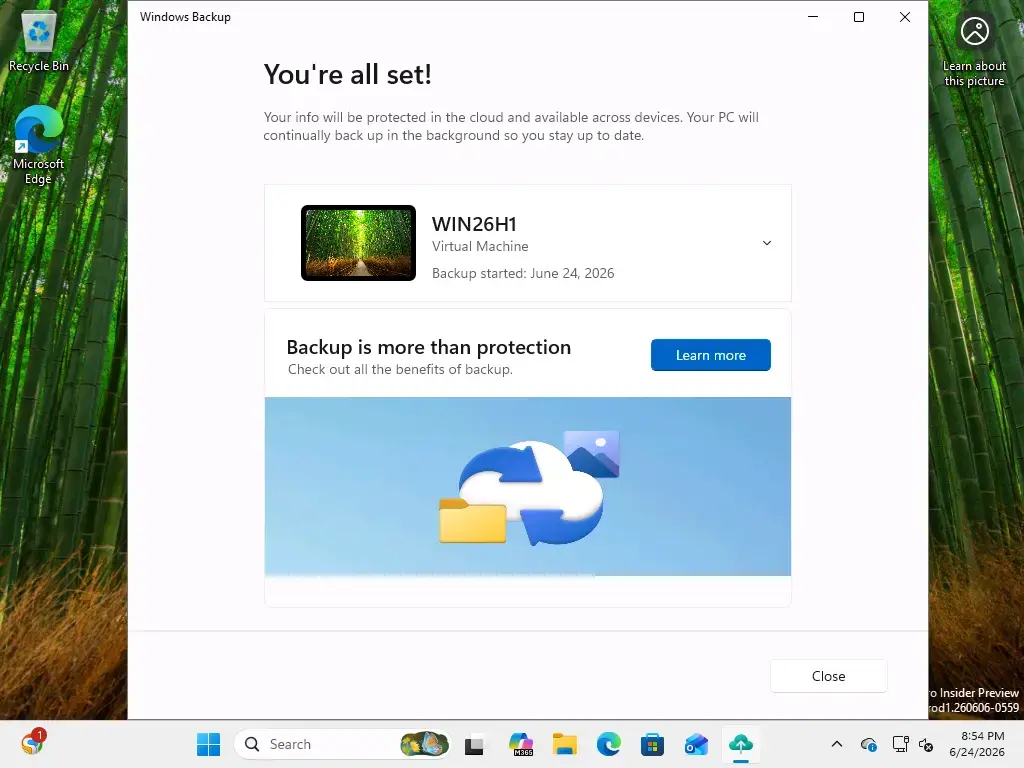
You can check the status of your backup anytime by opening the Windows Backup app or by going to Settings > Accounts > Windows backup. The app shows the current state of your backup and what’s been protected.
References:
Summary
This guide explained how to use Windows Backup in Windows 11 to protect your files and settings by syncing them to OneDrive using your Microsoft account.
Was this guide helpful?

About the Author
Richard
Tech Writer, IT Professional
Richard, a writer for Geek Rewind, is a tech enthusiast who loves breaking down complex IT topics into simple, easy-to-understand ideas. With years of hands-on experience in system administration and enterprise IT operations, he’s developed a knack for offering practical tips and solutions. Richard aims to make technology more accessible and actionable. He's deeply committed to the Geek Rewind community, always ready to answer questions and engage in discussions.


No comments yet — be the first to share your thoughts!