How to Automatically Disable Wi-Fi on Windows 11 with Ethernet
This guide explains how to set your Windows 11 computer to turn off Wi-Fi automatically whenever you plug in an Ethernet cable.
Why do this?
When you plug in an Ethernet cable, your computer uses the wired connection for internet. However, your Wi-Fi stays on in the background. This wastes battery power and can sometimes cause connection conflicts. Turning off Wi-Fi when you are plugged in keeps your machine running efficiently.
What happens when done?
Once this feature is enabled, your computer will detect the wired connection and instantly shut off the Wi-Fi radio. If you unplug the Ethernet cable, your computer will automatically turn the Wi-Fi back on so you stay connected.
Note: Some steps in this guide require administrative privileges to modify your hardware settings.
You can access your System Settings by pressing the Windows key + I on your keyboard or by clicking Start %%LNK0%% > Settings.

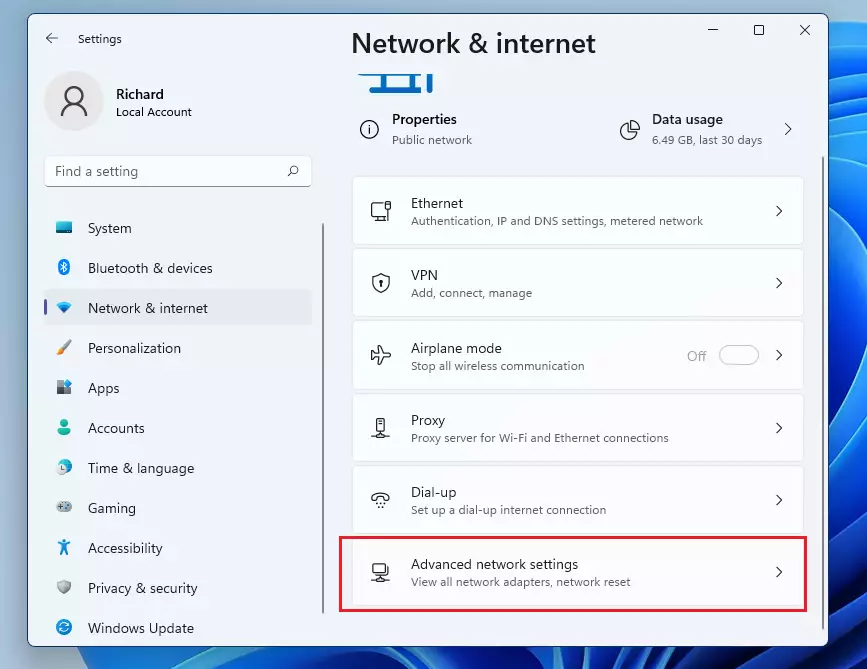
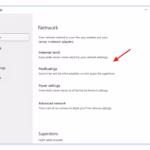
Once the Settings window opens, click on Network & internet. Next, select Advanced network settings on the right side of the screen.
On the next screen, click on More network adapter options.

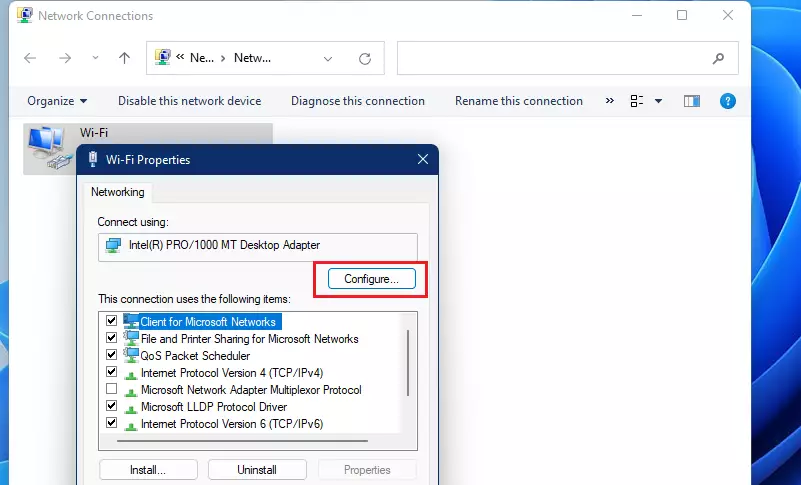
This opens a new window showing your network connections. Right-click on your Wi-Fi connection and select Properties.

In the window that appears, click the Configure button.
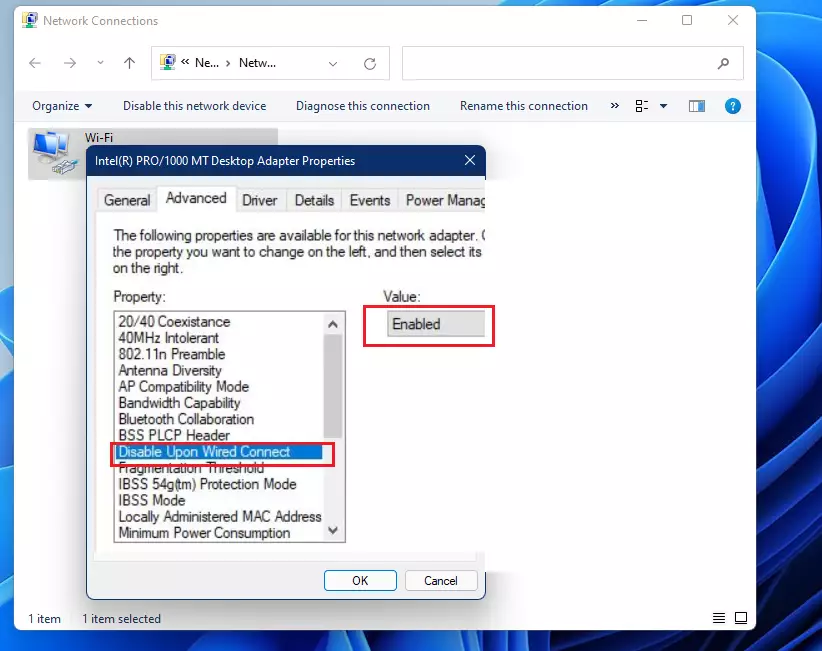
A new window will pop up. Look through the list of settings for Disable Upon Wired Connect. Click on it and change the value to Enabled. If you ever want to turn this off, just follow these same steps and select Disabled instead.
Click OK to save your changes and close the windows.
Summary
By enabling “Disable Upon Wired Connect,” you allow your computer to manage its own connections. This simple change saves battery life, reduces energy use, and ensures your computer always prioritizes the faster, more stable wired connection. It is a quick way to keep your Windows 11 system running smoothly without needing to manually toggle your Wi-Fi on and off.
Was this guide helpful?


Leave a Reply Cancel reply