How to Set Default Microphone in Ubuntu Linux
You set your default microphone in Ubuntu Linux through the Sound Settings panel.
This ensures that Ubuntu consistently uses your preferred audio input device for all applications, whether it’s your built-in laptop mic or an external USB microphone.
Ubuntu Linux offers straightforward tools to manage these audio preferences, ensuring your voice is always picked up by the right device.
This is crucial when you have multiple microphones connected, like a headset and a webcam mic, and need one to be the primary choice for calls and recordings.
For example, in Ubuntu 22.04 LTS, the process is quick and accessible directly from your system’s settings.
Open System Settings and navigate to the Sound panel. Under the Input section, select your desired microphone from the list of available devices to set it as the default. The input level indicator will confirm your selection.
How to set the default microphone in Ubuntu Linux
As described above, you can set the default input device and forget it in Ubuntu Linux. When it’s set, it will always be used by all apps on the system.
Ubuntu Linux will try to identify and select the best input device. You can control the device’s volume from the system menu, but only one device can appear in the system menu at a time.
Ubuntu Linux has a centralized location for the majority of its settings. From system configurations to creating new users and updating, all can be done from the System Settings panel.
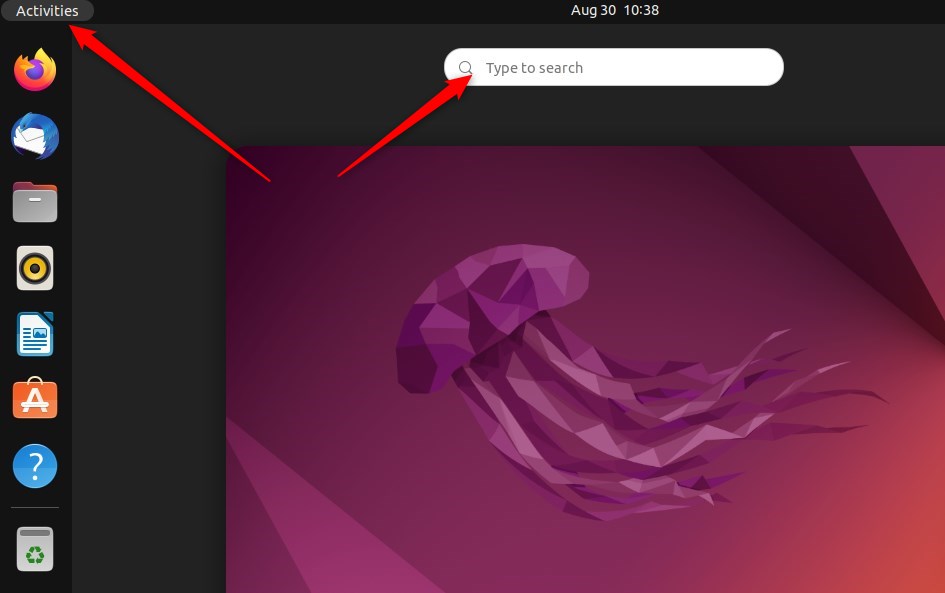
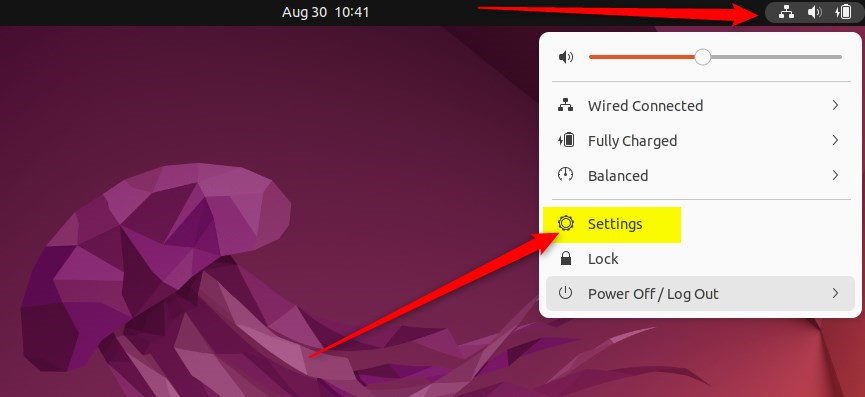
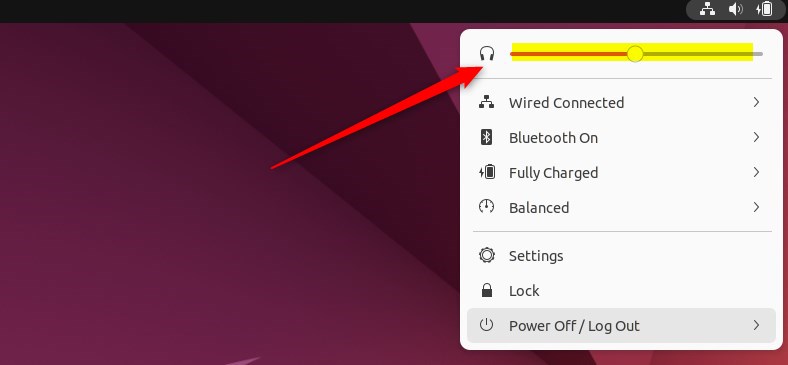
Alternatively, click on the System menu at the top-right corner of the top bar on your desktop.
On the System menu, select Settings, as highlighted below.
In the Settings app, click on a Sound tile to open the panel.
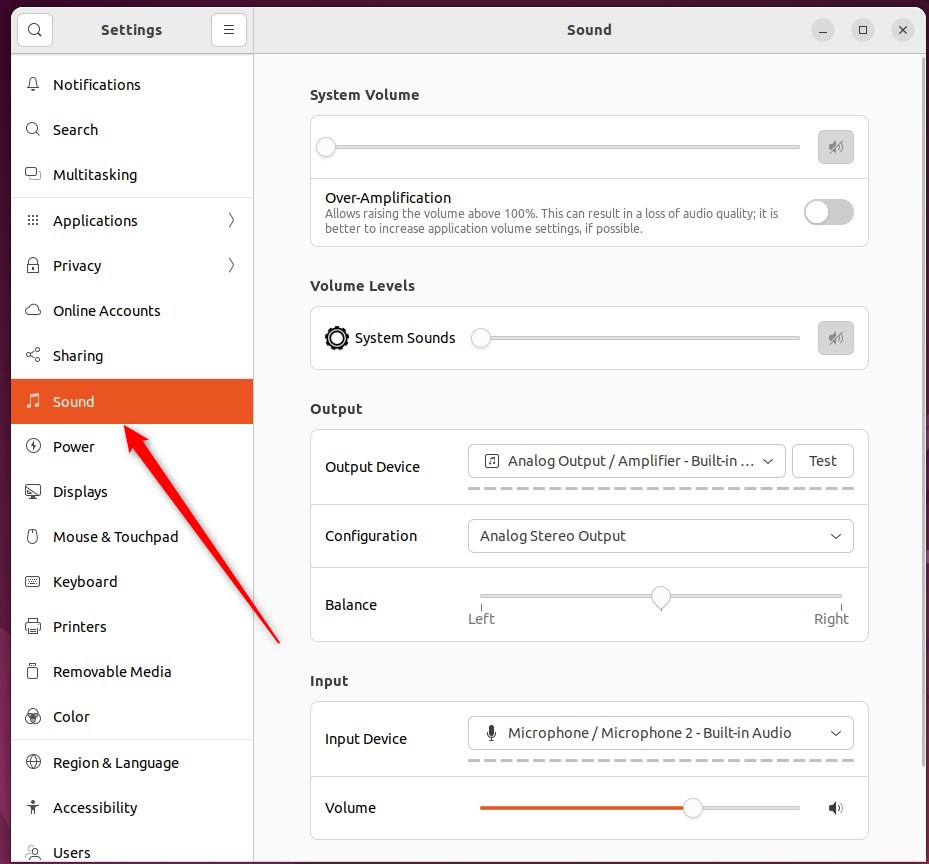
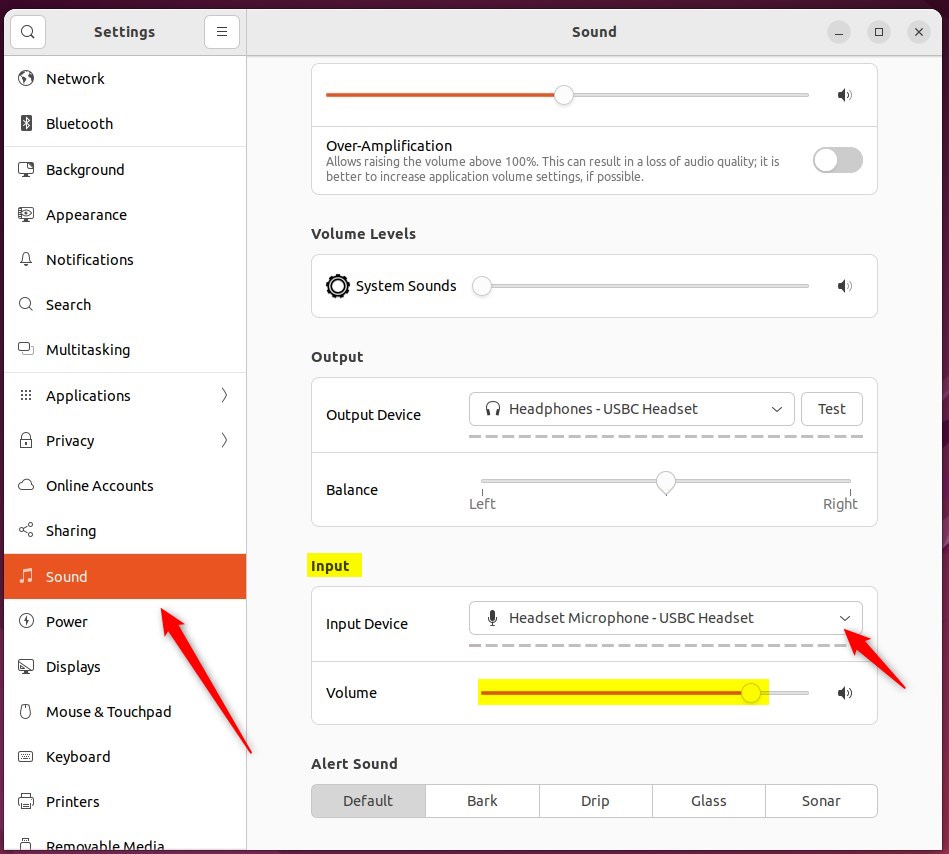
In the System Settings -> Sound panel, under Input, select the device you want to use.
The input level indicator should respond when you speak.
If you don’t see the connected mic device on the list, it may be that it is not recognized in Ubuntu Linux.
You can adjust the volume, switch the microphone off, or mute it from this panel.
That should do it! You can now close the Settings app.
Conclusion:
- Setting the default input device in Ubuntu Linux is essential for a seamless user experience across all applications.
- Ubuntu’s centralized System Settings panel simplifies selecting the default microphone.
- Users can monitor and adjust the input level indicator in the Sound panel to ensure the proper functioning of their chosen device.
- Users can troubleshoot and adjust settings if a connected mic device is not recognized.
- With the default mic configured, users can enjoy consistent audio input across various multimedia applications in Ubuntu Linux.
Frequently Asked Questions
How do I set the default microphone in Ubuntu Linux?
Why is my microphone not recognized in Ubuntu Linux?
Can I use multiple microphones in Ubuntu Linux?
How can I adjust the microphone volume in Ubuntu Linux?
What should I do if my microphone volume is too low in Ubuntu Linux?
Was this guide helpful?

About the Author
Richard
Tech Writer, IT Professional
Richard, a writer for Geek Rewind, is a tech enthusiast who loves breaking down complex IT topics into simple, easy-to-understand ideas. With years of hands-on experience in system administration and enterprise IT operations, he’s developed a knack for offering practical tips and solutions. Richard aims to make technology more accessible and actionable. He's deeply committed to the Geek Rewind community, always ready to answer questions and engage in discussions.

No comments yet — be the first to share your thoughts!