This article explains how to use the Settings and Terminal apps to check the ‘Manage Reserved Storage‘ size in Windows 11.
Reserved storage is a feature in Windows that sets aside a portion of the available disk space to be used by system updates, apps, temporary files, and system caches. This ensures critical system functions have enough space to operate even when the disk space is low.
Windows automatically manages Reserved storage, which starts at around 7 GB. However, its size can vary depending on the system configuration and available disk space.
It is a useful feature that ensures the smooth functioning of the operating system and prevents potential issues that may arise due to low disk space.
Learning to check the Reserved storage in Windows can be helpful in many ways. Knowing the size of the Reserved storage can help you better understand how much space is available for your files and programs.
Additionally, if you are experiencing low disk space issues and your system is not running smoothly, checking the Reserved storage can help you identify if enough space is reserved for critical system functions.
Check Researved storage using the Settings app
As mentioned above, learning how to check the system’s Reserved storage can be helpful in many ways.
Here’s how to do that.
First, open the Windows Settings app.
You can do that by clicking on the Start menu and selecting Settings. Or press the keyboard shortcut (Windows key + I) to launch the Settings app.
When the Setting app opens, click the System button on the left.

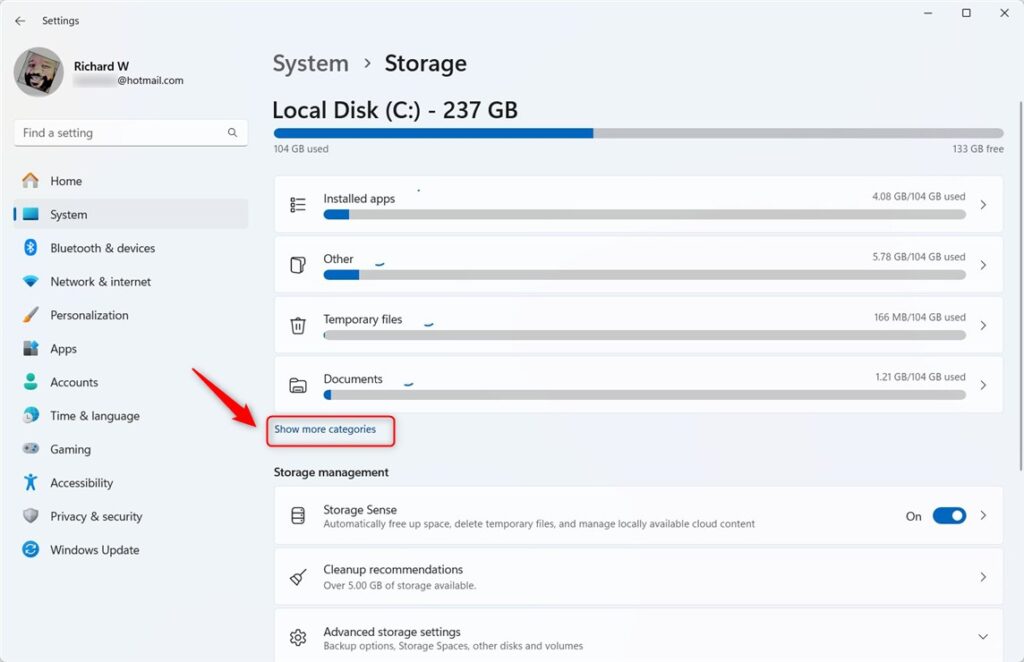
Next, select the Storage tile on the right to expand it.

Next, click the Show more categories link to expand it.
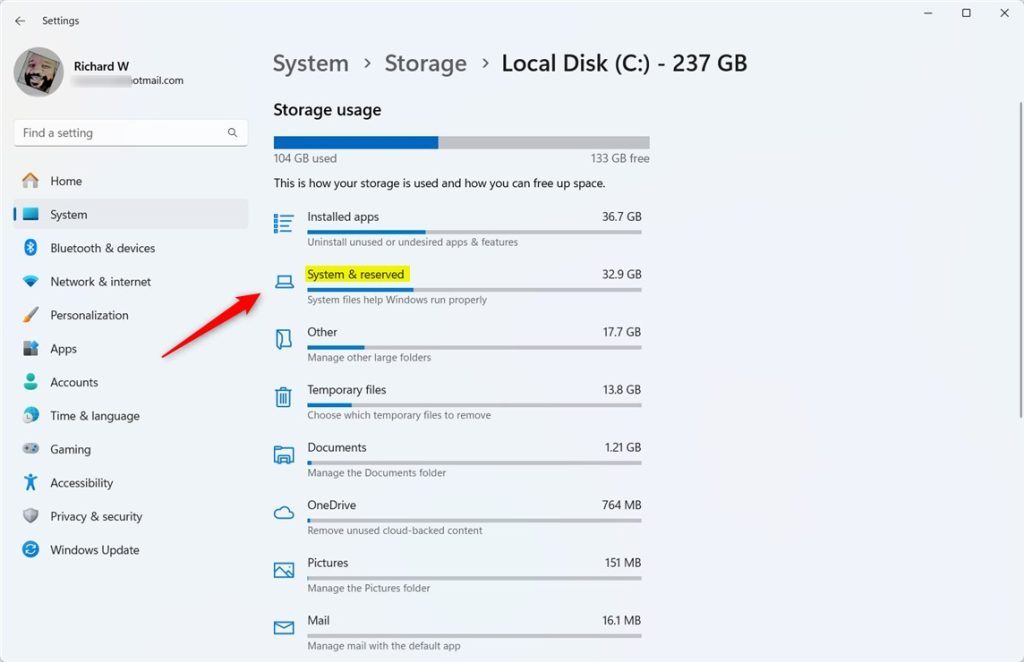
Then, click the System & reserve tile to expand it.
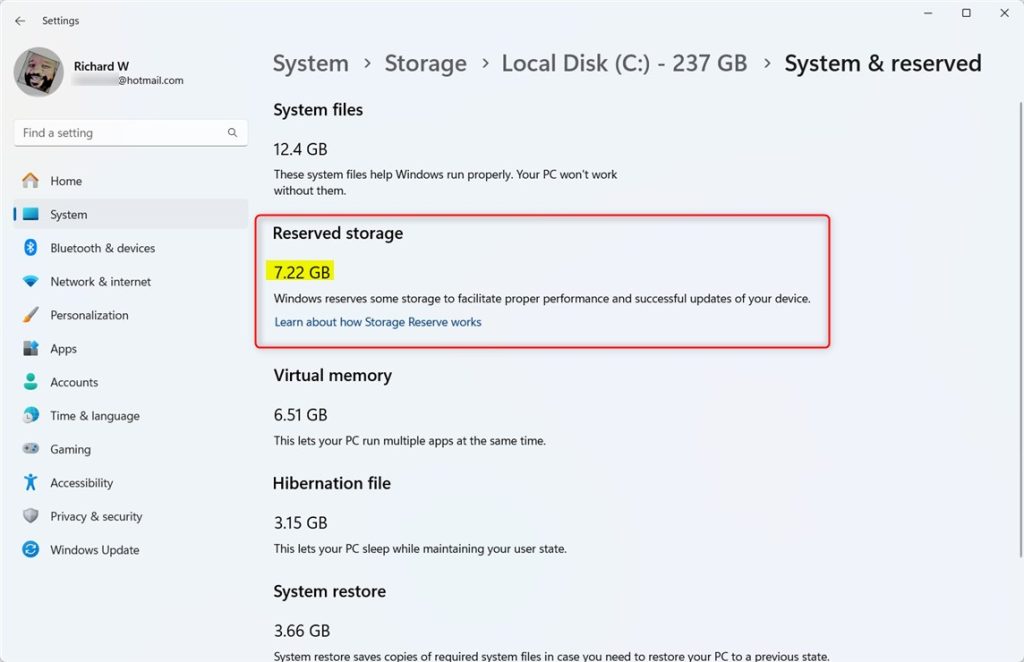
On the System & reserved detailed page, you’ll find your system’s ‘Reserved storage‘ size.
Close the Settings app when you’re done.
Check the Reserved storage size using the command line
Use the steps below to determine your device’s Reserved storage size using the command line.
First, open the Windows Terminal app as administrator.
Then, select either the PowerShell or Command Prompt tab and run the command below.
fsutil storagereserve query C:
That should do it!
Conclusion:
- Checking the Reserved storage in Windows 11 is essential to understand the available space for files and system functions.
- Utilizing the Settings app provides a straightforward method to access the Reserved storage size and ensure the smooth operation of your system.
- The Command Prompt or PowerShell in Windows Terminal offers an alternative approach to retrieve the Reserved storage size, catering to diverse user preferences.
- Regularly monitoring the reserved storage can help identify low disk space issues and maintain optimal system performance.
- Understanding and managing the Reserved storage is pivotal in ensuring the efficient functioning of the Windows 11 operating system.


Leave a Reply Cancel reply