
This article explains how to turn on or turn off the “Ask to save edited screenshots” feature in the Snipping Tool app on Windows 11.
What Is the Snipping Tool?
The Snipping Tool is a built-in screenshot tool that comes with Windows. It lets you capture screenshots of any part of your screen. You can take full-screen captures, capture individual windows, or capture just the area you select.
With the Snipping Tool, you can redact text, disable screen capture and recording, including system audio and microphone when recording, disable automatically saving screenshots, change screenshots folder, and more.
Where Do Screenshots Get Saved?
By default, your screenshots are automatically saved to the C:\Users\username\Videos\Screen Recordings folder on your computer.
Why Use This Feature?
In newer versions of the Snipping Tool, Microsoft added a toggle. This toggle lets you turn the “Ask to save edited screenshots” feature on or off. This gives you more control over how the app works.
How to Enable or Disable “Ask to Save Edited Screenshots”
Step 1: Open the Snipping Tool
First, open the Snipping Tool app on your computer.
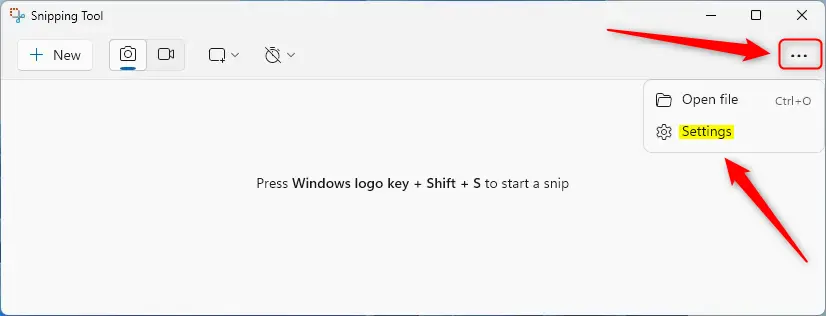
Step 2: Open the Settings Menu
Look for the See more button. It looks like three dots. Click it and select Settings.
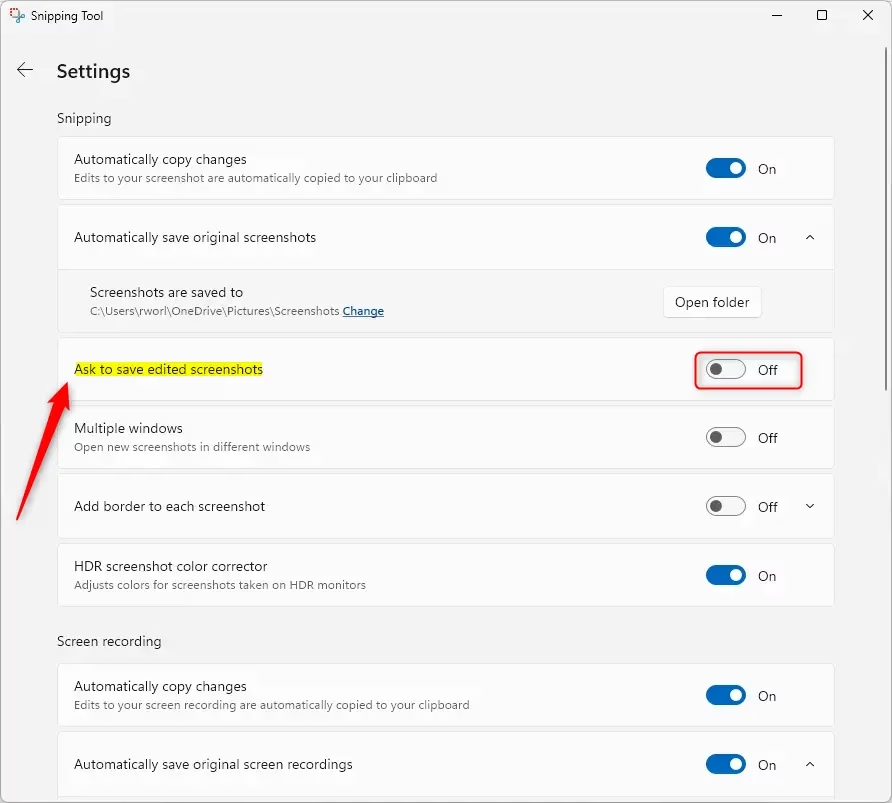
Step 3: Toggle the Setting
Find the “Ask to save edited screenshots” option on the Settings pane. Toggle the button to turn it on or off.
Step 4: Close the App
Close the Snipping Tool when you are done.
That’s it! Your setting is now saved.
Summary
The Snipping Tool in Windows 11 lets you take screenshots easily. You can now choose whether you want the app to ask you to save edited screenshots. To change this setting, open the Snipping Tool, click the three dots menu, go to Settings, and toggle the “Ask to save edited screenshots” option on or off. This simple change helps you customize the tool to work the way you want.

Leave a Reply Cancel reply