How to Install Consul Server on Ubuntu Linux
A Consul server on Ubuntu Linux is HashiCorp’s tool that helps manage apps spread across many computers. It automates network setup, helps services find each other, and keeps communication safe. This is super helpful for microservices and complex systems.
Setting up a single Consul server on Ubuntu 22.04 LTS involves a few key steps. You’ll learn exactly what to do to get it working.
Update system packages, then download and install the Consul binary to /usr/local/bin. Create a dedicated Consul user and configure directories. Finally, set up a systemd service file to run and manage the Consul agent.
Prerequisites
- A machine running Ubuntu Linux (18.04 or later)
- Sudo privileges
- Stable internet connection for software download
Update System Packages
Open up your terminal and begin by updating your package lists:
sudo apt-get update
Then, upgrade your system packages to the latest versions:
sudo apt-get upgrade
Download Consul
Downloading Consul is the first step to install Consul server on Ubuntu. You’ll need tools like `wget` and `unzip` to get the right Consul zip file from the official HashiCorp website for your computer’s system.
First, install wget if you do not have it already:
sudo apt-get install wget unzip
Next, download the Consul zip archive. You can find the latest version from the link below:
CONSUL_VERSION="1.17.2"
wget https://releases.hashicorp.com/consul/${CONSUL_VERSION}/consul_${CONSUL_VERSION}_linux_amd64.zip"1.17.2" with the latest Consul version if there is a newer one available.Install Consul
Installing Consul makes it easy for your Ubuntu system to find and run the program after you download it. This involves unzipping the Consul file and moving the Consul program to a system folder so you can run it from anywhere, then checking the install with a command.
unzip consul_${CONSUL_VERSION}_linux_amd64.zipMove the Consul binary to your system’s PATH so that it can be executed from anywhere:
sudo mv consul /usr/local/bin/
Verify the installation:
consul --version
The command should output similar lines shown below;
Consul v1.17.2
Revision 7736539d
Build Date 2024-01-22T16:55:18Z
Protocol 2 spoken by default, understands 2 to 3 (agent will automatically use protocol >2 when speaking to compatible agents)
Create a Consul User
For security reasons, it’s best not to run Consul as root. Create a new user for Consul:
sudo useradd --system --home /etc/consul.d --shell /bin/false consul
Configure Consul
Configuring Consul on your Ubuntu system involves creating special folders for its settings and files. You must also make sure the Consul user has the correct permissions to access these new folders so Consul can work properly.
sudo mkdir --parents /opt/consul
sudo mkdir --parents /etc/consul.d
Grant the Consul user ownership of those directories:
sudo chown --recursive consul:consul /opt/consul
sudo chown --recursive consul:consul /etc/consul.d
Create a basic configuration file by running the command below.
sudo nano /etc/consul.d/consul.hcl
Then, please copy and paste the content below into the file and save it. Remember to replace the bind_addr and advertise_addr addresses with your server’s own.
{
  "datacenter": "dc1",
  "data_dir": "/opt/consul",
  "log_level": "INFO",
  "server": true,
  "ui": true,
  "bind_addr": "192.168.128.2",
  "client_addr": "0.0.0.0",
  "advertise_addr": "192.168.128.2",
  "bootstrap_expect": 1
}
Create a Systemd Service File
Creating a systemd service file ensures Consul runs automatically in the background every time you start your Ubuntu machine. This file tells the system how to manage the Consul program, setting it up to run as a background service by copying specific text into it.
sudo nano /etc/systemd/system/consul.service
Then, please copy and paste the content below into the file and save it.
[Unit]
Description=Consul Service
After=network.target

[Service]
User=consul
Group=consul
ExecStart=/usr/local/bin/consul agent -config-dir=/etc/consul.d/
ExecReload=/bin/kill -HUP $MAINPID
KillMode=process
Restart=on-failure
LimitNOFILE=65536

[Install]
WantedBy=multi-user.target
Next, reload the systemd daemon and enable the Consul service to run on system boot:
sudo systemctl daemon-reload
sudo systemctl enable consul
Start and Verify the Consul Service
Starting and verifying the Consul service on your Ubuntu system is the next step after setting up the service file. You use commands to start the service and then check its status, confirming that Consul is loaded and enabled and ready to go.
sudo systemctl start consul
Check the status of the service:
sudo systemctl status consul
You should see similar lines as shown below.
 consul.service - Consul Service
     Loaded: loaded (/etc/systemd/system/consul.service; enabled; preset: enabled)
     Active: active (running) since Fri 2024-01-26 08:17:23 CST; 1min 43s ago
   Main PID: 9990 (consul)
      Tasks: 8 (limit: 4571)
     Memory: 25.9M
        CPU: 1.255s
     CGroup: /system.slice/consul.service
             └─9990 /usr/local/bin/consul agent -config-dir=/etc/consul.d/
Access the Consul Web UI
Accessing the Consul web UI lets you easily check its status and manage it once your Consul server is running on Ubuntu. Simply open your web browser and go to your Ubuntu machine’s IP address followed by port 8500 to use this visual interface.
http://<Your_Ubuntu_Machine_IP>:8500/ui/
<Your_Ubuntu_Machine_IP> with the actual IP address of your Ubuntu machine.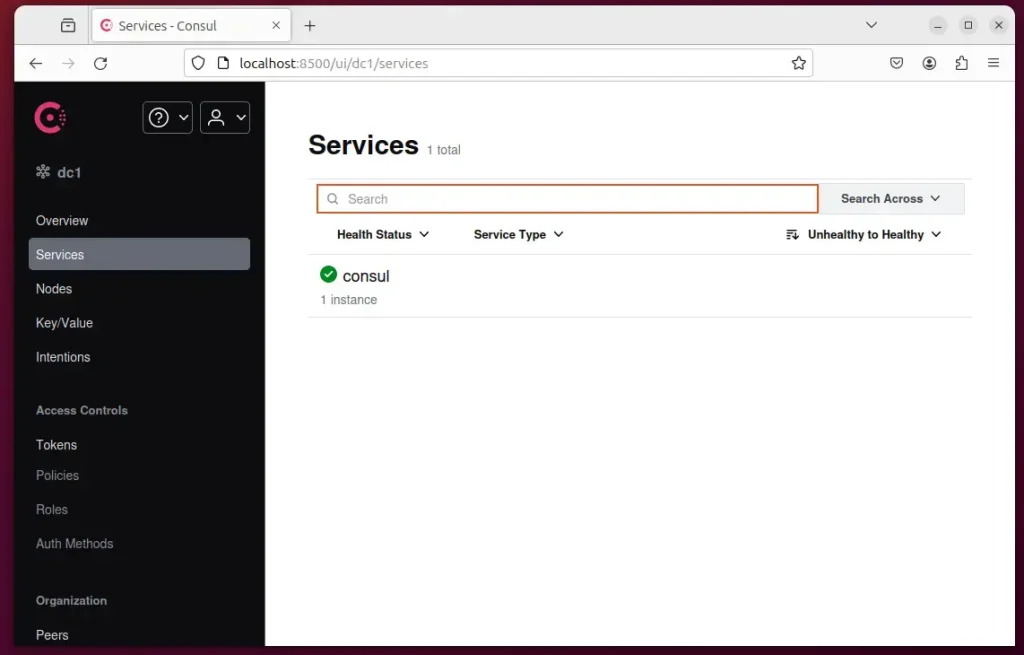
That should do it!
Conclusion:
- Consul by HashiCorp is a powerful tool for managing microservices, service meshes, and distributed systems. It provides automated network configurations, service discovery, and secure connectivity across any cloud or runtime environment.
- Following the installation guide, you have successfully installed Consul on your Ubuntu server. This allows you to organize services, manage dependencies, and automate common networking tasks.
- With Consul’s intuitive web UI and robust features, you are now ready to join other nodes to your cluster, configure service discovery, and set up service meshes to meet your organization’s specific requirements.
Was this guide helpful?

About the Author
Richard
Tech Writer, IT Professional
Richard, a writer for Geek Rewind, is a tech enthusiast who loves breaking down complex IT topics into simple, easy-to-understand ideas. With years of hands-on experience in system administration and enterprise IT operations, he’s developed a knack for offering practical tips and solutions. Richard aims to make technology more accessible and actionable. He's deeply committed to the Geek Rewind community, always ready to answer questions and engage in discussions.
No comments yet — be the first to share your thoughts!