
This article explains how to format external USB drives in Windows 11. We’ll walk you through each step so you can prepare your drive for backups or file storage.
Why Format a USB Drive?
Before you use an external drive in Windows 11, you may need to format it. Different operating systems use different file systems. A new USB drive usually works right away on Windows computers. But if it came from another operating system or is used, you might need to reformat it first.
What happens when you format a drive? Formatting prepares your drive to work with Windows. It also erases everything on the drive, so make sure you back up any files you want to keep.
How to Format an External USB Drive in Windows 11
Formatting a drive in Windows 11 is easy. Follow these steps:
Step 1: Open Windows Settings
First, open the Settings app. You can do this two ways:
- Press
Windows key + I - Click Start → Settings
You can also use the search box on your taskbar to find Settings.

Step 2: Go to Storage Settings
In the Settings window, click System on the left side. Then select Storage from the right pane.

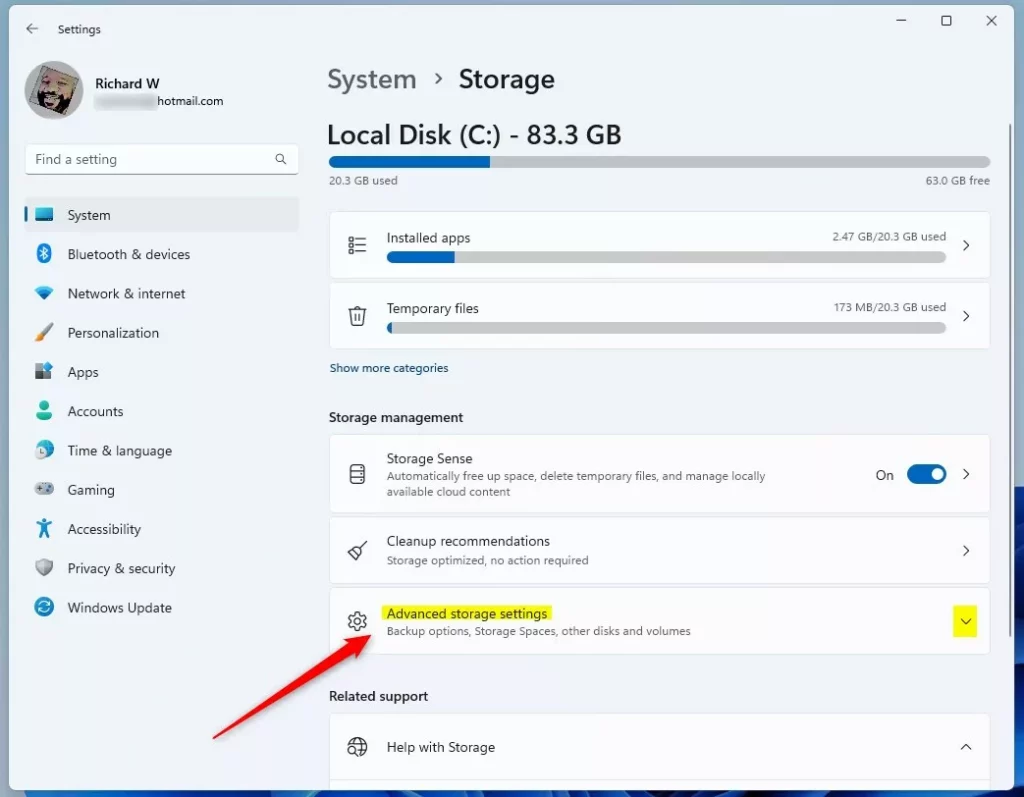
Step 3: Open Advanced Storage Settings
On the Storage page, click Advanced storage settings to see more options.
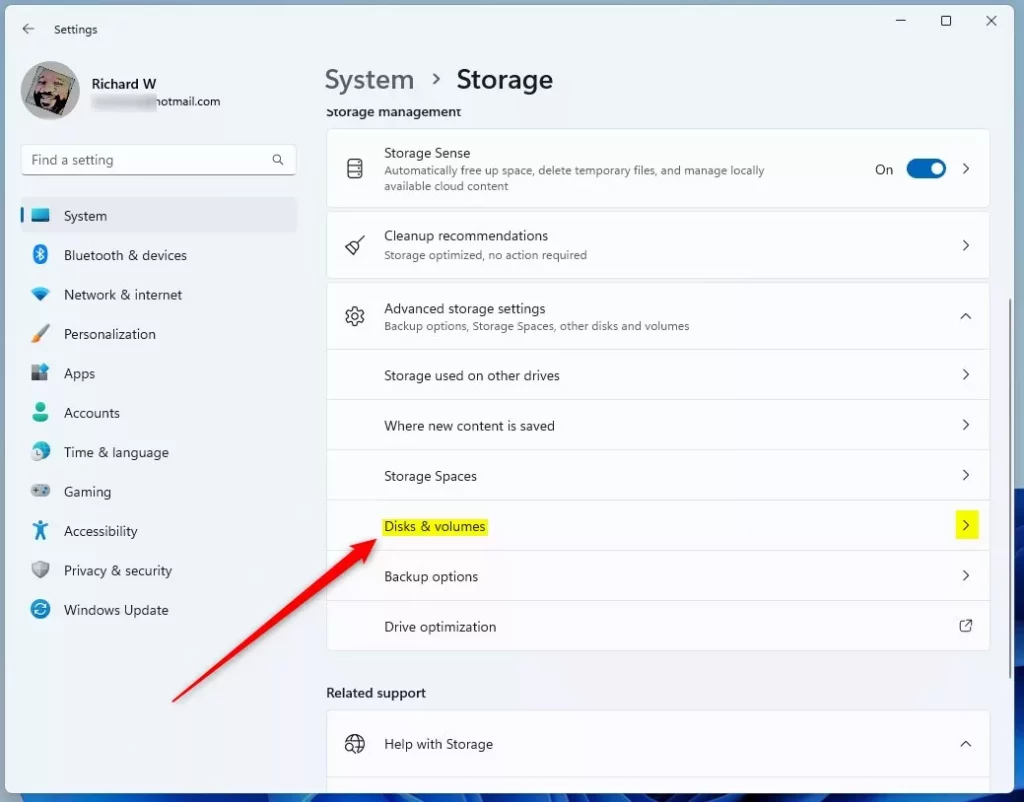
Step 4: Select Disk & Volume
In the expanded settings, click Disk & volume.
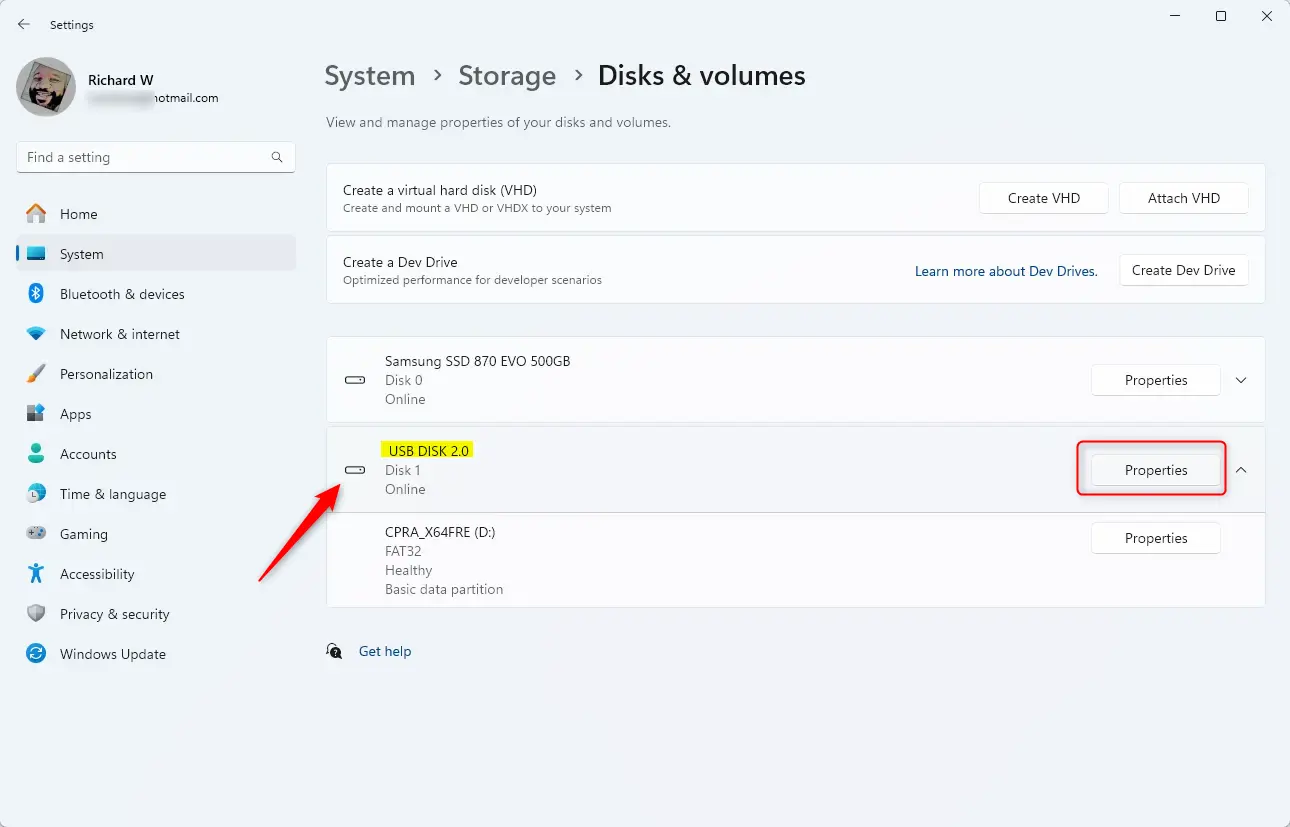
Step 5: Find Your USB Drive
You’ll see a list of all drives connected to your computer. Find your external USB drive in the list. Click on it, then click Properties.
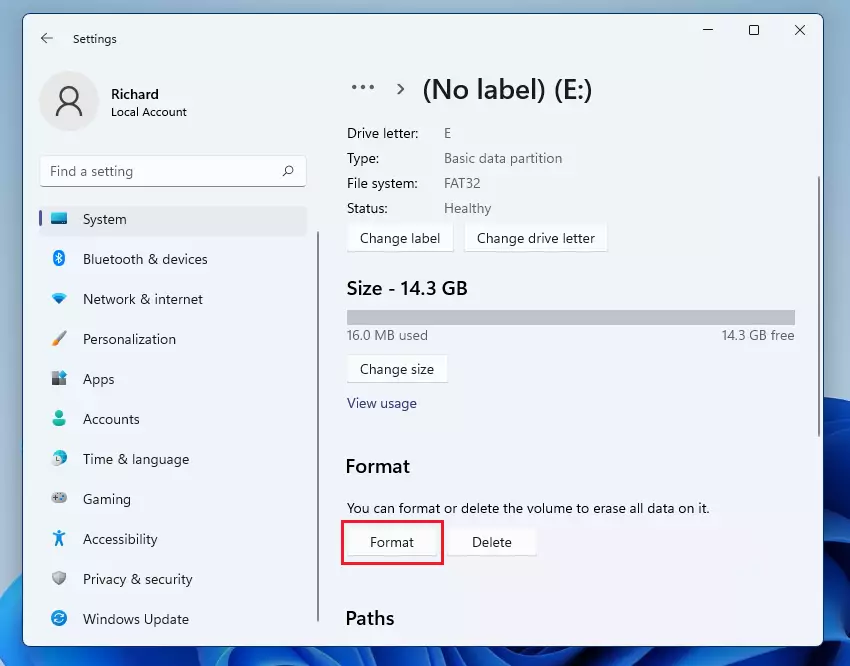
Step 6: Click Format Button ⚙️ (Requires Admin Privileges)
In the drive properties window, look for the Format button under the Format section. Click it.
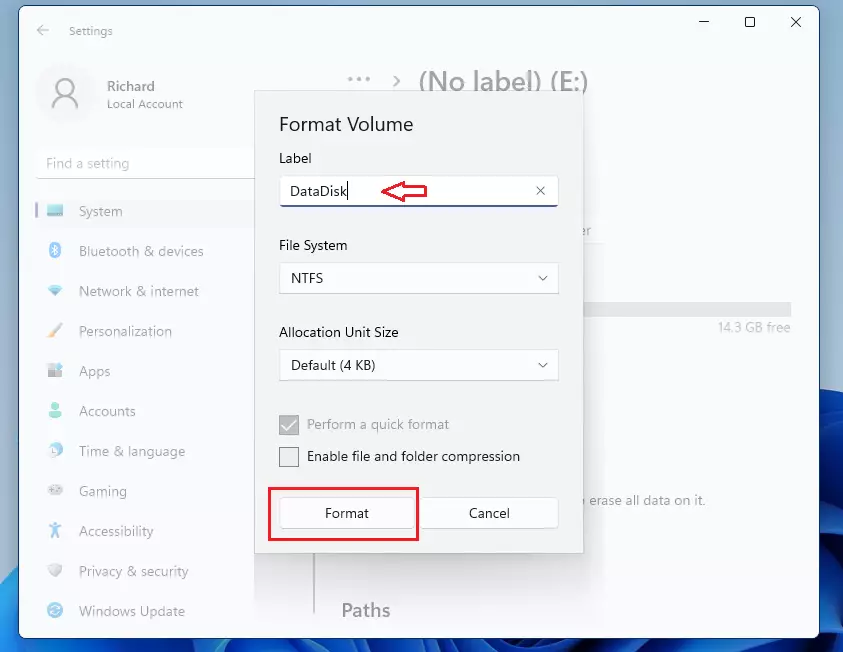
Step 7: Name Your Drive and Format It ⚙️ (Requires Admin Privileges)
A dialog box will appear. You can give your drive a new name if you want. When you’re ready, click the Format button to start the process.
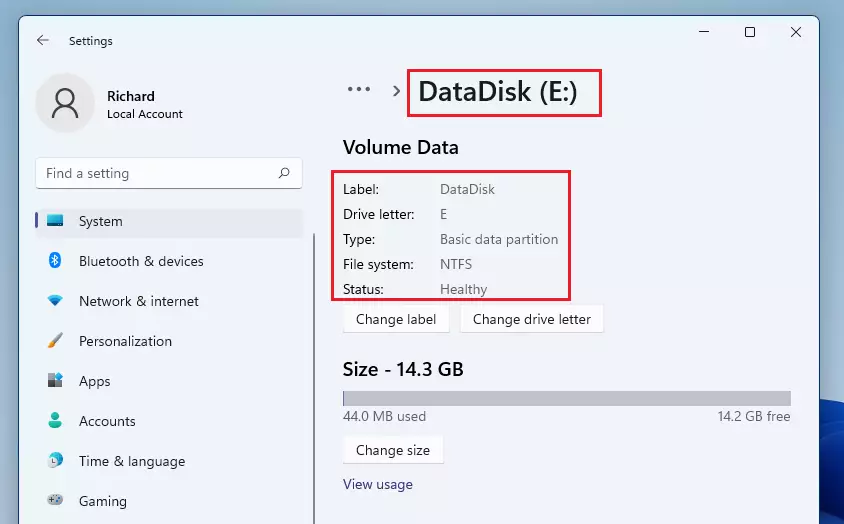
Step 8: Wait for Formatting to Complete
The formatting process will take a few moments. The time depends on how big your drive is and how fast your computer is. When it’s done, you’ll see a confirmation message.
Step 9: Eject Your Drive Safely
Once formatting is complete, eject the drive from your computer. Your USB drive is now ready to use.
Important Warning
Formatting erases everything on the drive. Make sure you select the correct drive before you format. Double-check the drive name and size to avoid losing important files.
Summary
- Formatting a USB drive prepares it for use in Windows 11
- The process erases all files on the drive, so back up anything you need first
- Open Settings → System → Storage → Advanced storage settings → Disk & volume
- Select your USB drive and click Properties
- Click the Format button and confirm
- Wait for the process to finish, then safely eject your drive
- Always verify you’re formatting the correct drive to avoid data loss
- Regular formatting helps keep your drives organized and working smoothly

Leave a Reply