
This article explains how to set up or configure Apache WebDAV on Ubuntu 24.04.
WebDAV, which stands for Web-based Distributed Authoring and Versioning, is an extension of the HTTP protocol that allows users to edit and manage files on remote web servers collaboratively.
WebDAV lets you create, edit, delete, and move files directly on the server without needing a separate FTP client. Some WebDAV servers support versioning, which can help track changes and revert to earlier versions of files when necessary.
The steps below walk you through setting up an Apache WebDAV on Ubuntu 24.04.
Something to remember:
- Windows requires SSL authentication for WebDAV resources.
- Use this post to set up an SSL connection with Apache.
- If you don’t have time to set up SSL with WebDAV, you can use this workaround to avoid requiring SSL for Windows clients.
Set up Apache WebDAV
For this tutorial, we will create a directory [/var/www/webdav] and make it accessible via WebDAV protocol over HTTP.
This post assumes Apache is already installed on the Ubuntu machine. If not, read the post below to learn how to install Apache.
Install Apache on Ubuntu Linux.
Run the command below to install the Apache utility package with Apache installed.
sudo apt install apache2-utils
Next, create the WebDAV directory and adjust the folder permission to allow the Apache web server to interact with the directory.
sudo mkdir /var/www/webdav
sudo chown www-data:www-data /var/www/webdav
sudo chmod 770 /var/www/webdav
Configure Apache
Now that you have installed Apache and its utility packages run the command below to create a WebDAV virtual host with the configurations.
sudo nano /etc/apache2/sites-available/webdav.conf
Then, copy the block below, paste it into the file, and save.
Alias /webdav /var/www/webdav
<Location /webdav>
    DAV On
    SSLRequireSSL
    Options None
    AuthType Basic
    AuthName WebDAV
    AuthUserFile /etc/apache2/.htpasswd
    <RequireAny>
        Require method GET POST OPTIONS
        Require valid-user
    </RequireAny>
</Location>
Exit the file when you are finished.
Create user account
WebDAV uses multiple authentication methods. However, we’ll be using Apache basic authentication with username and password.
For more about Apache’s basic authentication, read the post below.
Set up Apache basic authentication
Run the command below to create a basic user account.
sudo htpasswd -Bc /etc/apache2/.htpasswd username
Replace the username with the account name you want to use.
When prompted to create a password, enter and confirm a new password for the account.
Next, enable the Apache WebDAV module, the virtual host file created and above, and restart Apache services.
sudo a2enmod dav*
sudo a2ensite webdav
sudo systemctl restart apache2
Connect to the WebDAV
You should be ready to test. For this tutorial, we’ll be using a Windows machine.
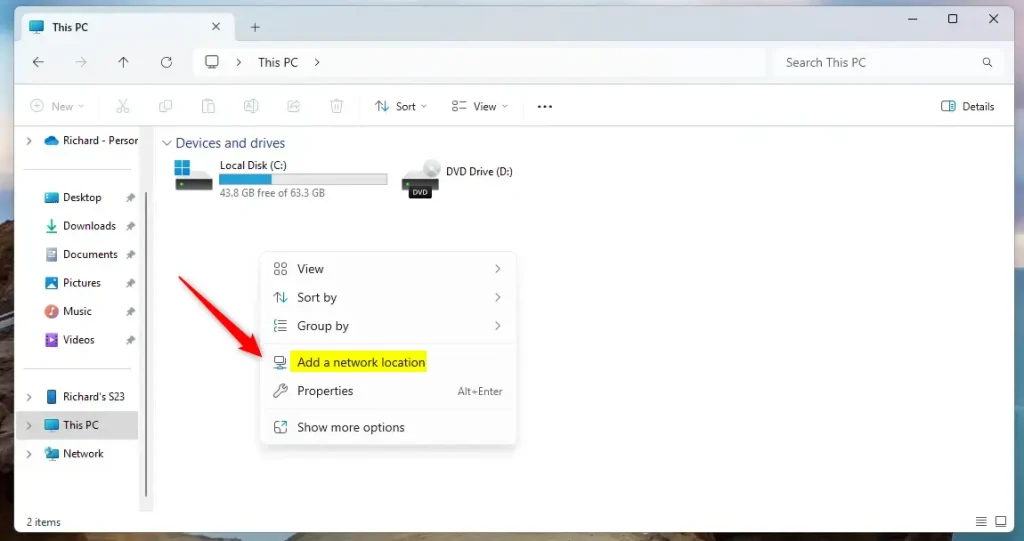
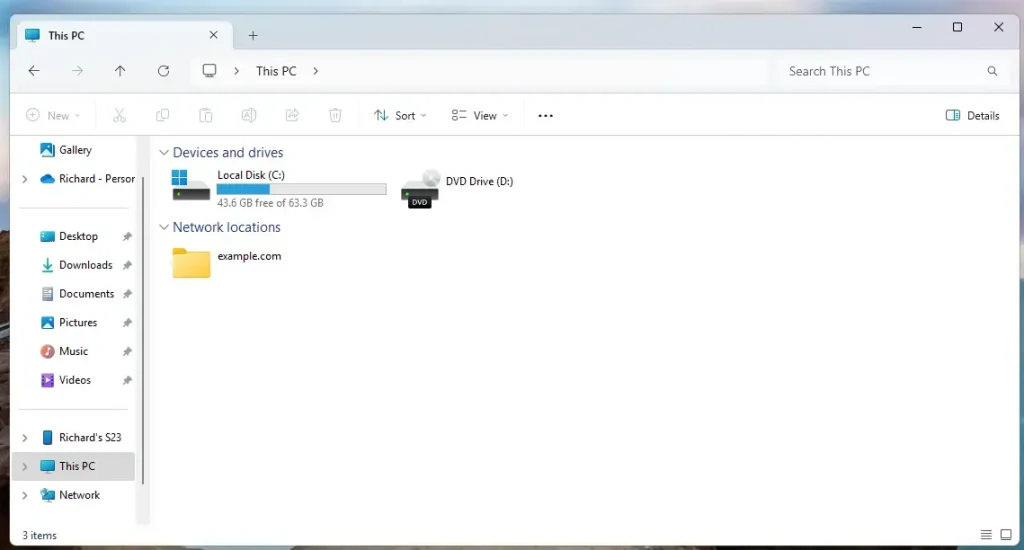
Add a network location in Windows.
Right-click File Explorer home and ‘Add a network location.’
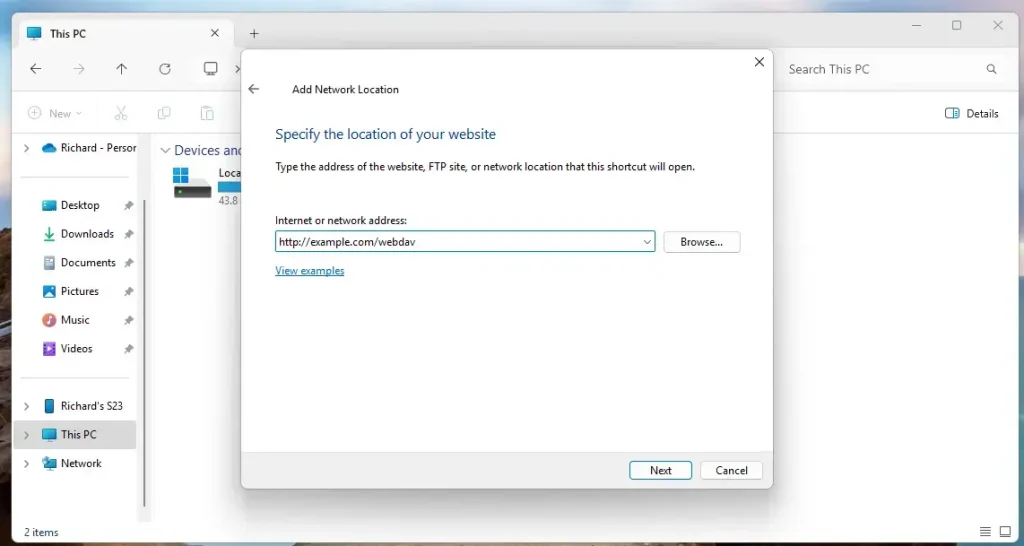
Type in the WebDAV address
http://example.com/webdav
When prompted, type in the account created above.
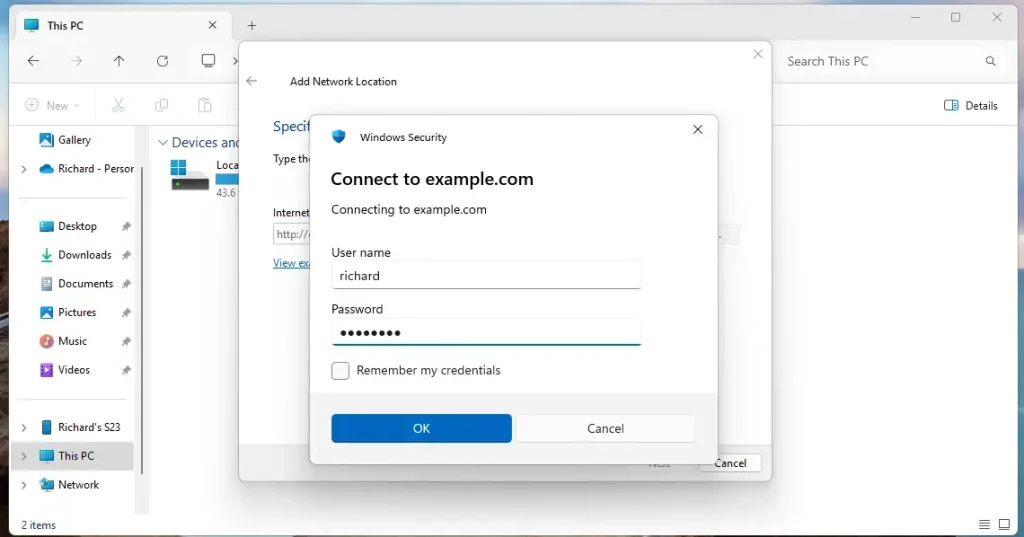
Continue and complete the setup.
That should do it!
Conclusion:
In summary, setting up Apache WebDAV on Ubuntu 24.04 provides a powerful solution for collaborative file management. With WebDAV, you can efficiently manage files on a remote server without a separate FTP client. Here are the key takeaways:
- Easy File Management: WebDAV allows direct editing, creation, and deletion of files on the server.
- Authentication: Utilizing basic authentication enhances security with username and password protection.
- Cross-Platform Compatibility: While Windows requires SSL for WebDAV, workarounds are available.
- Scalability: The setup can be adapted for larger systems as needed by adjusting configurations and permissions.
- Community Resources: Numerous tutorials and guides exist for troubleshooting and expanding WebDAV capabilities.
Implementing these steps will enable effective file collaboration and enhance productivity in your workflow.
Leave a Reply Cancel reply